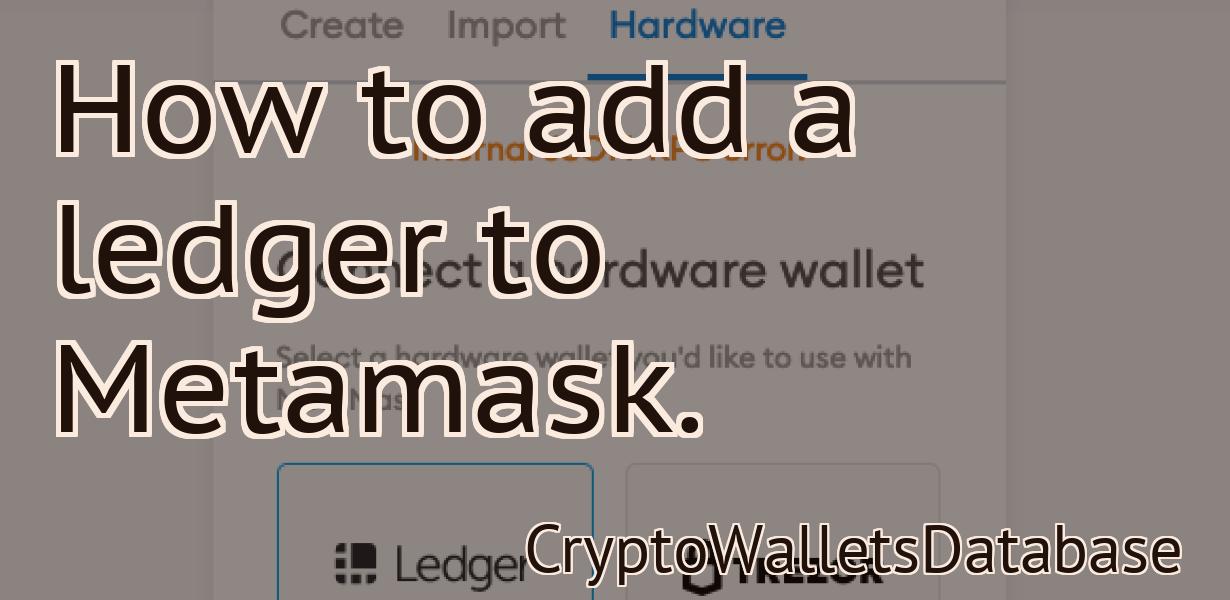
Connecting Ledger To Metamask
In order to connect your Ledger device to Metamask, you will need to perform the following steps: 1) Ensure that you have the latest Ledger firmware installed. You can check this by visiting the Ledger support website. 2) Download and install the Ledger Live application. 3) Once Ledger Live is installed, launch the application and connect your Ledger device. 4) Open the Metamask extension in your browser and click on the "Connect Hardware Wallet" option. 5) Select "Ledger" from the list of options. 6) Follow the on-screen instructions to complete the connection process.
How to Connect Ledger to Metamask
To connect Ledger to Metamask, open the Metamask app and click on the Three dots in the top right corner. From here, select Settings and then Add Account.
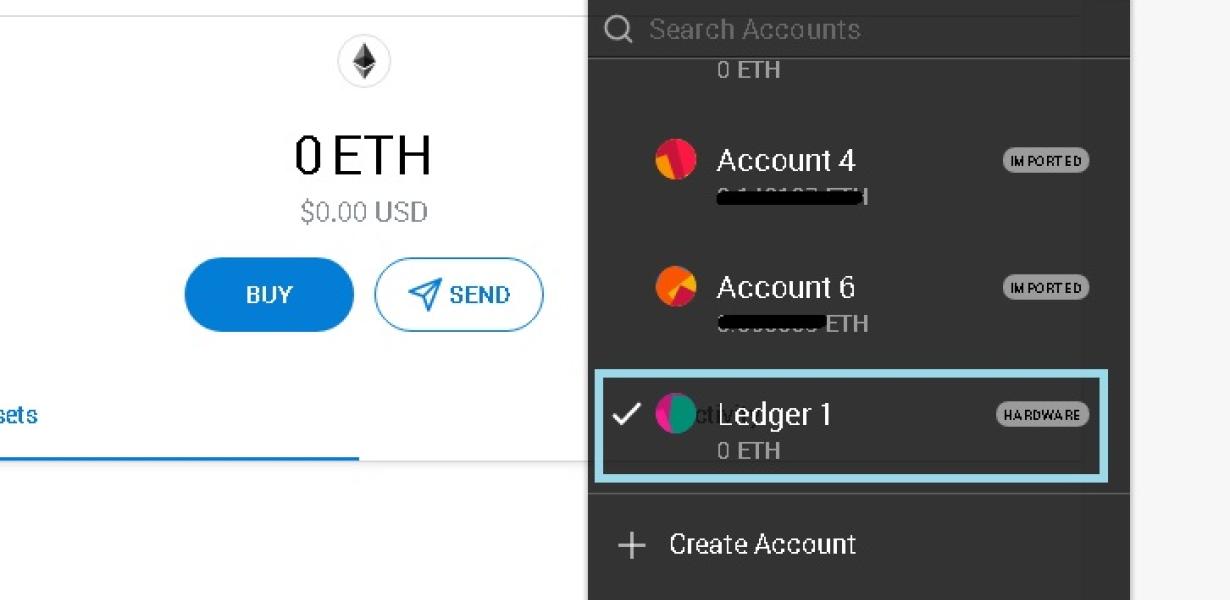
Next, enter your Metamask address and click on Connect. You'll then be prompted to select a wallet. Click on the Ledger wallet icon and select Use Existing Wallet.
You'll then be asked to provide your Metamask password. After logging in, you'll be presented with the main Metamask screen. From here, select the Ledger (Blue) app from the list of wallets and click on it to start using your Ledger device.
Steps to Connecting Ledger to Metamask
1. Open Ledger and click on the three lines in the top left corner (this will open the main menu).
2. On the left side of the main menu, click on "Settings."
3. On the Settings page, under "Connections," click on "Metamask."
4. On the Metamask page, click on "Connect."
5. On the Connect page, enter your Metamask address and password.
6. Click on "Connected."
7. On the right side of the main menu, click on "Accounts."
8. On the Accounts page, click on the name of the account you want to connect to Ledger.
9. On the account page, click on the "Send" button in the top right corner.
10. In the "To" field, enter the address of the account you want to send money to.
11. In the "Amount" field, enter the amount of money you want to send.
12. Click on "Send."
Connecting Your Ledger to Metamask
To connect your Ledger device to Metamask, follow these steps:
1. Open Metamask and click on the “Connect to Ledger” button.
2. On the Metamask Connections page, click on the blue “Connect to a Ledger Device” button.
3. On the Ledger Connections page, enter your ledger’s PIN and click on the “Connect” button.
4. You will be prompted to approve the connection request. Click on the “Yes” button to continue.
5. Once you have connected your Ledger, you will be able to see all of your transactions in Metamask.
Getting Started: Connecting Ledger to Metamask
To connect Ledger to Metamask, first open the Metamask Chrome extension.
From the Metamask home screen, click the three lines in the top left corner, and select Settings.
On the Settings page, click Add account.
In the Add an account dialog, enter ledger-metamask into the Email address field and click Next.
Click Connect.
Your Ledger device will now be connected to Metamask.
How to Use Ledger with Metamask
Ledger supports the Metamask browser extension, allowing you to easily manage your Ethereum and ERC20 tokens.
To begin using Ledger with Metamask:
1. Open the Metamask extension on your browser.
2. Click on the "Add a new account" button.
3. Type in the details of your new account, including a secure password.
4. Select Ethereum from the list of supported cryptocurrencies.
5. Click on the "Create new account" button.
6. Go to the "My accounts" tab and select your new account from the list.
7. Copy the Ethereum address and click on the "Copy" button.
8. Go to the "My wallets" tab and select your Ledger device from the list.
9. Click on the "Import Private Key" button.
10. Click on the "Import Key" button to display your imported private key.
11. Select the Ethereum address you copied in step 7 and click on the "Copy" button.
12. Go to the "Send" tab and enter the amount of Ethereum you want to send to your Metamask account.
13. Select the ERC20 token you want to send from your Metamask account and click on the "Send" button.
14. Your transaction will be confirmed and displayed in the "History" tab of your Metamask account.
How to Set Up Ledger with Metamask
To set up a Ledger with Metamask, first open the Metamask app on your computer. Click on the "Create New Account" button and complete the form.
Next, click on the "Ledger Wallet" button and enter the following information:
Name: This is the name you will use to identify your wallet on the Ledger app.
This is the name you will use to identify your wallet on the Ledger app. Address: This is where you will send and receive funds.
This is where you will send and receive funds. Private Key: This is the unique key that will allow you to access your wallet. Keep this secret!
This is the unique key that will allow you to access your wallet. Keep this secret! Password: This is the password you will use to access your wallet.
This is the password you will use to access your wallet. Security Code: This is a unique code that you will need to enter in order to complete the setup process.
After you have entered all of the required information, click on the "Create Account" button to finish the setup process.
Now, you will need to add a Ledger device to your account. To do this, open the Metamask app and click on the "Add Device" button.
Next, enter the following information:
Name: This is the name of your Ledger device.
This is the name of your Ledger device. Manufacturer: This is the name of the company that produced your Ledger device.
This is the name of the company that produced your Ledger device. Model: This is the model number of your Ledger device.
This is the model number of your Ledger device. Country: This is the country in which your Ledger device was manufactured.
After you have entered all of the required information, click on the "Connect" button to finish the setup process.
Now, you will need to add a cryptocurrency to your Ledger account. To do this, first open the Metamask app and click on the "Add Coin" button.
Next, enter the following information:
Name: This is the name of the cryptocurrency you are adding to your account.
This is the name of the cryptocurrency you are adding to your account. Symbol: This is the symbol of the cryptocurrency you are adding to your account.
This is the symbol of the cryptocurrency you are adding to your account. Decimals: This is the number of decimal places that will be used when displaying the value of the cryptocurrency in your account.
This is the number of decimal places that will be used when displaying the value of the cryptocurrency in your account. Address: This is where you will receive funds sent from your cryptocurrency.
This is where you will receive funds sent from your cryptocurrency. Private Key: This is the unique key that will allow you to access your cryptocurrency. Keep this secret!
This is the unique key that will allow you to access your cryptocurrency. Keep this secret! Password: This is the password you will use to access your cryptocurrency.
After you have added a cryptocurrency to your account, click on the "Save" button to finish the setup process.
Using Ledger with Metamask
If you are already using Ledger with Metamask, you can use the Ledger app to manage your EOS balances and transactions.
Connecting Ledger Nano S to Metamask
To connect Ledger Nano S to Metamask, follow these steps:
1. Launch the Metamask application on your computer.
2. Click on the Add New Account button in the top-right corner of the Metamask window.
3. Enter your desired Metamask account name and password.
4. Click on thebutton next to the Ledger Nano S account name.
5. Click on thebutton to open the Connections page.
6. Click on thebutton to open the Ledger Nano S Settings page.
7. Under thesection, click on theicon.
8. Under thesection, click on theicon.
9. Under thesection, click on thebutton to open the Addresses tab.
10. Under thetab, enter the following address:
ledger.com/metamask
11. Click on thebutton to open the Connections page.
12. Click on thebutton to open the Ledger Nano S Settings page.
13. Under thesection, click on theicon.
14. Under thesection, click on thebutton to open the Addresses tab.
15. Under thetab, enter the following address:
metamask.io/accounts/
Connecting Ledger Nano X to Metamask
To connect Ledger Nano X to Metamask, follow these steps:
1. Open Metamask and click on the three lines in the top left corner.
2. On the right side of the window, select "Settings" and then "Add Account."
3. In the "Add Account" window, enter the following information:
a. Name: "Ledger Nano X"
b. Email: [email protected]
c. Password: 1234
4. Click on the "Next" button and then on the "Finish" button.
5. Click on the "Ledger Nano X" account in the "Accounts" tab of Metamask.
6. On the "Ledger Nano X" account page, click on the blue "Connect" button.
7. Enter the following information:
a. Your Metamask address: 0x2324e6f7c4e19d38e
b. Your Ledger Nano X PIN: 1234

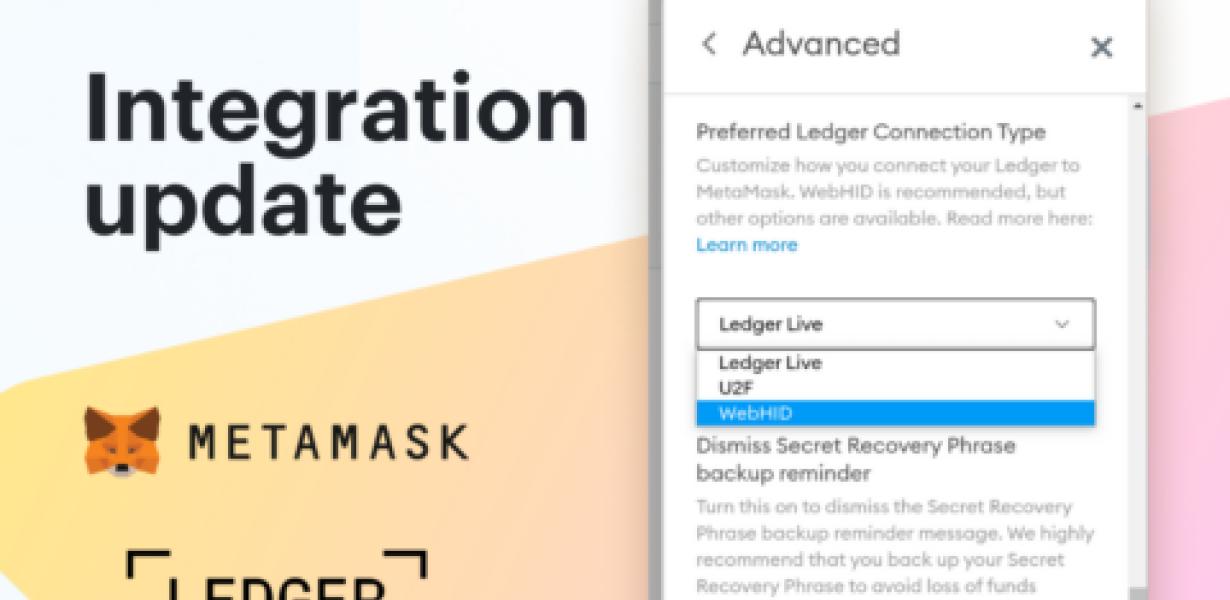
Setting up Ledger Live with Metamask
If you don’t have a Metamask account, you can create one here. Once you have a Metamask account, follow these steps to set up Ledger Live with Metamask:
1. Go to https://www.ledger.com/ and sign in.
2. Click on the Settings icon in the top-left corner of the page.
3. In the Settings page, click on the Add Wallet button.
4. In the Add Wallet dialog, select Metamask as the wallet type and click on the Continue button.
5. On the Metamask wallet page, click on the blue Connect button.
6. In the Connect to Metamask dialog, enter your Metamask credentials and click on the Connect button.
7. On the Ledger Live settings page, under Apps, click on the blue + sign next to the Ethereum app.
8. In the Add an Ethereum App dialog, enter the following information:
Name: MyEtherWallet
Description: Ethereum Wallet for MyEtherWallet
9. Click on the Install button.
10. When the installation is complete, click on the Open button.
11. On the MyEtherWallet page, click on the blue Send Ether and Tokens buttons.
12. In the Send Ether and Tokens dialog, enter the amount of ether or tokens you want to send and click on the Send button.
13. On the MyEtherWallet page, under Accounts, click on the blue Add Account button.
14. In the Add Account dialog, enter the following information:
Name: MyEtherWallet2
Email: [email protected]
15. Click on the Create Account button.
16. On the MyEtherWallet2 page, click on the blue Send Ether and Tokens buttons.
17. In the Send Ether and Tokens dialog, enter the amount of ether or tokens you want to send and click on the Send button.