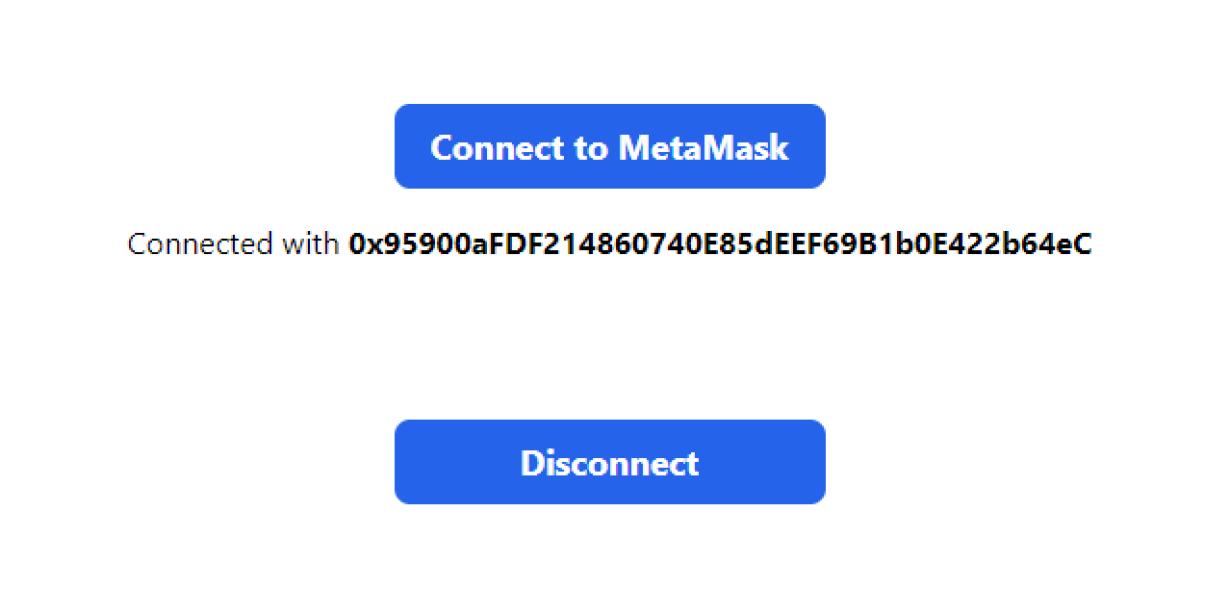
web3.connect(to: "metamask")
The web3.connect() function allows you to connect to a specific Ethereum node. In this example, the node being connected to is "metamask".
Get started with Web3 and MetaMask
Web3 is a platform for decentralized applications. MetaMask is a web browser extension that enables you to interact with decentralized applications (DApps) on the web.
To get started with Web3 and MetaMask:
1. Install Web3 and MetaMask.
2. Open MetaMask and create a new account.
3. Add your Ethereum address to MetaMask.
4. Click the "Web3" button in the toolbar and select "Web3 Provider."
5. In the "Web3 Provider" window, click the "Connect" button.
6. In the "Connected" window, enter your Web3 provider address and password.
7. Click the "OK" button to connect to Web3.
8. In the "Web3" window, click the "Browser" button and select "MetaMask."
9. In the "MetaMask" window, click the "Add Custom Token" button.
10. In the "Add Custom Token" window, enter the name of the custom token and click the "Add" button.
11. In the "Token Info" window, click the "Get Token Info" button.
12. In the "Token Info" window, click the "Copy Address" button and copy the address of the custom token.
13. In the "Web3" window, click the "Browse" button and select the address of the custom token you copied in Step 12.
14. In the "Web3" window, click the "Debug" button and select "Logs."
15. In the "Logs" window, click the "Events" tab and select the "Transfer" event.
16. In the "Transfer" event, paste the address of the custom token you copied in Step 12 into the "From" field and paste the address of the ERC20 token you want to use as a proxy in to the "To" field.
17. Click the "Log" button to stop logging.
How to connect Web3 with MetaMask
To connect MetaMask with Web3, open MetaMask and click on the three lines in the top left corner. In the drop-down menu that appears, select Add New Account.
Next, enter your MetaMask account name and password. Click on the Create Account button to finish.
Now that you have an account with MetaMask, open Web3 and click on the three lines in the top left corner. In the drop-down menu that appears, select Add New Wallet.
Enter your MetaMask wallet address and click on the Create Wallet button to finish.
You are now ready to start using Web3 with MetaMask!
Using Web3 with MetaMask
MetaMask is a browser extension that allows you to interact with decentralized applications (DApps) and smart contracts. Once you have MetaMask installed, you can connect to a Web3 instance that you have generated.
To connect to a Web3 instance, open MetaMask and click the three lines in the top left corner. In the dropdown menu that appears, select "Connect to a network." On the next page, select "Web3."
In the "Web3 provider" section, select the instance that you want to connect to. On the "Web3 settings" page, set the "Host" and "Port" values to the appropriate values.
To initiate a transaction, you will need to provide the "Account name" and "Private key" values. The "Account name" value is the account name that you used when you created your MetaMask account. The "Private key" value is the corresponding private key that you used to create your MetaMask account.
How to access your Ethereum account with MetaMask
If you have MetaMask installed on your browser, you can access your Ethereum account with the following steps:
1. Open MetaMask and click on the three lines in the top left corner.
2. In the "Addresses" section, select "Add a New Address."
3. Copy the address of your Ethereum wallet and paste it into the "Private Key" field.
4. Click on "Create Contract."
5. In the "Create Contract" window, paste the following code:
contract MyContract { function() { } }
6. Click on "Create."
7. In the "MyContract" window, you will see your contract's address and its function.
Connecting Web3 to MetaMask
If you are already using MetaMask, you will need to connect it to your Web3 account. Open MetaMask, click on the three lines in the top right corner, and select Connect. Enter your Web3 address and password, and click Connect.
If you don't have MetaMask, you can find instructions on how to install it here. Once installed, open it and click on the three lines in the top right corner. Under "Accounts," select "Add account." In the "Add account" dialog, enter your Web3 address and password and click Add.
Configuring Web3 and MetaMask
To use Web3 and MetaMask, you will first need to install them. Web3 can be installed via the Ethereum Mist browser extension or by running the Ethereum client. MetaMask can be installed as a standalone browser extension or as part of the Ethereum Mist browser extension.
Once Web3 and MetaMask are installed, you will need to generate a new Ethereum wallet. You can do this by visiting web3.eth.org and clicking on the "Create New Wallet" button. You will then be prompted to enter your Ethereum wallet address. You can also create a new Ethereum wallet by entering your email address and password into the MetaMask extension.
Once you have generated a new Ethereum wallet, you will need to add it to your Web3 account. To do this, open the Web3 client and click on the "Account" button. Then, click on the "Add Account" button and enter your Ethereum wallet address into the "Wallet Address" field. Note that you will need to use the same Ethereum wallet address that you used when you generated your wallet.
Next, you will need to add your MetaMask account to your Web3 account. To do this, open the MetaMask extension and click on the "Account" button. Then, click on the "Add Account" button and enter your MetaMask account address into the "Account Address" field. You will then be prompted to enter your password. Once you have added your MetaMask account to your Web3 account, you will be able to access your Ethereum wallet and transactions.
Setting up Web3 and MetaMask
To set up Web3 and MetaMask:
1. Go to https://www.web3.org/ and sign in.
2. Click on the Add a new account button.
3. Enter your credentials and click on the Create account button.
4. On the next page, click on the MetaMask button.
5. Click on the Get Started button to launch the MetaMask installation wizard.
6. Click on the Install MetaMask button to begin the installation process.
7. After the installation has completed, click on the Finish button.
8. Click on the Open MetaMask button to launch the MetaMask browser extension.
9. Click on the Add wallet button to open the MetaMask wallet.
10. Enter your credentials and click on the Add wallet button.
11. After the MetaMask wallet has been created, click on the Transactions tab to view your transactions.
Using MetaMask with Web3
MetaMask is a browser extension that allows users to access decentralized applications (DApps) and smart contracts on the Ethereum network. You can also use MetaMask to manage your funds and identity on the Ethereum network.
To use MetaMask with Web3, you first need to install the MetaMask extension. Once you've installed the extension, open it and click on the three lines in the top left corner. This will open the MetaMask settings page.
Under "Web3 Providers," select "Web3.js."
Under "Accounts," click on the "Add Account" button and enter the following information:
Your Ethereum address : This is the address where your Ether (ETH) is stored.
: This is the address where your Ether (ETH) is stored. Your MetaMask account name : This is the name you used when you created your MetaMask account.
: This is the name you used when you created your MetaMask account. Your password: This is your password for your MetaMask account.
Once you've entered these details, click on the "Save" button.
Next, under "Settings," click on the "Gas Limit" tab.
Set the gas limit to 128,000 and click on the "Save" button.
Finally, under "Settings," click on the "Debug" tab.
Ensure that the "Log verbosity" setting is set to "High."
Now, you'll need to create an Ethereum wallet. To do this, click on the "Wallets" tab and select "Ethereum Wallet."
Click on the "Create New Wallet" button and enter the following information:
Your Ethereum address : This is the address where your Ether (ETH) is stored.
: This is the address where your Ether (ETH) is stored. Your password: This is your password for your Ethereum wallet.
Once you've entered these details, click on the "Create New Wallet" button.
Now, you'll need to add some Ether (ETH) to your Ethereum wallet. To do this, click on the "Balances" tab and select "Add Money."
Click on the "Deposit Ether" button and enter the amount of Ether you want to deposit.
Once you've entered the amount of Ether you want to deposit, click on the "Deposit Ether" button.
You'll now be able to access your MetaMask account and send and receive Ether (ETH) using Web3.