Metamask Chrome Plugin
The Metamask Chrome plugin is a browser extension that allows you to run Ethereum dapps right in your browser. Metamask also lets you easily switch between different Ethereum networks, so you can test your dapp on different testnets or even the main Ethereum network.
Metamask: The Ultimate Guide to the Chrome Plugin
This guide is intended to help those who are unfamiliar with the Metamask plugin and want to learn more about it.
What is Metamask?
Metamask is a Chrome plugin that allows users to execute ERC20 tokens and other blockchain transactions without having to leave the browser.
How does it work?
When you install the Metamask plugin, it will create a new “Metamask” account for you. This account is a personal account that you use to interact with the Metamask network.
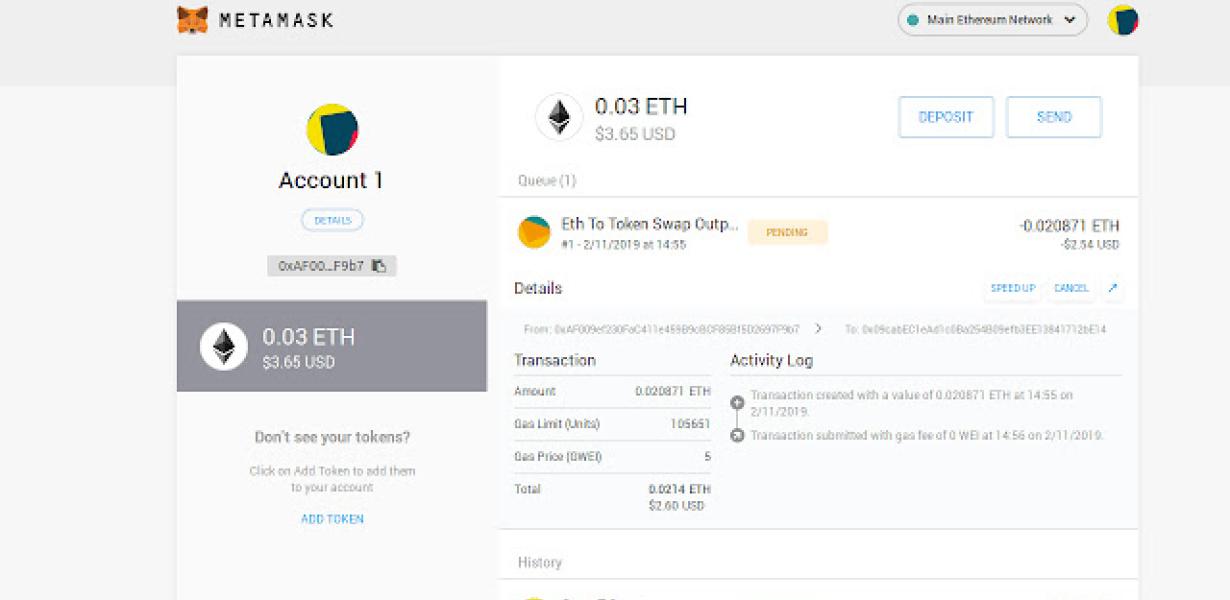
Whenever you want to execute a blockchain transaction, you will need to open the Metamask plugin and click on the “Create New Transaction” button. This will take you to the “Create Transaction” page where you will need to enter the following information:
The destination address : This is the address that you want to send the tokens to.
: This is the address that you want to send the tokens to. The amount of tokens : This is the amount of tokens that you want to send.
: This is the amount of tokens that you want to send. The memo field: This is where you can write a description of the transaction.
After you have completed the transaction, you will need to click on the “Submit Transaction” button. Metamask will then send the tokens to the destination address.
How do I use Metamask?
To use Metamask, you will first need to install the plugin. After you have installed the plugin, you can open it by clicking on the “Metamask” icon in the toolbar of your browser.
Once you have opened the Metamask plugin, you will need to click on the “Create New Transaction” button. This will take you to the “Create Transaction” page where you will need to enter the following information:
The destination address : This is the address that you want to send the tokens to.
: This is the address that you want to send the tokens to. The amount of tokens : This is the amount of tokens that you want to send.
: This is the amount of tokens that you want to send. The memo field: This is where you can write a description of the transaction.
After you have completed the transaction, you will need to click on the “Submit Transaction” button. Metamask will then send the tokens to the destination address.
What is Metamask? How to Use this Popular Chrome Plugin
?
Metamask is a popular Chrome plugin that allows users to interact with decentralized applications (DApps) and smart contracts. It is also possible to use Metamask to store and manage cryptocurrency assets.
Metamask Review: The Pros and Cons of this Crypto Plugin
Metamask is a popular plugin that allows users to manage their cryptocurrency transactions and holdings. The plugin is available for both Chrome and Firefox, and it has a user-friendly interface. However, there are some cons to consider when using Metamask.
First, the plugin can be resource intensive, so it may not be suitable for all users. Second, Metamask is not available on all platforms, so users may need to use a different browser or plugin to use it. Finally, the Metamask platform is not fully decentralized, so there is a risk that the platform might be taken over by a third party.
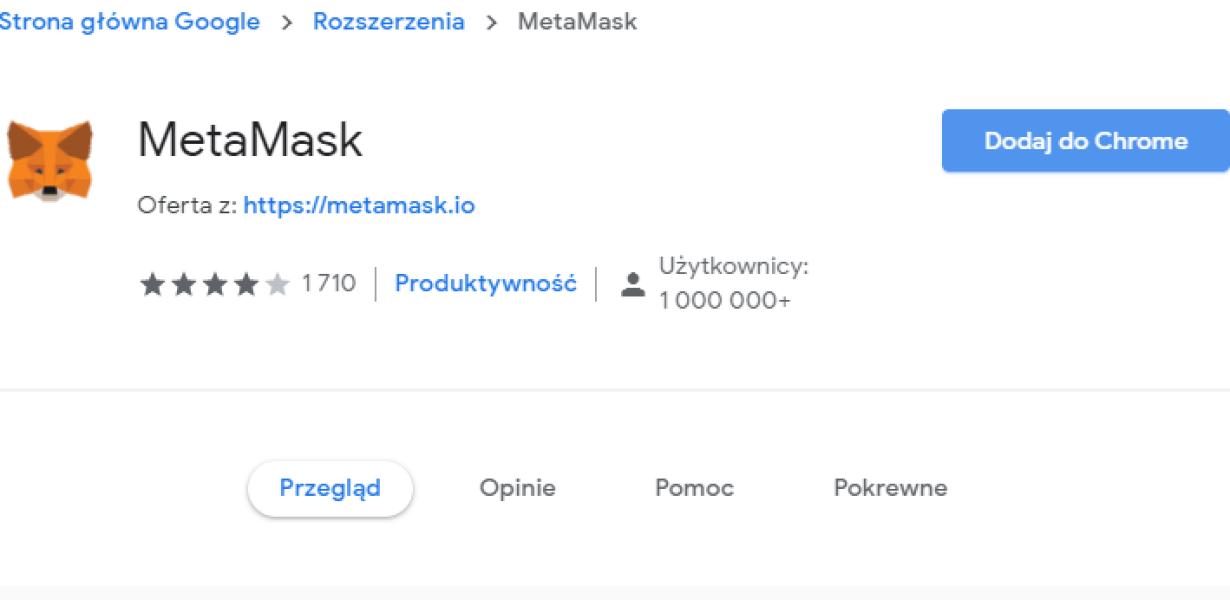
How to Install Metamask & Get Started Using it With Chrome
If you're using Chrome, you can install Metamask by following these steps:
1. Open Chrome and click on the three lines in the top-left corner of the browser window.
2. Click on "More tools."
3. Click on "Extensions."
4. Click on the "Add an extension" button.
5. Search for "Metamask" and click on the results.
6. Click on the "Install" button.
7. When the extension asks you to confirm installation, click on the "Yes" button.
8. Once the extension has been installed, you'll need to open it up. To do this, click on the small pink triangle in the top-right corner of the Metamask extension icon.
9. You'll now be presented with a set of instructions on how to start using Metamask. Follow these instructions to get started!
Metamask Tutorial: Getting Started & Using This Crypto Plugin
In this tutorial, we will show you how to get started with the Metamask plugin and how to use it to store and trade cryptocurrencies.
1. Sign up for a Metamask account.
2. Install the Metamask plugin on your browser.
3. Enable the Metamask plugin in your browser.
4. Load the Metamask plugin and sign in.
5. In the top left corner of the Metamask window, click on the Lock icon ( ). This will protect your Metamask account from being accessed by other users.
6. In the top right corner of the Metamask window, click on the Add Account button ( ). This will open the Add Account dialog box.
7. In the Add Account dialog box, click on the button labeled “Metamask” ( ). This will open the Metamask Login dialog box.
8. In the Metamask Login dialog box, enter your Metamask account password and click on the Log In button ( ).
9. If you are not already logged in to your Metamask account, the Metamask Login dialog box will display the message “Log In With Email”. Click on the link in this message to log in to your Metamask account using your email address.
10. After you have logged in to your Metamask account, the Metamask Login dialog box will display the message “Your account has been initialized”. This message means that your Metamask account is now ready for use.
11. In the top left corner of the Metamask window, click on the Globe icon ( ). This will open the Globe menu.
12. In the Globe menu, click on the Wallet item ( ). This will open the Wallet dialog box.
13. In the Wallet dialog box, click on the Browse button ( ). This will open the Browse For Coins dialog box.
14. In the Browse For Coins dialog box, browse to the location where you want to store your cryptocurrencies. You can store your cryptocurrencies in any of the following locations:
- An external storage location (such as an external hard drive or USB stick).
- A local storage location (such as your computer’s hard drive).
- A cryptocurrency wallet (such as MyEtherWallet or Jaxx).
15. After you have selected the location where you want to store your cryptocurrencies, click on the Select Coins button ( ). This will open the Select Coins dialog box.
16. In the Select Coins dialog box, select the cryptocurrencies that you want to store in your Metamask account and click on the Select button ( ). This will open the Add Coins dialog box.
17. In the Add Coins dialog box, enter the amount of cryptocurrency that you want to add to your Metamask account and click on the Add button ( ). This will add the selected cryptocurrencies to your Metamask account.
18. After you have added the cryptocurrencies to your Metamask account, the Add Coins dialog box will display the message “Your selected coins have been added”. This message means that your cryptocurrencies have been added to your Metamask account.
19. In the top left corner of the Metamask window, click on the Lock icon ( ). This will protect your Metamask account from being accessed by other users.
20. In the top right corner of the Metamask window, click on the Globe icon ( ). This will open the Globe menu.
21. In the Globe menu, click on the Accounts menu item ( ). This will open the Accounts dialog box.
22. In the Accounts dialog box, click on the name of the account that you want to use to store your cryptocurrencies (in this example, we will use the “MyCryptocurrency” account). This will open the MyCryptocurrency wallet panel.
23. In the MyCryptocurrency wallet panel, click on the Add Coin button ( ). This will open the Add Coin dialog box.
24. In the Add Coin dialog box, enter the amount of cryptocurrency that you want to add to your MyCryptocurrency account and click on the Add button ( ). This will add the selected cryptocurrency to your MyCryptocurrency account.
25. After you have added the cryptocurrency to your MyCryptocurrency account, the Add Coin dialog box will display the message “Your selected coin has been added”. This message means that your cryptocurrency has been added to your MyCryptocurrency account.
How to Securely Store Your Cryptocurrency with Metamask
1. Open Metamask and click on the three lines in the top left corner.
2. Select "My Wallet."
3. Click on the "Add a New Wallet" button.
4. Enter a name for your wallet and click on the "Create" button.
5. Click on the "Metamask" tab.
6. Under the "Settings" heading, click on the " Security " button.
7. Select the "Use a PIN" radio button and enter a 6-digit PIN.
8. Click on the "Save" button.
9. Click on the "Metamask" tab again and under the "Wallets" heading, click on the "Import wallets" button.
10. Select the "Metamask" wallet you just created and click on the "Import" button.
11. Your cryptocurrency will be securely stored in Metamask.
The Benefits of Using Metamask: Why You Should Try It
If you haven’t used Metamask yet, you should definitely give it a try. Metamask is a secure platform that allows users to conduct transactions and manage their cryptocurrency holdings without having to leave the comfort of their browsers. There are many benefits to using Metamask, including:
1. Privacy and Security: Metamask ensures that your transactions are private and secure, and that you have control over your own information.
2. Ease of Use: Metamask is easy to use, and you don’t need to be an expert in cryptocurrency to use it.
3. Access to a Range of Cryptocurrencies: Metamask allows you to access a range of different cryptocurrencies, so you can choose the one that best suits your needs.
4. Low Fees: Metamask charges low fees for its services, so you can save money on your transactions.
5. Wide Range of Cryptocurrencies: Metamask supports a wide range of cryptocurrencies, so you can find the one that best suits your needs.
How Metamask Can Help You Safely Store & Use Cryptocurrency
Metamask is a Chrome extension that lets you safely store and use cryptocurrency. By using Metamask, you can keep your coins safe and secure in the event that your account is hacked. Additionally, Metamask also provides a number of other features, such as the ability to buy and sell cryptocurrencies, access decentralized applications (DApps), and more.
Metamask Review: A Comprehensive Look at This Crypto Plugin
Metamask is a plugin that allows users to securely manage their crypto assets. The plugin was created by the team at Bitfinex, and it’s one of the most popular plugins on the market.
Metamask provides a number of features that make it a popular choice for crypto users. These features include:
-A secure login interface: Metamask allows users to securely login to their accounts with their private key.
-A smart contract browser: Metamask allows users to view and manage their smart contracts.
-An easy-to-use wallet: Metamask provides an easy-to-use wallet that supports a variety of cryptocurrencies.
One of the main benefits of using Metamask is that it provides a secure way to manage your crypto assets. The plugin uses state-of-the-art security measures to keep your data safe.
Metamask is also highly convenient for users. The plugin provides an easy-to-use wallet that supports a variety of cryptocurrencies. This makes it easy for users to access their funds no matter what cryptocurrency they are using.
Overall, Metamask is a popular plugin that provides a number of features that make it an ideal choice for crypto users. The plugin is easy to use and provides a secure way to manage your assets.
Getting Started with Metamask: A Simple Tutorial
Metamask is a very simple and easy to use Ethereum browser extension that allows you to interact with the Ethereum network. In this tutorial, we will explain how to get started with Metamask and how to use it to interact with the Ethereum network.
First, you will need to install the Metamask extension from the Chrome Web Store. Once installed, open the Chrome Web Store and click on the Metamask icon.
Next, click on the Metamask icon and select New Account.
Enter your desired Ethereum address and click on the Create Account button.
Once you have created your account, you will need to sign in. To sign in, click on the Metamask icon and select Sign In.
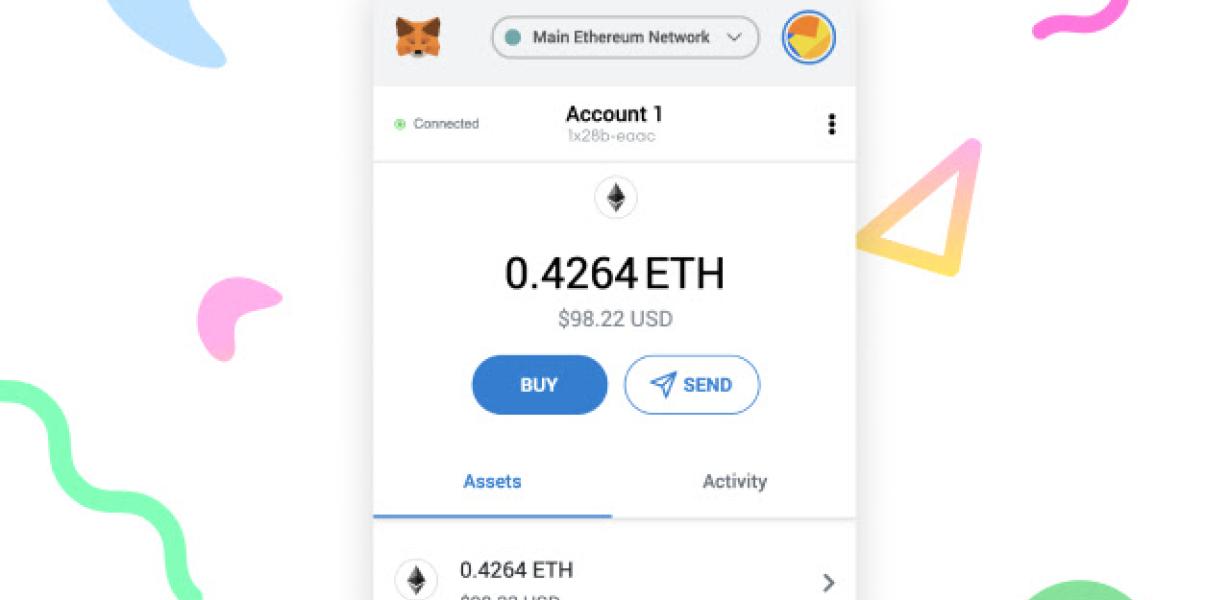
Once you have signed in, you will be presented with the main Metamask interface. On the left side of the interface, you will see a list of transactions that have been made on the Ethereum network recently.
On the right side of the interface, you will see a list of Ethereum tokens that you can use to interact with the Ethereum network.
To make a transaction on the Ethereum network, first click on the token that you want to use and then select the transaction that you want to make.
After selecting the transaction, you will need to provide some information about the transaction. This information includes the recipient address, the amount of ether that you are sending, and the Gas price that you are using.
After providing this information, you will need to click on the Execute Transaction button.
After clicking on the Execute Transaction button, the transaction will be executed and the results will be displayed on the right side of the interface.
Congratulations! You have now started using Metamask to interact with the Ethereum network.
An Introduction to Metamask: How This Crypto Plugin Works
Metamask is a crypto plugin for the popular Ethereum browser, Etherscan. It allows users to interact with decentralized applications (dapps) and smart contracts directly from the browser.
Metamask is a very powerful plugin, and it can be used by both experienced Ethereum users and those new to the blockchain. In this article, we'll explain how Metamask works and how it can be useful for users.
What Is Metamask?
Metamask is a plugin that allows users to interact with decentralized applications (dapps) and smart contracts directly from the browser. It is also a very powerful plugin, and it can be used by both experienced Ethereum users and those new to the blockchain.
How Does Metamask Work?
Metamask uses a special cross-platform protocol known as ERC-721. This protocol enables Metamask to interact with dapps and smart contracts on Ethereum and other platforms.
How Can Metamask Be Useful for Users?
Metamask can be very useful for users who want to use Ethereum dapps and smart contracts. It allows users to interact with these applications without having to download or install any additional software.
Furthermore, Metamask can be used to store Ethereum tokens offline. This can be very useful for users who want to keep their tokens safe and secure.
Finally, Metamask can also be used to make transactions on the Ethereum network. This can be useful for users who want to make quick and easy transactions without having to deal with complex blockchain addresses or transaction fees.
Using Metamask? Here's What You Need to Know
Metamask is a decentralized network that allows users to access the Ethereum network and its applications. The network is available as a browser extension and as a standalone mobile application.
To use Metamask, you first need to create an account. After you have created your account, you will need to set up a password and authorize Metamask to access your Ethereum wallet. You can also add other users to your Metamask account to help you manage your transactions.
Once you have set up your Metamask account, you can start using the network to access Ethereum applications and wallets. To use an Ethereum application, you first need to add the application to your Metamask account. After you have added the application, you will need to open the application and click on the “Add Account” button. After you have added the application, you will need to fill in the application’s information, including its address and its price. After you have filled in the application’s information, you will need to click on the “OK” button. After you have clicked on the “OK” button, the application will start to use the Ethereum network.
To use a Ethereum wallet, you first need to add the wallet to your Metamask account. After you have added the wallet, you will need to open the wallet and click on the “Add Account” button. After you have added the wallet, you will need to fill in the wallet’s information, including its address and its price. After you have filled in the wallet’s information, you will need to click on the “OK” button. After you have clicked on the “OK” button, the wallet will start to use the Ethereum network.