How To Login To Metamask
Assuming you already have the Metamask extension installed in your browser, follow these steps to login: 1) Click the Metamask extension icon in your browser toolbar and select "Import using account seed phrase" 2) Type in or paste your seed phrase into the text field (make sure you don't have any typos!) and click "Import" 3) Type in your password and click "Unlock" 4) You should now be logged in to Metamask!
How to Login to MetaMask: A Step-by-Step Guide
1. Open the MetaMask application on your computer.
2. Click on the three lines in the top left corner of the application.
3. Enter your email address and password into the fields provided.
4. Click on the Login button.
5. You will be taken to the MetaMask login page.
6. Copy the address bar of the browser window and paste it into the address bar of your MetaMask account.
7. Click on the Log In button.
8. You will be taken to the MetaMask account login page.
9. Enter your account password and click on the Log In button.
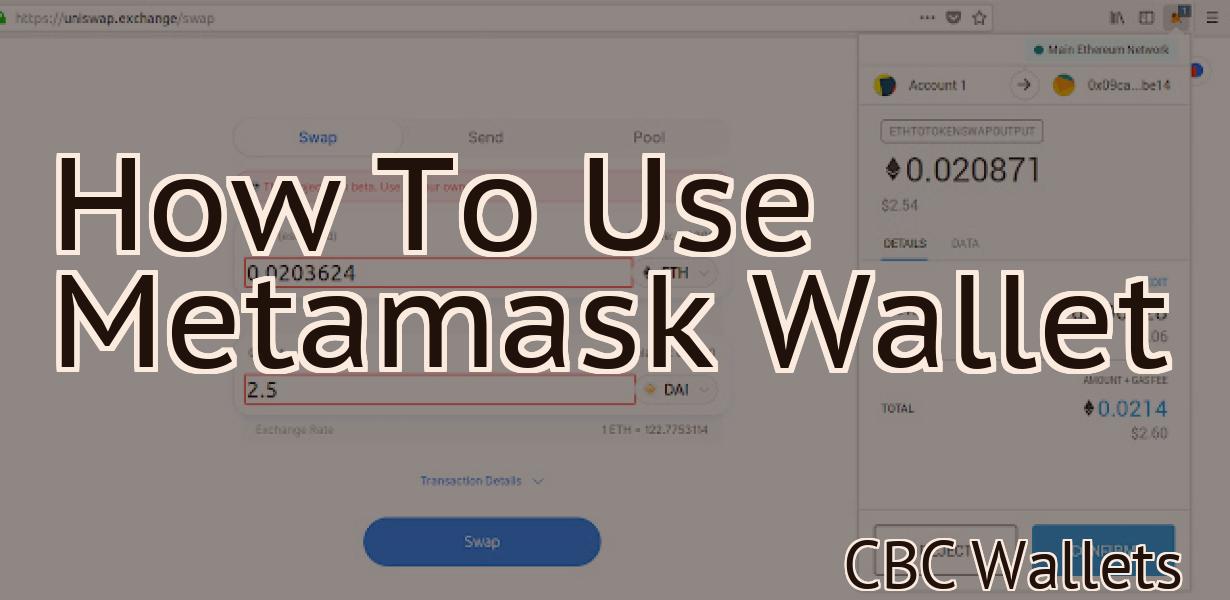
How to Use MetaMask: A Comprehensive Guide
MetaMask is a browser extension that allows you to securely access your Ethereum and ERC20 tokens. MetaMask also allows you to make transactions with other users on the Ethereum network.
To install MetaMask, visit the Chrome Web Store and search for "MetaMask." Once installed, open the extension and click on the "Create New Wallet" button.
Enter the following information into the "New Wallet Address" field:
1. The wallet address that you want to use to store your MetaMask tokens.
2. The password that you will use to access your wallet.
3. A secure password (not your actual password). This is needed to confirm your identity when making transactions.
4. Your ETHEREUM WALLET ADDRESS. This is the same address that you use to receive Ethereum payments.
5. A SECURE DASH WALLET ADDRESS. This is the address where you will store your Dash coins.
6. A SECURE WALLET PASSWORD. This is the password that you will use to access your wallet.
7. A DASH WALLET COIN ADDRESS. This is the address where you will store your Dash coins.
8. A DASH WALLET PASSWORD. This is the password that you will use to access your wallet.
9. A CRYPTOCURRENCY WALLET ADDRESS. This is the address where you will store your cryptocurrency coins.
10. A CRYPTOCURRENCY WALLET PASSWORD. This is the password that you will use to access your wallet.
11. A GOOGLE PLAY CRYPTOCURRENCY ACCOUNT. If you want to use Google Play to purchase cryptocurrencies, you will need to provide this information.
12. A GOOGLE PLAY ACCOUNT NAME. You will need to provide this information if you want to use Google Play to purchase cryptocurrencies.
13. A GOOGLE PLAY ACCOUNT SECRET KEY. You will need to provide this information if you want to use Google Play to purchase cryptocurrencies.
14. A TOS REFERENCE URL. You will need to provide this information if you want to use MetaMask to make transactions with other users on the Ethereum network.
15. YOUR EMAIL ADDRESS. This is the address where you will receive verification emails for your new MetaMask wallet.
16. YOUR WALLET PASSWORD VERIFIED BY GOOGLE PLAY. This is a check box that you can check if you want MetaMask to verify your wallet password when you make a transaction on Google Play.
17. YOUR EMAIL ADDRESS VERIFIED BY GOOGLE PLAY. This is a check box that you can check if you want MetaMask to verify your email address when you make a transaction on Google Play.
18. YOUR WALLET PASSWORD VERIFIED BY META MASK. This is a check box that you can check if you want MetaMask to verify your wallet password when you make a transaction on the web.
19. YOUR EMAIL ADDRESS VERIFIED BY META MASK. This is a check box that you can check if you want MetaMask to verify your email address when you make a transaction on the web.
20. CLICK " CREATE WALLET " TO FINALIZE YOUR NEW WALLET SETUP.
Now that you have created a new MetaMask wallet, click on the "Log In" button in the upper right corner of the browser window.
Enter your information into the "Login" field and click on the "Log In" button.
You will now be logged in to your new MetaMask wallet!
Getting Started with MetaMask: A Beginner's Guide
MetaMask is a browser extension that allows you to interact with the Ethereum network. MetaMask is a key tool for users who want to access and use decentralized applications on the Ethereum network.
Before you can start using MetaMask, you'll need to set up a Ethereum wallet. You can visit our guide on how to create a Ethereum wallet to get started. Once you have a Ethereum wallet, you can install the MetaMask extension.
To install the MetaMask extension, open your browser and click the "Add New Extension" button in the toolbar. On the extension page, click the "Install" button and select "MetaMask." After MetaMask is installed, open it and click the "Open" button in the toolbar.
Now, you'll need to create a new account. To do this, click the "Create New Account" button in the MetaMask window. On the account creation page, enter your name, email address, and password. After you've created your account, you'll be able to access it by clicking the "Account" button in the MetaMask window and clicking the "Log In" button.
Now, you'll need to add a Ethereum wallet address to your account. To do this, click the "Account" button in the MetaMask window and click the "Add Address" button. On the address add page, enter the address of your Ethereum wallet and click the "Next" button. After you've added your Ethereum wallet address, you'll be able to access it by clicking the "Account" button in the MetaMask window and clicking the "View Address" button.
Now, you'll need to configure MetaMask to use your Ethereum wallet address. To do this, click the "Settings" button in the MetaMask window and click the "Configure Settings" button. On the settings page, click the "Copy Address" button and then paste your Ethereum wallet address into the "Address" field. After you've pasted your Ethereum wallet address, click the "Next" button.
Now, you'll need to enable Ethereum web3. To do this, click the "Settings" button in the MetaMask window and click the "Enable Web3" button. After you've enabled Ethereum web3, you'll be able to access it by clicking the "Settings" button in the MetaMask window and clicking the "Web3 Options" button.
Now, you'll need to copy a private key from your Ethereum wallet. To do this, click the "Settings" button in the MetaMask window and click the "Copy Key" button. After you've copied your private key, you'll be able to access it by clicking the "Settings" button in the MetaMask window and clicking the "View Private Key" button.
After you've completed these steps, you're ready to start using MetaMask. To start using MetaMask, open your browser and click the "Sign In" button. On the sign in page, enter your name and email address and click the "Sign In" button. After you've signed in, you'll be able to access your account by clicking the "Account" button in the MetaMask window and clicking the "View Balance" or "View Transactions" buttons.

How to Create a MetaMask Account
To create a MetaMask account, first open the MetaMask website and click on the "Create a new account" button. This will open the account creation form.
In the "Name" field, enter a name for your account. This name will be displayed on the MetaMask website and in the "Logo" field.
In the "Email" field, enter a valid email address.
In the "Password" field, enter a password.
Click on the "Create my account" button to finish creating your account.
How to Import an Existing Ethereum Wallet into MetaMask
1. Open MetaMask and click on the three lines in the top right corner.
2. Click on "Add Wallet."
3. Select the Ethereum wallet you want to import and click on "Import."
4. MetaMask will ask you to confirm the import. Click on "Yes."
5. MetaMask will now show your imported Ethereum wallet's address and its private key. You can copy both of these values if you want to transfer Ethereum from your imported wallet into another one.
How to Access Your MetaMask Wallet
To access your MetaMask wallet, go to the MetaMask website and click on the "My Wallet" button. You will be presented with a list of all the addresses in your wallet. To view a specific address, click on it and you will be presented with a dialog box that will allow you to send or receive tokens from that address.
How to Send Ether with MetaMask
MetaMask is a browser extension that allows you to send and receive Ethereum, Bitcoin, and other cryptocurrencies.
To send Ether with MetaMask, first open the MetaMask extension and click the "Send" button.
In the "To:" field, enter the address of the recipient.
In the "Amount:" field, enter the amount of Ether you want to send.
In the "Gas Limit:" field, set the gas limit for the transaction.
Click the "Send" button.
How to Add Tokens to Your MetaMask Wallet
To add tokens to your MetaMask wallet, first open the MetaMask wallet on your computer.
Once you have opened the MetaMask wallet, you will see the Add Tokens button in the top right corner of the screen.
To add tokens to your MetaMask wallet, click on the Add Tokens button.
You will then be presented with a list of all the tokens that are available on the Ethereum network.
To add a token to your MetaMask wallet, click on the token that you want to add to your wallet.
You will then be prompted to enter the amount of tokens that you want to add to your wallet.
Once you have entered the amount of tokens that you want to add to your wallet, click on the Add to Wallet button.
Your tokens will now be added to your MetaMask wallet.
How to Secure Your MetaMask Wallet
MetaMask is a secure web browser that allows you to send and receive Bitcoin, Ethereum, and other cryptocurrencies.
To secure your MetaMask wallet, follow these steps:
1. Open MetaMask and click on the three lines in the top left corner.
2. Click on the "Settings" tab.
3. Under "Security," click on the "Create a new seed" button.
4. Type in a unique 12-word seed into the box that appears and click on the "Create seed" button.
5. Save your seed by clicking on the "Saved seeds" button at the bottom of the Settings tab.
6. Click on the "Import private key" button to import your private key into MetaMask.
7. Enter your private key into the "Import private key" field and click on the "Import" button.
8. Your MetaMask wallet should now be secure.
Frequently Asked Questions About MetaMask
1. What is MetaMask?
MetaMask is a web browser extension that allows you to access your Ethereum and ERC20 tokens without having to leave the web page you're on. MetaMask also allows you to make transactions with those tokens, and to view your account balances and transaction history.
2. How do I get MetaMask?
You can download MetaMask from the Chrome Web Store or the Firefox Add-ons store.
3. How do I use MetaMask?
To use MetaMask, first install it from the Chrome Web Store or the Firefox Add-ons store. Once it's installed, open the browser extension and click on the green "Ethereum" button in the top right corner. You'll be asked to login to your Ethereum wallet (if you don't have one, MetaMask will create one for you). After you've logged in, you'll see a list of all of your ERC20 tokens in your wallet. Click on the token you want to use, and you'll be taken to the token's page on the Ethereum network. From there, you can make transactions and view your account balance.