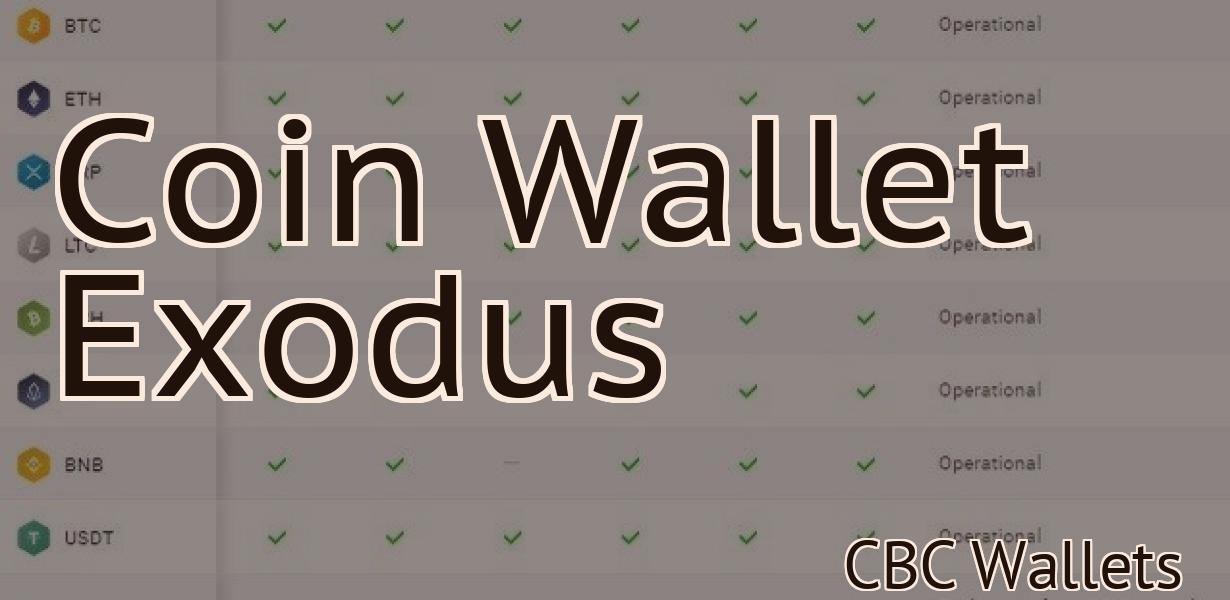
Desktop Metamask
Metamask is a desktop application that allows you to manage your Ethereum accounts and private keys. It also allows you to sign transactions, and interact with dapps and smart contracts.
How to Use Desktop MetaMask to Access the Ethereum Network
1. Open the Desktop MetaMask application.
2. Click the Create a New Account button.
3. Fill in the required information and click the Create Account button.
4. Once you have created your account, you will be taken to the Account Overview page.
5. To connect to the Ethereum network, click the Connect to Network button and enter your Ethereum address.
6. Click the Advanced Options button and select the Use My Ether Wallet To Send And Receive Tokens checkbox.
7. Click the Connect button to connect to the Ethereum network.
MetaMask - The Gateway to Ethereum
What is Ethereum? Ethereum is a decentralized platform that runs smart contracts: applications that run exactly as programmed without any possibility of fraud or third party interference.
How Desktop MetaMask Can Help You Access Decentralized Applications
Desktop MetaMask is a browser extension that allows you to access decentralized applications (DApps). With Desktop MetaMask, you can easily access your decentralized applications, tokens, and other blockchain-based assets.
Desktop MetaMask is also a secure interface that allows you to manage your private keys and identities. You can also use Desktop MetaMask to make transactions with other users in the DApp ecosystem.
How to Install Desktop MetaMask on Your Computer
To install Desktop MetaMask on your computer, follow these steps:
1. Download the Desktop MetaMask extension from the Chrome Web Store.
2. After you have downloaded the Desktop MetaMask extension, open Chrome Web Store on your computer.
3. Search for "Desktop MetaMask."
4. Click the "Install" button next to the Desktop MetaMask extension.
5. After the Desktop MetaMask extension has been installed, you will be prompted to open it. Click the "Open" button to open the extension.
6. Click the "Add a new account" button to create a new account.
7. Enter your name and email address into the form fields and click the "Create Account" button.
8. After you have created your account, you will be given an access token. Save the access token so you can use it later.
9. Click the "Show on desktop" button to show the Desktop MetaMask extension on your computer's desktop.
10. Click the "Sign in" button to sign in to your account.
11. After you have signed in, you will be taken to the account overview page. On this page, you will see all of the DApps that you have access to.
12. Click the "My tokens" button to see all of the tokens that you have access to.
13. To transfer tokens between accounts, click the "Send" button next to the token that you want to transfer.
14. After you have sent the token, you will be taken to the transfer confirmation page. Click the "Confirm" button to complete the transfer.
15. After you have transferred the token, you will be taken back to the account overview page. You will now have access to the token that you have transferred.
Using Desktop MetaMask to Connect to the Ethereum Network
To connect to the Ethereum network, open a new web browser window and enter the following address:
https://www.metamask.io
If you have installed the MetaMask extension on your desktop, you will see the MetaMask extension icon in your browser toolbar. If you do not have the MetaMask extension installed, you can download it from the Chrome Web Store or the Firefox Add-ons Store.
Click on the MetaMask extension icon to open the extension.
Click on the three lines in the top left corner of the window to open the menu.
Select "Connect to Ethereum Network."
Enter your Ethereum wallet address and click "Connect."
You will be prompted to allow MetaMask to access your computer's network. Click "Allow."
You will now be connected to the Ethereum network.
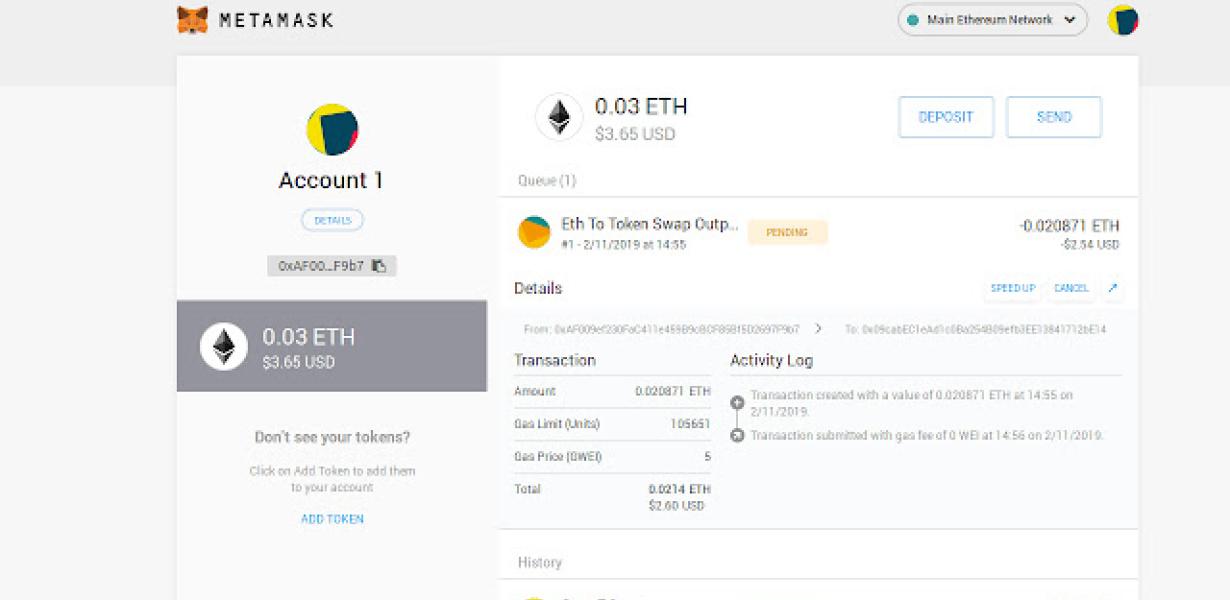
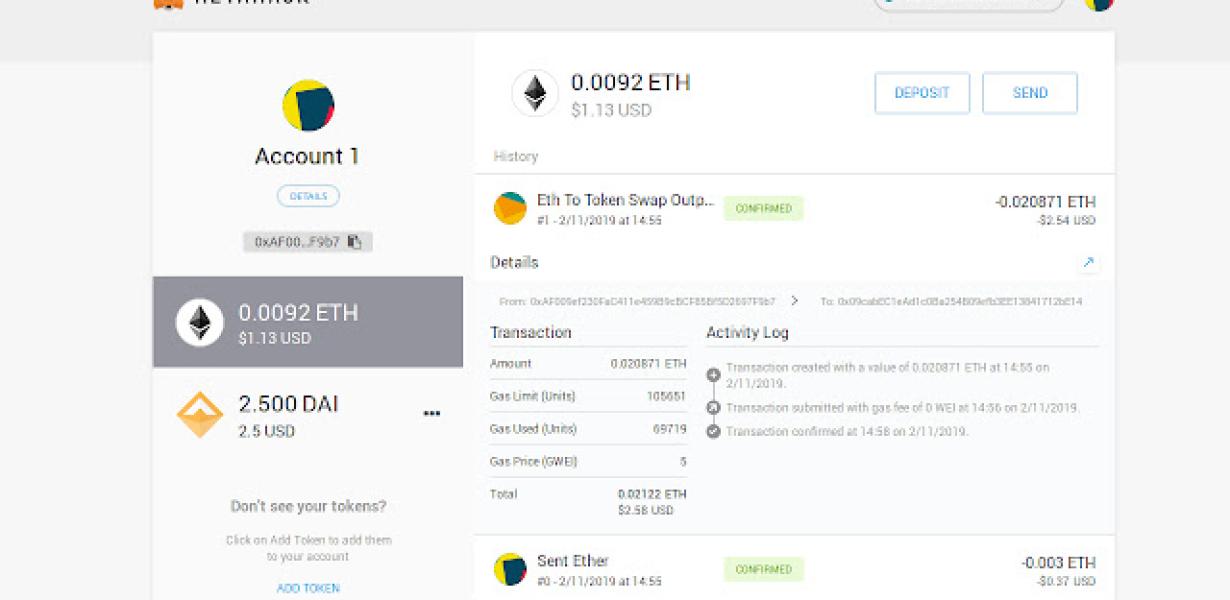
How to Use MetaMask to Send & Receive Ether
1. Open MetaMask and click the three lines in the top left corner.
2. On the left, select "Wallet."
3. On the right, select "Send Ether & Tokens."
4. On the left, enter the recipient's Ethereum address and select "Send."
5. On the right, enter the amount of Ether you want to send and select "Send."
6. On the left, select "Receive."
7. On the right, enter the recipient's Ethereum address and select "Receive."
8. On the left, select the token you want to send and select "Receive."
9. On the right, enter the amount of tokens you want to receive and select "Receive."
How to Store your Ether Safely with Desktop MetaMask
Desktop MetaMask is a browser extension that allows you to store your ether safely and easily.
To store your ether with Desktop MetaMask:
1. Open Desktop MetaMask.
2. Click the "Add Wallet" button.
3. Select the Ethereum wallet address you want to use.
4. Click the "Save" button.
5. Your ether will be stored securely in Desktop MetaMask!
Getting Started with Desktop MetaMask
Desktop MetaMask is a browser extension that allows you to access your Ethereum wallet and other decentralized applications (DApps) from your desktop.
To get started, open the Desktop MetaMask extension from the Chrome web store. If you don't have Chrome installed, you can download it here.
Once you have installed Desktop MetaMask, click the icon to open the extension.
If you don't have an Ethereum wallet yet, you can create one by clicking the "Create new Ethereum wallet" button.
Once you have created a wallet, you will need to add a valid address. To do this, click on the "Add a new Ethereum address" button.
Next, enter the address into the "Address" field and click the "Create address" button.
You will now be able to access your Ethereum wallet from the "Ethereum Wallet" tab.
To interact with DApps on Desktop MetaMask, you will first need to add a keystore file. To do this, click on the "Add keystore file" button.
Next, enter the path to the keystore file into the "Keystore file" field and click the "Create keystore" button.
You will now be able to access your DApps from the "Dapps" tab.
How to Install Desktop MetaMask
Desktop MetaMask is a web browser extension that helps you interact with decentralized applications and smart contracts.
To install Desktop MetaMask, first open your web browser and click the Chrome menu (three lines in the top left corner of the browser window). Then click on "Tools," and then "Extensions."
Next, click on the "Add extension" button in the top right corner of the Extensions window.
Select "Desktop MetaMask" from the list of available extensions, and then click on the "Install" button.
Finally, click on the "Open" button in the top right corner of the Extensions window to open Desktop MetaMask.
Using Desktop MetaMask with MyEtherWallet
If you have a desktop browser, you can use Desktop MetaMask to manage your Ethereum and ERC20 tokens.
To install Desktop MetaMask:
1. Go to https://metamask.io/ and click the "Install" button.
2. If you already have a MetaMask account, click the "Login" button and enter your MetaMask login credentials.
3. If you don't have a MetaMask account, click the "Create New Account" button and follow the instructions.
4. After you have installed Desktop MetaMask, click the "MetaMask" button in the main toolbar and select "Desktop (Chrome)" to use it with Chrome.
5. In Chrome, open the Chrome menu (three lines at the top right of the browser window), and select "Tools > Extensions > Desktop MetaMask."
6. In the "Extensions" panel, click the "Add an Extension" button.
7. In the "Extension" window, click the "Browse" button, locate Desktop MetaMask in the Chrome store, and click the "Install" button.
8. After Desktop MetaMask has been installed, click the "Activate" button in the "Extensions" panel.
How to Create a Wallet with Desktop MetaMask
1. Open your web browser and go to https://metamask.io/
2. Click on the "Create a New Account" button and enter your desired personal information.
3. Click on the "Download Wallet" button and save the file to your computer.
4. Open your wallet file and click on the "Import Wallet" button.
5. Select the "Desktop" option and enter the location of your MetaMask file.
6. Click on the "Next" button and select the amount of ETH you want to deposit into your wallet.
7. Click on the "Next" button again and select the "Gas Limit" option.
8. Enter the correct Gas Limit value and click on the "Next" button.
9. Click on the "Finish" button to create your new wallet.
Importing an Existing Wallet into Desktop MetaMask
MetaMask allows you to import an existing wallet into your desktop browser.
To import an existing wallet:
1. Open MetaMask.
2. Click the "Import Wallet" button on the left.
3. Select the wallet file you want to import.
4. Click the "Import" button.
Using Desktop MetaMask with mist
Desktop MetaMask is a Chrome extension that allows you to interact with Ethereum and ERC20 tokens on the web.
To use Desktop MetaMask with mist, open mist and click on the "wallet" button in the top left corner. In the wallet window that pops up, select the "add account" button and enter your Desktop MetaMask account credentials. You will now be able to access all of your ERC20 tokens and transactions from mist.