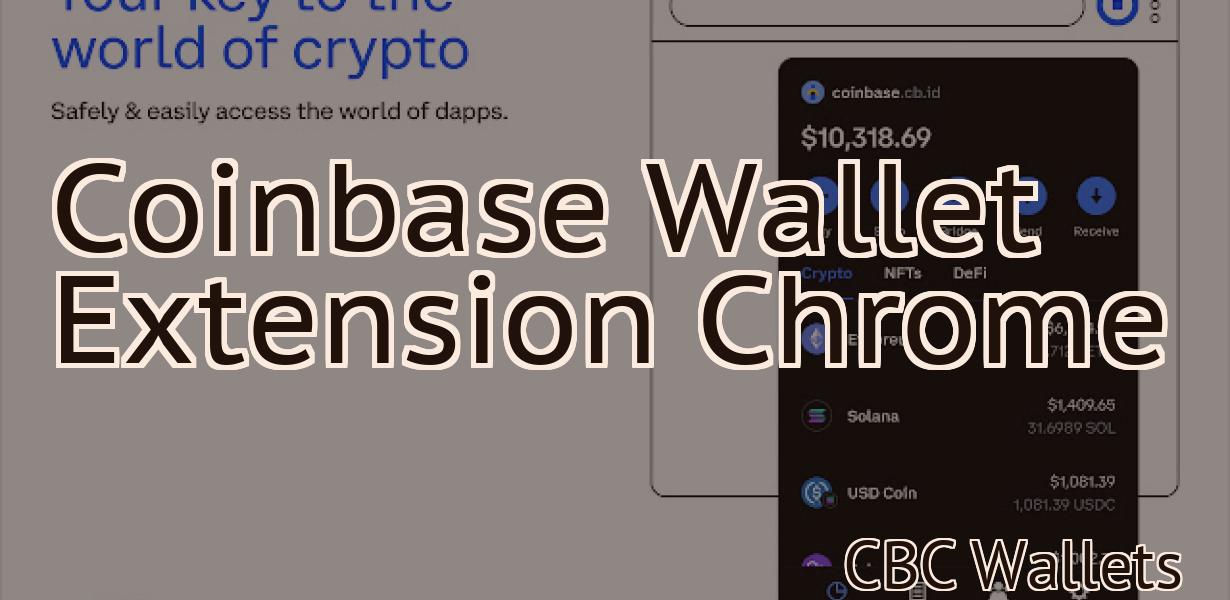
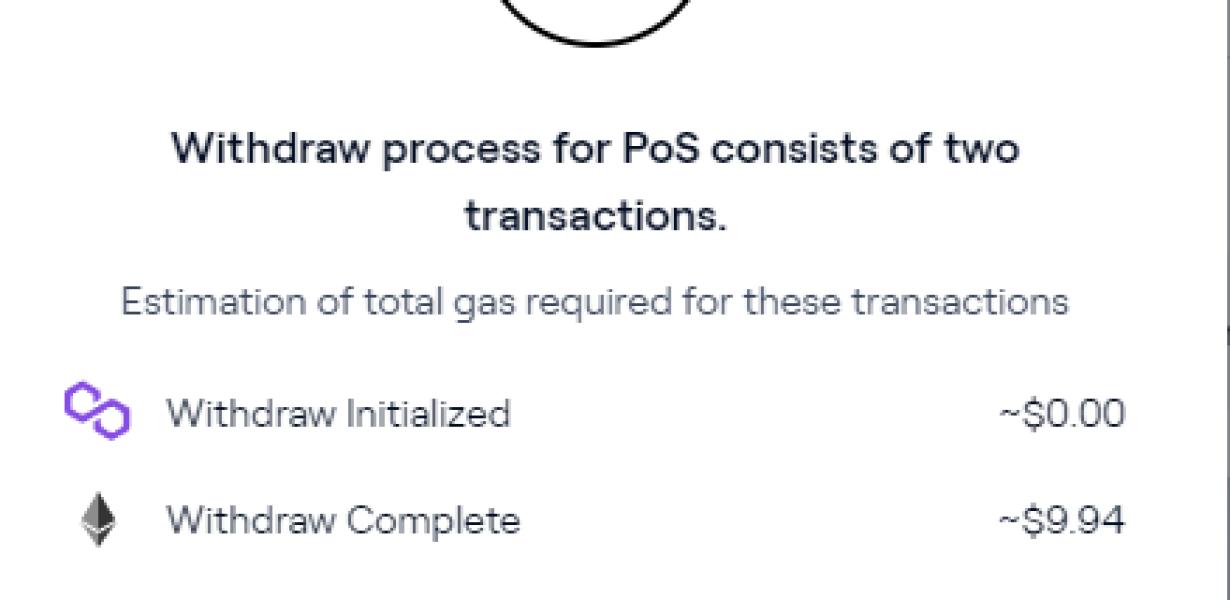
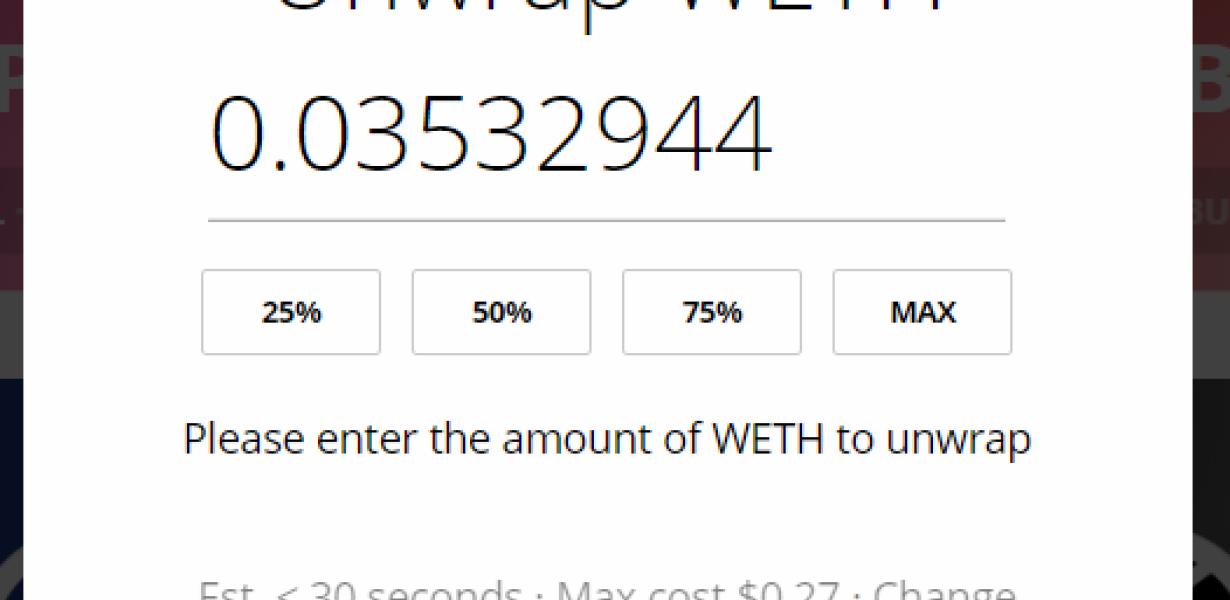
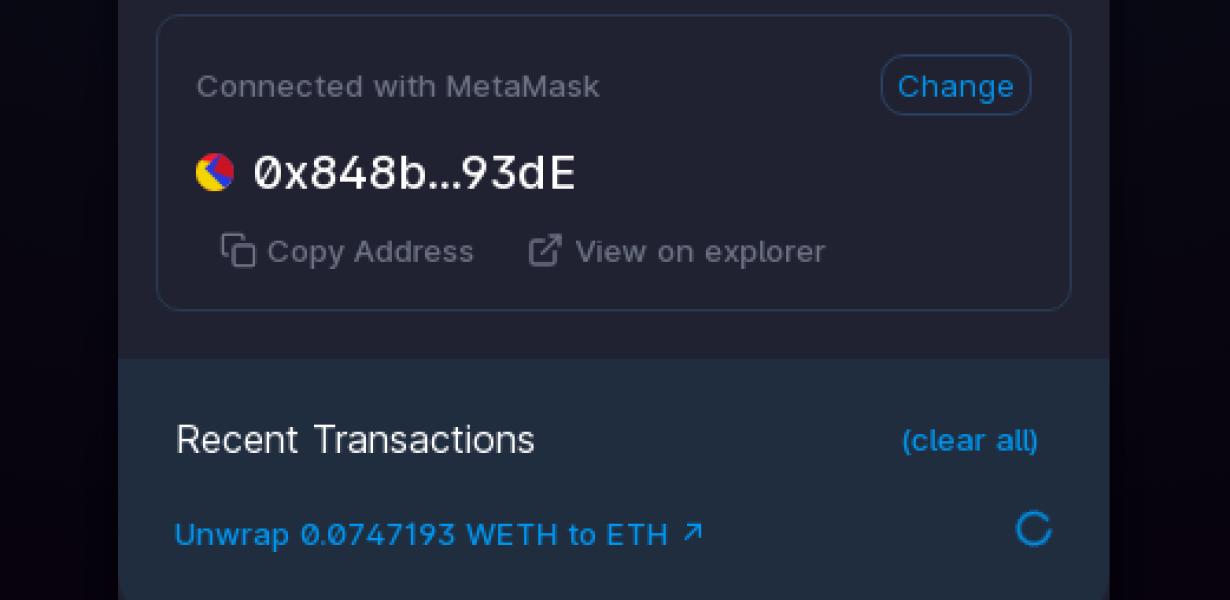
Unwrap Ethereum Metamask
Ethereum Metamask is a browser extension that allows you to run Ethereum dApps without having to run a full Ethereum node.
Unwrapping the Ethereum Metamask: How to Use It and What You Need to Know
Ethereum Metamask is a web tool that allows users to interact with the Ethereum blockchain. It is a Chrome browser extension, and requires the installation of a compatible Ethereum client. According to Ethereum.org, Metamask "allows you to keep your keys safe and manage your transactions with a single click."
Once you have installed the Metamask extension, you can access it by clicking on the three lines in the top right corner of the Chrome browser. This will open the Metamask main window. In this window, you will need to create a new Ethereum address. To do this, click on the "New Address" button on the left side of the window.
Next, you will need to input the information for your new address. This will include the address itself, as well as the gas limit (in gas units) and the gas price (in Gwei). The gas limit is important, as it will determine how much Ether you are allowed to send to this address. The gas price is also important, as it determines how much Ether you will need to pay for each transaction.
When you have finished entering your information, click on the "Create Address" button. This will create a new Ethereum address that you can use in future transactions.
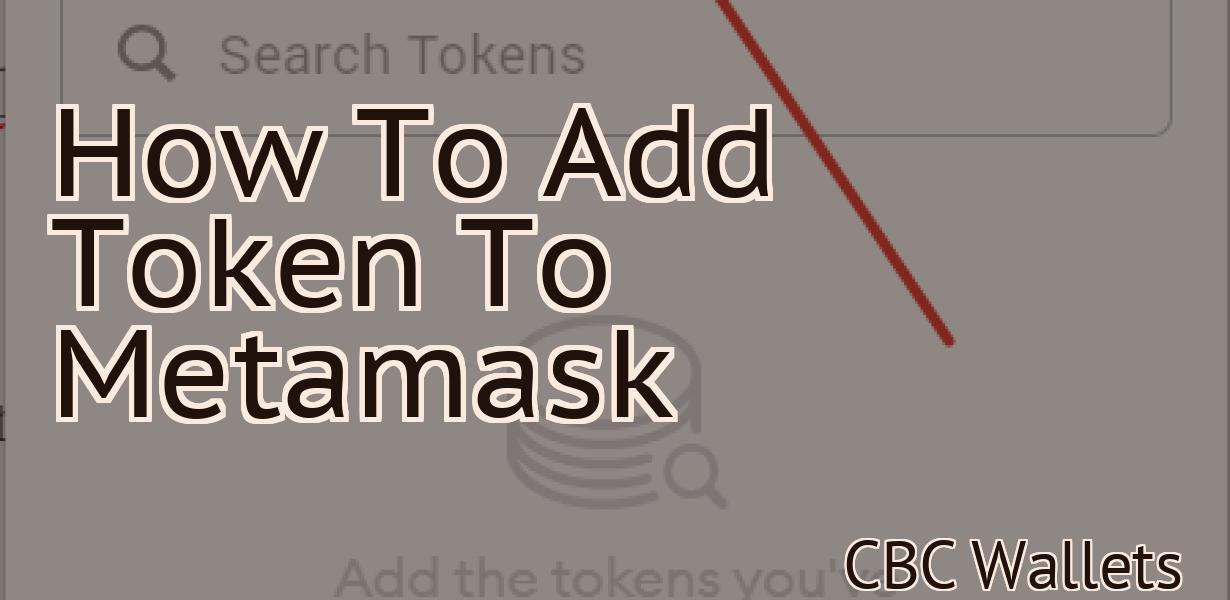
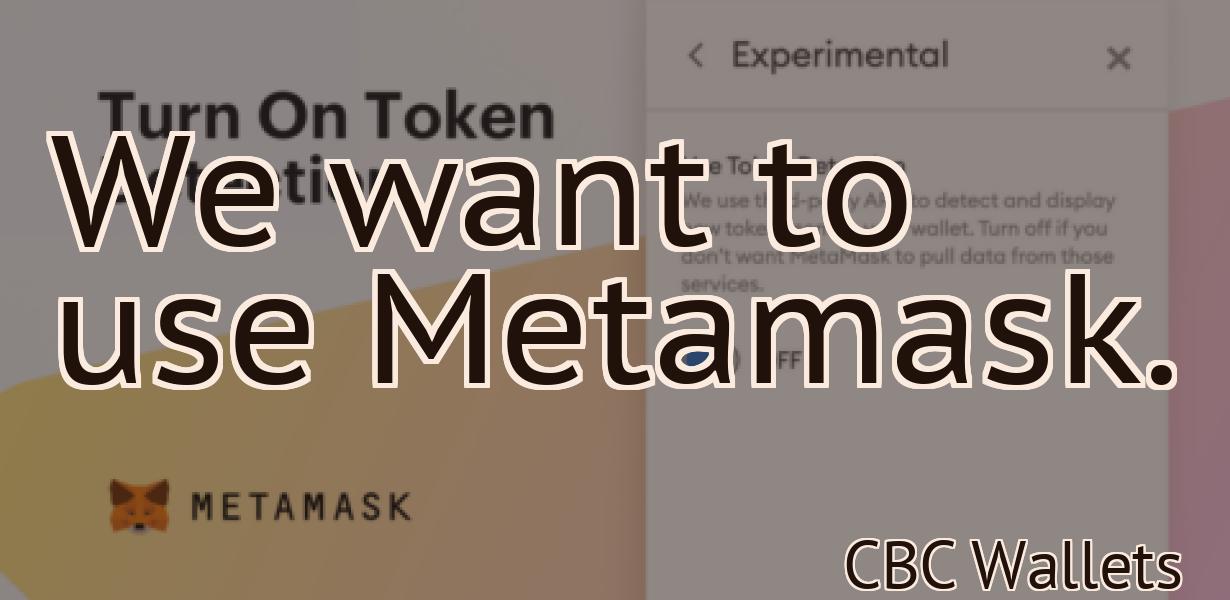
Now, you will need to add a token to your Metamask account. To do this, click on the "Add Token" button on the left side of the window. This will open the "Add Token" window.
In this window, you will need to input the information for your new token. This will include the name of your token, as well as the symbol and the decimal value for its price (in Ether). You can also add a description for your token, if you wish.
When you have finished entering your information, click on the "Add Token" button. This will add your new token to your Metamask account.
Now, you will need to send some Ether to your new address. To do this, click on the "Send Ether" button on the left side of the window. This will open the "Send Ether" window.
In this window, you will need to input the amount of Ether that you want to send to your new address. You can also add a note about this transaction, if you wish.
When you have finished entering your information, click on the "Send Ether" button. This will send the Ether that you have entered to your new address.
Metamask: The Beginner's Guide to Using Ethereum's Default Wallet
Metamask is a web application that allows users to interact with the Ethereum network and carry out transactions without having to install any additional software.
To get started, you first need to create an account on metamask.com. Once you have created your account, you will be prompted to download the Metamask app. Once you have downloaded the Metamask app, open it and click on the "Create New Account" button.
On the "Create New Account" page, you will be asked to provide your name, email address, and password. After you have entered these details, click on the "Create Account" button.
When you have created your account, you will be taken to the "Metamask Home" page. On the "Metamask Home" page, you will see a list of all the accounts that you have created on metamask.com. Under the "My Accounts" heading, you will see your newly created account.
To manage your accounts on metamask.com, click on the "My Accounts" heading and then on the "Ethereum" heading. On the "Ethereum" heading, you will see a list of all the wallets that you have created on metamask.com. Under the "Wallets" heading, you will see your newly created wallet.
To create a new transaction, click on the "Transaction" heading and then on the "New Transaction" button. On the "New Transaction" page, you will be prompted to enter your address and data. After you have entered these details, click on the "Create Transaction" button.
After you have created a transaction, you will be taken to the "Transaction History" page. On the "Transaction History" page, you will see a list of all the transactions that you have created on metamask.com. To view the details of a specific transaction, click on the transaction ID.
To send a transaction, click on the "Send Transaction" heading and then on the "Send Transaction" button. On the "Send Transaction" page, you will be prompted to enter your address and data. After you have entered these details, click on the "Send Transaction" button.
After you have sent a transaction, you will be taken to the "Transaction History" page. On the "Transaction History" page, you will see a list of all the transactions that you have sent on metamask.com. To view the details of a specific transaction, click on the transaction ID.
To view your balance, click on the "Balance" heading and then on the "View Balance" button. On the "View Balance" page, you will be prompted to enter your address. After you have entered your address, you will be shown your current balance in ethers and tokens.
How to Use Metamask: A Complete Guide for Beginners
Metamask is a decentralized application that allows users to interact with the blockchain world. The application provides a user interface for managing your identity and transactions on the blockchain. Metamask also allows users to create and manage their own Ethereum-based tokens.
To start using Metamask, you first need to download the application from the Google Play or Apple App Store. Once you have downloaded the application, open it and sign in.
Once you have logged in, you will be taken to the Metamask main screen. On this screen, you will need to create a new account or login with an existing account.
To create a new account, click on the Create Account button and follow the instructions on the screen. In order to login with an existing account, click on the Login with Existing Account button and enter your credentials.
Once you have logged in, you will be taken to the Metamask main screen. On this screen, you will need to select the type of account you want to use. You can use a personal account, a company account, or a foundation account.
Next, you will need to select the Ethereum network you want to use. You can use the default Ethereum network or you can select a different network.
Finally, you will need to select the type of token you want to create. You can create a standard Ethereum token or a ERC-20 token.
After you have selected your settings, click on the Create Account button to start creating your token.
Getting Started with Metamask: How to Use Ethereum's Popular Wallet
Metamask is a popular Ethereum wallet that allows users to interact with the Ethereum network. To start using Metamask, open the app and click on the "Get Metamask" button. This will open the Metamask website in a new tab.
On the Metamask website, click on the "Create a New Wallet" button. This will open the Metamask wallet creation wizard.
First, type in a name for your Metamask wallet. This will be the name that appears in the main Metamask window.
Next, type in a password for your Metamask wallet. This will be the password that protects your Metamask wallet.
Finally, click on the "Create Account" button. This will open the Metamask wallet creation confirmation window.
Once you have created your Metamask wallet, you will be able to access it by clicking on the "Metamask" button on the main Metamask window.
Metamask 101: How to Use Ethereum's Browser Extension Wallet
Ethereum's browser extension wallet is a great way to store and manage your ether. Here's how to use it:
1. Install the Metamask extension from the Ethereum website.
2. Once installed, open the Metamask extension and click on the "New Wallet" button.
3. In the "New Wallet" window, you'll be prompted to create a new Ethereum address. Click on the "Create New Address" button to create a new address.
4. Next, you'll need to input the address you created in step 3 into the "Address" field. You can also add a password in this field if you want.
5. In the "Token Symbol" field, you can enter the symbol for your Ethereum tokens.
6. In the "Decimals" field, you can specify the number of digits for your token's decimal point.
7. Finally, click on the "Create" button to create your new Ethereum wallet.
8. Now you can store your ether in this wallet and use it to purchase tokens or other cryptocurrencies on exchanges.
How to Install and Use Metamask Wallet
To install Metamask wallet on your computer, open a web browser and go to metamask.io. Click on the “Download” button and save the Metamask wallet installer file to your computer.
To install Metamask wallet on your Android device, open the Google Play Store and search for “Metamask.” Click on the Metamask app icon and follow the on-screen instructions to install the Metamask wallet.
To install Metamask wallet on your iOS device, open the App Store and search for “Metamask.” Click on the Metamask app icon and follow the on-screen instructions to install the Metamask wallet.
How to Create an Account on Metamask
To create an account on Metamask, you will first need to download the Metamask extension for your browser. After installing the Metamask extension, you will be redirected to the Metamask website where you will be able to create your account.
1. Click the Metamask icon on your browser toolbar.
2. On the Metamask website, click the “Create Account” button.
3. Enter your desired username and password.
4. Click the “Create Account” button to finish creating your account.
What is Metamask and How to Use It
Metamask is a decentralized application that allows users to interact with the Ethereum network. It is a desktop application that runs in your browser and connects to the Ethereum network. With Metamask, you can manage your Ethereum assets, send and receive transactions, and access decentralized applications (DApps) on the Ethereum network.
A Comprehensive Guide to Using Metamask Wallet
Metamask is a popular cryptocurrency wallet that supports a variety of cryptocurrencies. This guide will teach you how to use Metamask wallet to store, spend, and exchange cryptocurrencies.
To start using Metamask, download the app from the App Store or Google Play Store. Open the app and sign in using your credentials.
Next, select the “Metamask” tab in the upper-left corner of the app.
To create a new account, click the “New Account” button. Fill in the basic details of your account, such as your name and email address. You will also need to choose a password.
To create a new wallet, click the “Create New Wallet” button. This will open the Metamask wallet creation wizard.
First, you will need to choose a name for your wallet. This name will be displayed in the main Metamask window and in the history of transactions that you make.
Next, you will need to choose a password for your wallet. This password will be used to access your wallet and to make transactions.
You will also need to choose a security level for your wallet. The default security level is “medium”. However, you can choose one of the other security levels, such as “high” or “ultra high”, if you prefer.
Finally, you will need to choose a backup phrase. This is a phrase that you will use to restore your wallet if it gets lost or stolen.
Click the “Create New Wallet” button to continue.
The next step is to add a cryptocurrency to your Metamask wallet. To do this, click the “Add Coin” button on the Metamask wallet creation wizard.
This will open the Add Coin dialog box. You will need to enter the name of the cryptocurrency that you want to add to your Metamask wallet.
Next, you will need to choose a wallet address for the cryptocurrency that you are adding to your Metamask wallet. This is the address that you will use to send and receive the cryptocurrency.
You will also need to choose a payment method for the cryptocurrency that you are adding to your Metamask wallet. The default payment method is “send funds”. However, you can choose one of the other payment methods, such as “withdraw funds” or “buy coins”.
Click the “Add Coin” button to continue.
The next step is to add a cryptocurrency to your Metamask wallet. To do this, click the “Add Coin” button on the Metamask wallet creation wizard.
This will open the Add Coin dialog box. You will need to enter the name of the cryptocurrency that you want to add to your Metamask wallet.
Next, you will need to choose a wallet address for the cryptocurrency that you are adding to your Metamask wallet. This is the address that you will use to send and receive the cryptocurrency.
You will also need to choose a payment method for the cryptocurrency that you are adding to your Metamask wallet. The default payment method is “send funds”. However, you can choose one of the other payment methods, such as “withdraw funds” or “buy coins”.
Click the “Add Coin” button
How to Use Ethereum's Metamask Wallet
First, you'll need to install the Metamask Ethereum wallet. To do this, go to https://metamask.io/ and click on the "Install Metamask" button.
Once Metamask is installed, you'll need to create a new Ethereum wallet. To do this, go to https://metamask.io/ and click on the "Create New Wallet" button.
Next, you'll need to input your Ethereum address. This can be found on your Ethereum wallet or on the Ethereum blockchain.
You'll also need to input your password. This will be used to access your Metamask wallet and to make transactions on the Ethereum blockchain.
Finally, you'll need to verify your identity. This can be done by uploading a photo of yourself or by using one of the verification methods offered by Metamask.
Once you've completed these steps, you'll be ready to start using your Metamask wallet.