Trezor Set Up
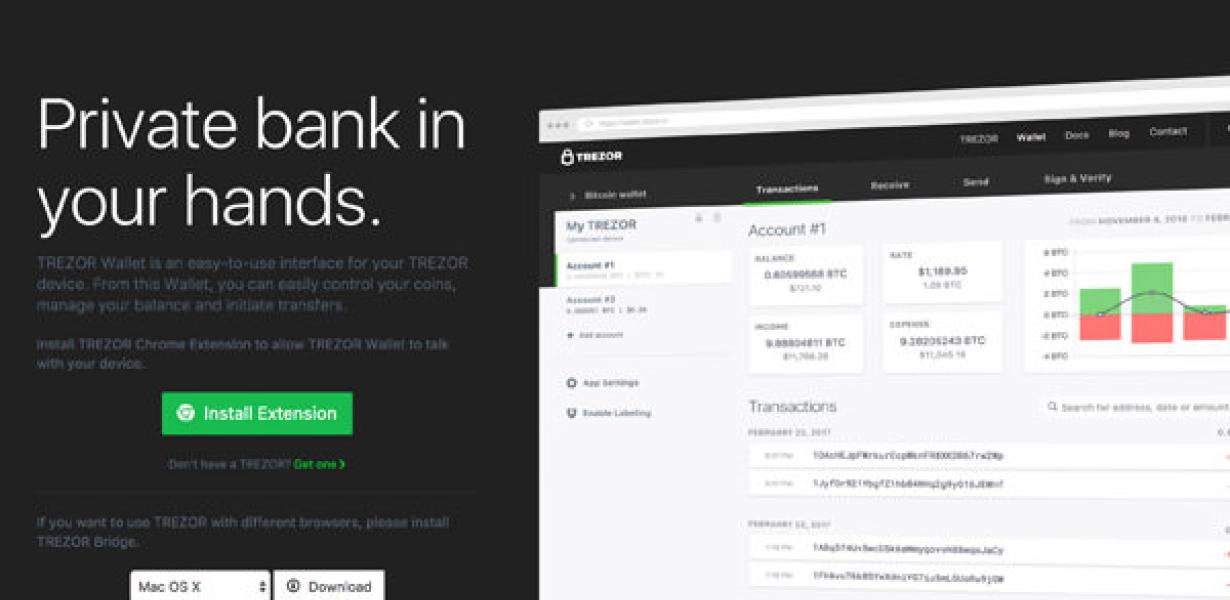
If you're looking to set up a Trezor, this article will walk you through the steps you need to take. First, you'll need to download the Trezor Bridge software and install it on your computer. Next, connect your Trezor to your computer using the provided USB cable. Once it's connected, open the Trezor Bridge software and follow the on-screen instructions to set up your device. Once you've got everything set up, you'll be able to use your Trezor to securely store your cryptocurrency offline.
trezor set up: A step-by-step guide
on how to set up a Trezor wallet
If you are new to cryptocurrencies, or if you have not used a hardware wallet before, setting up a Trezor wallet is a good idea. The Trezor wallet is a secure way to store your cryptocurrencies and keep them safe from hackers.
To set up your Trezor wallet, follow these steps:
1. Get a Trezor wallet. The Trezor wallet is available in different colors and can be purchased from many online and offline retailers.
2. Plug in your Trezor. If you have the Trezor device already plugged in, skip to step 4. If you do not have the Trezor device plugged in, plug it in to your computer and follow the on-screen instructions.
3. Create a recovery seed. A recovery seed is a set of 12 random words that you will need if you ever lose your Trezor device. To create a recovery seed, click on the “Create New Recovery Seed” button on the main screen of the Trezor device.
4. Enter your PIN. After you have created a recovery seed, enter your PIN to unlock your Trezor device.
5. Choose your cryptocurrencies. On the main screen of your Trezor device, you will see a list of all of your cryptocurrencies. You can select which cryptocurrencies you would like to store on your Trezor device.
6. Add your cryptocurrencies. To add a cryptocurrency to your Trezor device, click on the “Add Cryptocurrency” button on the main screen of your Trezor device. You will then be able to select the cryptocurrency you would like to add to your wallet.
7. Backup your cryptocurrencies. To backup your cryptocurrencies on your Trezor device, click on the “Backup Cryptocurrencies” button on the main screen of your Trezor device. This will save a copy of your cryptocurrencies offline on your Trezor device.
8. encrypt your cryptocurrencies. To encrypt your cryptocurrencies on your Trezor device, click on the “Encrypt Cryptocurrencies” button on the main screen of your Trezor device. This will encrypt your cryptocurrencies with a strong password so that they are safe from hackers.
How to set up your trezor wallet
1. Verify your trezor wallet is compatible with TREZOR
The first step is to verify that your trezor wallet is compatible with TREZOR. You can do this by connecting your trezor wallet to your computer and opening the TREZOR Manager. Then, select the “Verify” button on the left panel and follow the on-screen instructions.
2. Create a new wallet
Once your trezor wallet is verified, you can create a new wallet. To do this, open the TREZOR Manager and select the “New Wallet” button on the right panel. Enter a name for your wallet and click the “Create” button.
3. Add a new trezor device
Now that you have created a new wallet, you need to add a new trezor device. To do this, open the TREZOR Manager and select the “Devices” tab. Next, select the “Add Device” button and enter the following information:
Device name: This is the name that will appear in the TREZOR Manager and on the devices themselves.
This is the name that will appear in the TREZOR Manager and on the devices themselves. PIN: This is the PIN that you will use to access your wallet.
This is the PIN that you will use to access your wallet. Password: This is the password that you will use to access your wallet.
This is the password that you will use to access your wallet. Backup Phrase: This is a phrase that you will use to backup your wallet.
4. Import your private key
Now that you have added a new trezor device and created a new wallet, you need to import your private key. To do this, open the TREZOR Manager and select the “Keys” tab. Next, select the “Import Private Key” button and enter the following information:
File: This is the location where you saved your private key file.
This is the location where you saved your private key file. Name: This is the name that will appear in the TREZOR Manager and on the devices themselves.
This is the name that will appear in the TREZOR Manager and on the devices themselves. Type: This is the type of key that you are importing.
This is the type of key that you are importing. Comment: This is a comment about the key.
5. Set up your trezor wallet
Now that you have imported your private key and set up your trezor wallet, you are ready to use it. To do this, open the TREZOR Manager and select the “Wallets” tab. Next, select the “Add Wallet” button and enter the following information:
Name: This is the name that will appear in the TREZOR Manager and on the devices themselves.
This is the name that will appear in the TREZOR Manager and on the devices themselves. Password: This is the password that you will use to access your wallet.
This is the password that you will use to access your wallet. Backup Phrase: This is a phrase that you will use to backup your wallet.
6. Add funds to your wallet
Now that you have set up your trezor wallet, you can add funds to it. To do this, open the TREZOR Manager and select the “Wallets” tab. Next, select the “Add Wallet” button and enter the following information:
Name: This is the name that will appear in the TREZOR Manager and on the devices themselves.
This is the name that will appear in the TREZOR Manager and on the devices themselves. Address: This is the address that you would like to send funds to.
This is the address that you would like to send funds to. Amount: This is the amount of funds that you would like to send.
7. Send funds from your wallet
Now that you have added funds to your wallet and sent them to an address, you are ready to use them. To do this, open the TREZOR Manager and select the “Wallets” tab. Next, select the “Send” button and enter the following information:
To Address: This is the address that you would like to send funds to.
This is the address that you would like to send funds to. Amount: This is the amount of funds that you would like to send.
This is the amount of funds that you would like to send. Comment: This is a comment about the transaction.
3 simple steps to setting up your trezor
1. Connect your TREZOR to your computer using the provided USB cable.
2. Click on the "Trezor" icon on your desktop and select "Trezor Setup."
3. Enter your PIN and click on "Next."
4. Select "Create a new wallet."
5. Choose a strong password and click on "Next."
6. Enter your name and email address and click on "Next."
7. Click on the "Create" button to finish setting up your TREZOR.
trezor set up made easy
Bitcoin is a digital asset and a payment system invented by Satoshi Nakamoto. Transactions are verified by network nodes through cryptography and recorded in a public dispersed ledger called a blockchain. Bitcoin is unique in that there are a finite number of them: 21 million.
Get started with trezor in just a few minutes
First, connect your computer to the Internet and install the trezor software. Next, create a new wallet by clicking on the “Create a new wallet” button. You will be asked to provide some basic information about your wallet, such as its name and address. Once you have created your wallet, you can start adding your cryptocurrencies. To add a new cryptocurrency, click on the “Add a new cryptocurrency” button and enter the required information. Next, select the cryptocurrency you want to add to your wallet and click on the “Add” button. After you have added all of your cryptocurrencies, you can start spending them by clicking on the “Spend” button.
How to use a trezor – the ultimate guide
If you’re looking for a bitcoin wallet that is secure, private, and has a high level of functionality, then the TREZOR bitcoin wallet is the perfect option for you. Here’s how to use it:
1. First, download the TREZOR app from the App Store or Google Play store.
2. Once you have downloaded the app, open it and create a new account.
3. Next, select “Trezor” as your wallet type.
4. Enter your PIN code to unlock your TREZOR.
5. Select “New Address” to generate a new bitcoin address.
6. Write down the Bitcoin address and keep it safe.
7. Click “Send” to send bitcoin to your new address.
8. Enjoy your wealth of bitcoins!
Everything you need to know about setting up your trezor
When you first set up your trezor, you will need to create a new Bitcoin wallet and import your private key. You can do this by going to:
https://www.trezor.io/
On the trezor.io website, click on the “Create a new Bitcoin Wallet” button.
You will be asked to enter your email address and password. Make sure to remember these details as you will need them to log in to your trezor later.
Once you have logged in, you will be taken to the “My Trezor” page. Here, you will see a list of all of your trezor wallets. If you have more than one trezor, each wallet will have a different address.
To import your private key, click on the “Import Your Private Key” button. This will take you to a page where you can paste in your private key. Make sure that you are copying the entire private key, including the “B” at the beginning and the “3” at the end.
Once you have copied your private key, click on the “Yes, Import” button.
Your trezor will now be set up and ready to use.
The complete guide to setting up your trezor wallet
If you have never used a cryptocurrency wallet before, now is the time to start. A cryptocurrency wallet is a digital storage device where you can store your cryptocurrencies.
To set up your Trezor wallet, you will first need to download the Trezor wallet app. The Trezor wallet app is available for both Android and iOS devices.
Once you have downloaded the Trezor wallet app, open it and click on the “Create new Wallet” button.
Enter your desired password and click on the “Create” button.
Your new wallet will now be created and you will be taken to the main screen. On the main screen, you will see a list of your cryptocurrencies.
To add a new cryptocurrency to your wallet, click on the “Add” button and select the cryptocurrency you want to add to your wallet.
To view your current balance and transactions, click on the “View” button and select the currency you want to view.
To delete a cryptocurrency from your wallet, click on the “Remove” button and select the cryptocurrency you want to delete from your wallet.
Your Trezor wallet is now ready to use.
Setting up your trezor – a quick and easy guide
If you have not already, you will need to create a backup of your trezor before setting it up. It is advised that you write down the 24-word recovery phrase, and store it in a safe location.
Once you have your trezor set up, follow these steps:
1. Connect your trezor to your computer using the included USB cable.
2. Click on the trezor icon on your computer.
3. Enter your trezor’s PIN code.
4. Click on the “Settings” button.
5. Under the “Security” tab, select the “Two-factor authentication” option.
6. Click on the “Generate new password” button.
7. Enter your new password twice, and click on the “OK” button.
8. Click on the “Close” button.
9. Disconnect your trezor from your computer.
How to configure your trezor wallet
To configure your trezor wallet, you will need:
1. A trezor device.
2. A computer with a USB port.
3. The trezor wallet software.
4. Your trezor seed.
5. Your trezor passphrase.
6. Your trezor account number.
7. Your trezor PIN.
8. Your trezor recovery seed.
9. Your trezor PIN recovery phrase.
1. Connect your trezor device to your computer using the USB cable.
2. Launch the trezor wallet software.
3. Click on the “Settings” button.
4. Enter your trezor device’s serial number and click on the “Next” button.
5. Enter your trezor device’s passphrase and click on the “Next” button.
6. Click on the “Accounts” button.
7. Click on the “Add Account” button.
8. Enter your trezor account number and click on the “Next” button.
9. Click on the “Confirm New Account” button.
10. Click on the “Finish” button to save your changes and exit the trezor wallet software.
Get the most out of your trezor with this easy set-up guide
1. Connect your trezor to your computer.
2. Open the TREZOR software and click on “Trezor Setup”.
3. On the “Trezor Setup” window, click on the “Create new Trezor” button.
4. On the “Create new Trezor” window, enter your trezor’s unique 12-word recovery phrase.
5. Click on the “Next” button.
6. On the “Next” window, you will be asked to choose a security level for your trezor. You can select between “Basic” and “Advanced”.
7. Click on the “Next” button.
8. On the “Confirm Security Level” window, you will be asked to write down your trezor’s PIN code. You will need this code to access your trezor later on.
9. Click on the “Next” button.
10. On the “Finish Setup” window, your trezor is ready to use.