How to import tokens on Metamask?
This article provides instructions on how to import tokens on Metamask.
How to Import Your ERC20 Tokens Into MetaMask
To import your ERC20 tokens into MetaMask, first open MetaMask and click the three lines in the top right corner.
On the left side of the window, select "Token Balances."
On the right side of the window, select "ERC20 Token."
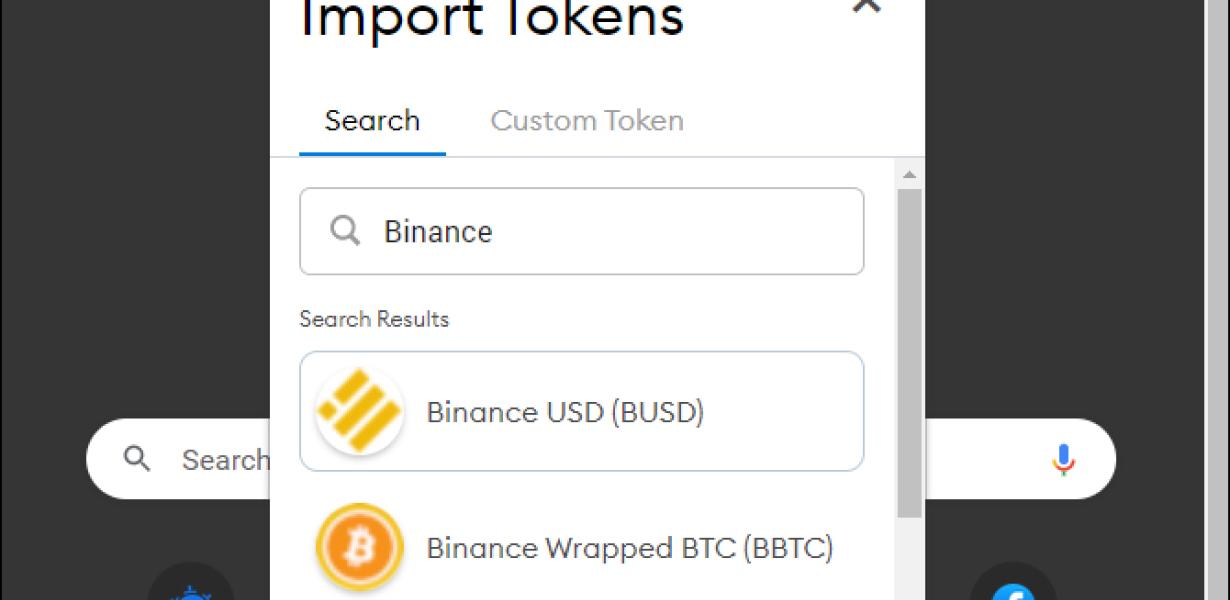
In the "Import ERC20 Token" pop-up, select the ERC20 tokens you want to import and click "Import."
Once your ERC20 tokens have been imported, they will be shown in the "Token Balances" section of MetaMask.
A Step-By-Step Guide to Importing ERC20 Tokens Into MetaMask
1. Open MetaMask and click on the 3 lines in the top right corner.
2. Under the "Token Balances" tab, click on the "Import tokens" button.
3. In the "Token Import Format" dropdown menu, select ERC20.
4. In the "Token Address" field, enter the address of the ERC20 token you want to import.
5. In the "Decimals" field, enter the number of decimals of the ERC20 token you want to import.
6. Click on the "Import" button.
7. MetaMask will now ask you to confirm the import. Click on the "Yes, import all" button.
The Simplest Way to Import Your ERC20 Tokens Into MetaMask
1. Open MetaMask and click on the three lines in the top left corner.
2. On the left, under "Addresses," click on "Custom Token."
3. In the "Token Symbol" field, paste the name of your ERC20 token.
4. In the "Decimals" field, paste the number of decimals your ERC20 token has.
5. Under "Token Contract Address," paste the address of the contract address of your ERC20 token.
6. Click "Save."
How to Add Custom Tokens to MetaMask
To add custom tokens to MetaMask, open the MetaMask app on your computer, and click on the three lines in the top right corner. In the "Add Custom Token" dialogue box, enter the following details:
Name: The name of the token
The name of the token Symbol: A symbol for the token
A symbol for the token Decimals: The number of decimals for the token
The number of decimals for the token URL: The URL of the MetaMask contract where the token will be stored
The URL of the MetaMask contract where the token will be stored ABI: The ABI of the MetaMask contract where the token will be stored
The ABI of the MetaMask contract where the token will be stored Icon: The icon for the token
Click on "Create Token". MetaMask will generate a new address and contract for your token. Copy the address and contract, and paste them into a new web browser window. In the new window, enter the details of your token:
Name: The name of your token
The name of your token Symbol: The symbol you assigned to your token
The symbol you assigned to your token Decimals: The number of decimals for your token
The number of decimals for your token URL: The URL of your MetaMask contract
The URL of your MetaMask contract ABI: The ABI of your MetaMask contract
The ABI of your MetaMask contract Icon: The icon you assigned to your token
How to Import ERC20 Tokens Into Your MetaMask Wallet
1. Open MetaMask and click on the three lines in the top left corner.
2. Select “Add an ERC20 Token” and enter the token’s address into the input field.
3. Click on the “Import” button and MetaMask will start to calculate the token’s balance.
4. Once the balance has been calculated, click on the “Copy Token Address” button and save it for later.
5. Next, open your MetaMask wallet and send the copied token address to a friend or other party.

How to Use MetaMask: The Complete Guide (With Pictures)
MetaMask is a browser extension that allows you to run Ethereum dApps and interact with other Ethereum users. Here’s how to use it:
1. Launch MetaMask.
2. Click the “Add New Account” button on the toolbar.
3. Enter your desired Ethereum address and click the “Next” button.
4. Click the “Create New Password” button and provide a strong password.
5. Click the “Next” button again.
6. On the “Confirm New Password” screen, ensure that the “Re-enter Password” checkbox is checked and click the “Next” button.
7. Click the “Install” button to install the MetaMask extension.
8. After the installation is complete, click the “Open” button to launch the MetaMask extension.
9. Click the “Add Account” button on the MetaMask toolbar to open the account creation window.
10. Enter your desired Ethereum address and click the “Next” button.
11. Click the “Create New Password” button and provide a strong password.
12. Click the “Next” button again.
13. On the “Confirm New Password” screen, ensure that the “Re-enter Password” checkbox is checked and click the “Next” button.
14. Click the “Install” button to install the MetaMask extension.
15. After the installation is complete, click the “Open” button to launch the MetaMask extension.
16. Click the “Accounts” tab to view your account information.
17. Under “ ETH Addresses,” you will see a list of all of your Ethereum addresses. Click the address you wish to use to interact with Ethereum dApps and transactions.
18. To send or receive Ethereum, click the “Ethereum” button and select the appropriate action from the menu.
19. To manage your Ethereum transactions, click the “Tasks” tab and select the appropriate action from the menu.