Does ledger support trust wallet?
The article discusses whether the ledger support trust wallet. Trust wallet is a mobile wallet that allows users to store, send, and receive cryptocurrencies. The wallet is available for iOS and Android devices.
Yes, Ledger Supports Trust Wallet
Yes, Ledger supports Trust Wallet.
How to Use Ledger with Trust Wallet
To use Ledger with Trust Wallet, first open Trust Wallet and create a new account. Once you have created your account, open the main menu and select "Addresses." From here, select "New Address."
Next, enter the desired information for your new address, such as a name and email address. Next, select "Ledger" from the list of options and click on the "Create" button.
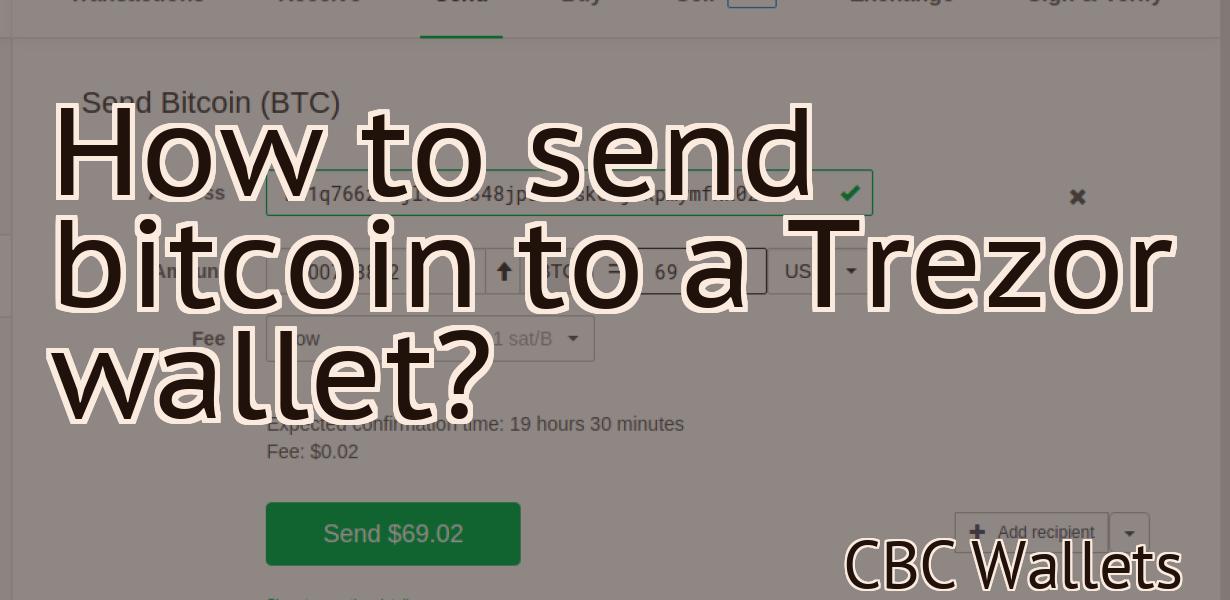
After your new address has been created, open Trust Wallet and click on the "Send" button. From here, select your new address from the list of options and paste the relevant information into the "To" field. Finally, select the amount of Ethereum you want to send and click on the "Send" button.
Configuring Ledger for Trust Wallet
To configure Ledger for Trust Wallet, open the app and click on the three lines in the top left corner.
On the first screen, select the device you want to use to manage your finances.
On the second screen, select your account type.
On the third screen, select your language and click on the Next button.
On the fourth screen, you will be asked to provide your email address and password.
After filling in these details, click on the Next button.
On the fifth screen, you will be asked to create a new password.
Once you have entered your new password, click on the Next button.
On the sixth screen, you will be asked to confirm your password.
After confirming your password, click on the Next button.
On the seventh screen, you will be asked to provide your name.
After providing your name, click on the Next button.
On the eighth screen, you will be asked to provide your address.
After providing your address, click on the Next button.
On the ninth screen, you will be asked to provide your phone number.
After providing your phone number, click on the Next button.
On the tenth screen, you will be asked to provide your email address again.
After providing your email address, click on the Next button.
On the eleventh screen, you will be asked to choose a password recovery method.
You can choose from a list of options, or you can create a new password recovery method. In the latter case, you will be asked to provide your new password once again.
After completing these steps, click on the Finish button.
Getting Started with Ledger and Trust Wallet
To get started with Ledger and Trust Wallet, you first need to create an account. After you have created an account, you will need to set up a device.
To set up a device, you will need to connect your device to your computer and install the Ledger software. You can find more information about setting up a device on the Ledger website.
After you have set up your device, you will need to create a new trust wallet. To do this, you will need to enter your email address and password. After you have created your trust wallet, you will be able to manage your funds and transactions.
Creating a Secure Environment with Ledger and Trust Wallet
If you want to create a secure environment with Ledger and Trust Wallet, you will first need to create a new account.
Next, you will need to install the Ledger app on your device. After you have installed the app, open it and click on the settings menu.
In the settings menu, you will need to click on the devices tab. Here, you will need to select the Ledger device that you would like to use.
After you have selected the Ledger device, you will need to enter the required PIN code. Next, you will need to click on the connect button.
After you have connected the Ledger device to your computer, you will need to open the Trust Wallet app.
In the Trust Wallet app, you will need to click on the Add Account button.
After you have clicked on the Add Account button, you will need to enter the required information. First, you will need to enter your name. Next, you will need to enter your email address. Finally, you will need to enter your password.
After you have entered the required information, you will need to click on the Next button.
In the next step, you will need to select the country in which you would like to install the Trust Wallet app. After you have selected the country, you will need to click on the Next button.
In the next step, you will need to select the device type in which you would like to install the Trust Wallet app. After you have selected the device type, you will need to click on the Next button.
In the next step, you will need to select the language in which you would like to install the Trust Wallet app. After you have selected the language, you will need to click on the Next button.
In the next step, you will need to review the terms of service agreement. After you have reviewed the terms of service agreement, you will need to click on the Next button.
In the next step, you will need to select the country in which you would like to store your tokens. After you have selected the country, you will need to click on the Next button.
In the next step, you will need to provide your personal information. First, you will need to provide your name. Next, you will need to provide your email address. Finally, you will need to provide your password.
After you have provided your personal information, you will need to click on the Finish button.
After you have finished creating your account, you will need to install the Ledger app on your device. After you have installed the app, open it and click on the devices tab.
In the devices tab, you will need to select the Ledger device that you would like to use.
After you have selected the Ledger device, you will need to enter the required PIN code. Next, you will need to click on the connect button.
After you have connected the Ledger device to your computer, you will need to open the Trust Wallet app.
In the Trust Wallet app, you will need to click on the Add Account button.
After you have clicked on the Add Account button, you will need to enter the required information. First, you will need to enter your name. Next, you will need to enter your email address. Finally, you will need to enter your password.
After you have entered the required information, you will need to click on the Next button.
In the next step, you will need to select the country in which you would like to install the Trust Wallet app. After you have selected the country, you will need to click on the Next button.
In the next step, you will need to select the device type in which you would like to install the Trust Wallet app. After you have selected the device type, you will need to click on the Next button.
In the next step, you will need to select the language in which you would like to install the Trust Wallet app. After you have selected the language, you will need to click on the Next button.
In the next step, you will need to review the terms of service agreement. After you have reviewed the terms of service agreement, you will need to click on the Next button.
In the next step, you will need to select a password recovery method. After you have selected a password recovery method, you will need to enter your password again.
After you have entered your password again, you will need to click on the Finish button.
After you have finished creating your account, you will need to install the Trust Wallet app on your device. After you have installed the app, open it and click on the devices tab.
In the devices tab, you will need to select the Trust Wallet device that you would like to use.
After you have selected the Trust Wallet device, you will need to enter the required PIN code. Next, you will need to click on the connect button.
After you have connected the Trust Wallet device to your computer, you will need to open the Ledger app.
In the Ledger app, you will need to click on the Add Account button.
After you have clicked on the Add Account button, you will need to enter the required information. First, you will need to enter your name. Next, you will need to enter your email address. Finally, you will need to enter your password.
After you have entered the required information, you will need to click on the Next button.
In the next step, you will need to select a security question. After you have selected a security question,you will need to answer it correctly.
After you have answered the security question correctly,you will need to click on the Next button.
In the next step,you will need to select a 2-factor authentication method. After you have selected a 2-factor authentication method,you will need to enter your phone number and password.
After you have entered your phone number and password,you will need to click on the Finish button.
After you have finished creating your account,you will now be able to store your tokens with
Protecting Your Assets with Ledger and Trust Wallet
Ledger and Trust Wallet are two different types of wallets that you can use to protect your assets. Ledger is a hardware wallet, while Trust Wallet is a mobile app.
Hardware wallets are devices that are designed to store your cryptocurrencies offline. This means that your coins are not directly accessible from the device. Ledger is one of the most popular hardware wallets on the market.
Trust Wallet is a mobile application that allows you to store your cryptocurrencies in a secure and easy to use format. You can also use Trust Wallet to make transactions with other users.
Both Ledger and Trust Wallet offer a number of security features that will help protect your assets. Ledger features a unique security features called ‘cold storage’. This means that your coins are stored in a secure environment without the need for a computer.
Trust Wallet also offers a number of security features including 2-factor authentication and a seed generator. This means that you will be able to secure your account even if you lose your phone or password.
Overall, both Ledger and Trust Wallet are excellent choices for protecting your assets. They offer a number of security features and are easy to use.
Storing Your Coins Safely with Ledger and Trust Wallet
Ledger and Trust Wallet are two popular and safe ways to store your coins.
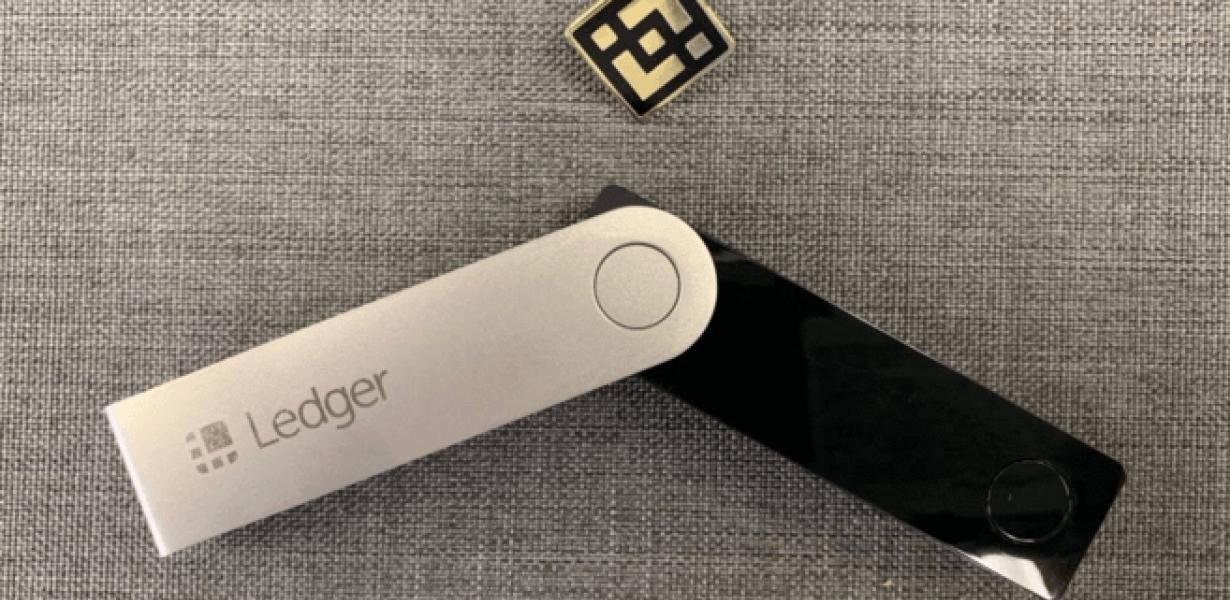
Ledger Nano S is a hardware wallet that can be used to store your bitcoins, ethereum, and other cryptocurrencies. It supports a wide range of cryptocurrencies and can be used to store multiple cryptocurrencies simultaneously.
Trust Wallet is a mobile app that allows you to store, manage, and trade bitcoin, ethereum, and other blockchain assets. It provides a user-friendly platform for users to manage their cryptocurrency assets.
Building a fortress of security with Ledger and Trust Wallet
Ledger and Trust Wallet are two of the most popular wallets available for storing cryptocurrencies. They are both built with security in mind, making them a great choice for building a fortress of security.
To start, create an account with Ledger. Once you have an account, create a new wallet by clicking on the "New Wallet" button. You will be prompted to choose a name for your wallet and a secure password. Next, select the type of wallet you would like to create. You can choose to create a hardware wallet or a mobile wallet.
Once your wallet has been created, open it and click on the " Ledger Live " button. This will bring up your ledger wallet's main screen. On this screen, you will see a list of all the addresses and accounts contained within your wallet. The first thing you want to do is create a new account. To do this, click on the "Add Account" button and select the "Ledger Nano S" as your device type. You will then be prompted to enter your password and address. After you have added your new account, your wallet will be updated with the new information.
Now that you have a basic understanding of how Ledger and Trust Wallet work, it is time to start building your fortress of security. To start, you will need to add some addresses to your wallet. To do this, click on the "Add Address" button and select the "Bitcoin" as your currency. You will then be prompted to enter the address you would like to add to your wallet. After you have added the address, your wallet will be updated with the new information.
Now that you have added some addresses to your wallet, it is time to start storing some cryptocurrency. To do this, click on the "Send/Receive" button and select the "Bitcoin" as your currency. You will then be prompted to enter the amount of cryptocurrency you would like to send or receive. After you have entered the amount of cryptocurrency, you will be prompted to choose a payment method. You can choose to send your cryptocurrency using a wallet address or a QR code. After you have chosen a payment method, you will be prompted to enter the recipient's address. After you have entered the recipient's address, your wallet will be updated with the new information.
Now that you have stored some cryptocurrency in your Ledger and Trust Wallet, it is time to protect your assets. To do this, you will need to create a trust. To create a trust, click on the "Trust" button and select the "Do Not Trust" option as your trust type. You will then be prompted to enter a name for your trust and a description of your trust. After you have created your trust, your wallet will be updated with the new information.
Now that you have created a trust and stored some cryptocurrency in your Ledger and Trust Wallet, it is time to protect your assets offline. To do this, you will need to create a cold storage wallet. To create a cold storage wallet, click on the "Cold Storage" button and select the "Create New Wallet" option as your cold storage type. You will then be prompted to enter a name for your cold storage wallet and a secure password. After you have created your cold storage wallet, your wallet will be updated with the new information.
Now that you have created a cold storage wallet and stored some cryptocurrency in your Ledger and Trust Wallet, it is time to start protecting your assets online. To do this, you will need to create a security key. To create a security key, click on the "Security Key" button and select the "Create New Key" option as your security key type. You will then be prompted to enter a name for your security key and a secure password. After you have created your security key, your wallet will be updated with the new information.
Now that you have created a security key and stored some cryptocurrency in your Ledger and Trust Wallet, it is time to start protecting your assets offline. To do this, you will need to export your security key. To export your security key, click on the "Security Key" button and select the "Export" option as your security key type. You will then be prompted to enter a file name for your security key. After you have entered the file name for your security key, your wallet will be updated with the new information.
Now that you have created a security key and exported your security key, it is time to start protecting your assets online. To do this, you will need to install a password manager. To install a password manager, click on the "Password Manager" button and select the "Install" option as your password manager type. You will then be prompted to enter a name for your password manager and a secure password. After you have installed your password manager, your wallet will be updated with the new information.
Now that you have installed a password manager and stored some cryptocurrency in your Ledger and Trust Wallet, it is time to start protecting your assets offline. To do this, you will need to export your security key again. To export your security key again, click on the "Security Key" button and select the "Export" option as your security key type. You will then be prompted to enter a file name for your security key. After you have entered the file name for your security key, your wallet will be updated with the new information.
Now that you have exported your security key and stored some cryptocurrency in your Ledger and Trust Wallet, it is time to start protecting your assets online. To do this, you will need to install a web browser extension. To install a web browser extension, click on the "Web Browser Extension" button and select the "Install" option as your web browser extension type. You will then be prompted to enter a name for your web browser extension and a secure password. After you have installed your web browser extension, your wallet will be updated with the new information.
Now that you have installed a web browser extension and stored some cryptocurrency in your Ledger and Trust Wallet, it is time to start protecting your assets offline. To do this, you will need to export your security key again. To export your security key again, click on the "Security Key" button and select the "Export"
How to keep your coins safe with Ledger and Trust Wallet
If you want to keep your coins safe, you can use Ledger and Trust Wallet. Ledger is a hardware wallet that allows you to store your coins offline. Trust Wallet is a mobile app that allows you to store your coins online.
Tips for using Ledger and Trust Wallet together
To use the Ledger and Trust Wallet together, first install the Ledger app on your device. Next, open the Trust Wallet app and connect your Ledger device. You will then be able to select your ledger account and start transacting.
Why use Ledger and Trust Wallet together
?
Ledger and Trust Wallet together offer a secure way to store your cryptocurrencies and tokens. They allow you to easily manage your digital assets and make sure they are safe and accessible.