How To Create Metamask Wallet
Creating a MetaMask wallet is simple and only takes a few minutes. In this article, we'll show you how to create a MetaMask wallet and add it to your browser.
How to create a Metamask wallet in 8 easy steps
1. Open Metamask and click on the “Create a new wallet” button.
2. Enter a name for your wallet and click on the “Create wallet” button.
3. Metamask will generate a 12-word mnemonic to help you remember your wallet password. Write this down and keep it safe.
4. Click on the “Generate keys” button to create your own Ethereum address and private key.
5. Copy your Ethereum address and private key and store them safely away. You will need them to send or receive Ethereum transactions.
6. Click on the “Activate” button to finish setting up your Metamask wallet.
7. Metamask will now generate a new 12-word mnemonic to help you remember your wallet password. Write this down and keep it safe.
8. Click on the “Login” button to log in to your Metamask wallet and start trading Ethereum!
The ultimate guide to creating a Metamask wallet
Metamask is a blockchain-based platform that allows users to interact with the Ethereum network. Before you can start using Metamask, you will need to create a wallet. This guide will walk you through the process of creating a Metamask wallet.
1. First, you will need to download the Metamask application. You can find the application on the Google Play Store or the App Store.
2. After you have downloaded the Metamask application, open it and click the "Create New Wallet" button.
3. On the "Create New Wallet" screen, you will need to provide some basic information about yourself. You will need to provide your name, email address, and password.
4. After you have provided your information, you will be asked to choose a password. Make sure that your password is strong and unique. You will need to remember your password in order to access your Metamask wallet.
5. Next, you will be asked to choose a location for your Metamask wallet. You can choose to store your Metamask wallet on your computer or you can store it on the Metamask app.
6. After you have selected a location for your Metamask wallet, you will be asked to confirm your password. Click the "Confirm Password" button to finish setting up your Metamask wallet.
From zero to hero: creating a Metamask wallet
We’ll start by creating a Metamask wallet.
1. Go to metamask.io and click on the “Create a Metamask Wallet” button.
2. Fill out the form with your desired information and click on the “Create my Metamask Wallet” button.
3. You will be redirected to your Metamask wallet page. Click on the “Metamask Wallet” button to launch the Metamask wallet.
4. Click on the “Get Started” button to begin setting up your Metamask wallet.
5. Review the terms of use and click on the “I Accept” button.
6. Click on the “Set Up Your Account” button to begin setting up your Metamask account.
7. Enter your desired Metamask wallet password and click on the “Create Account” button.
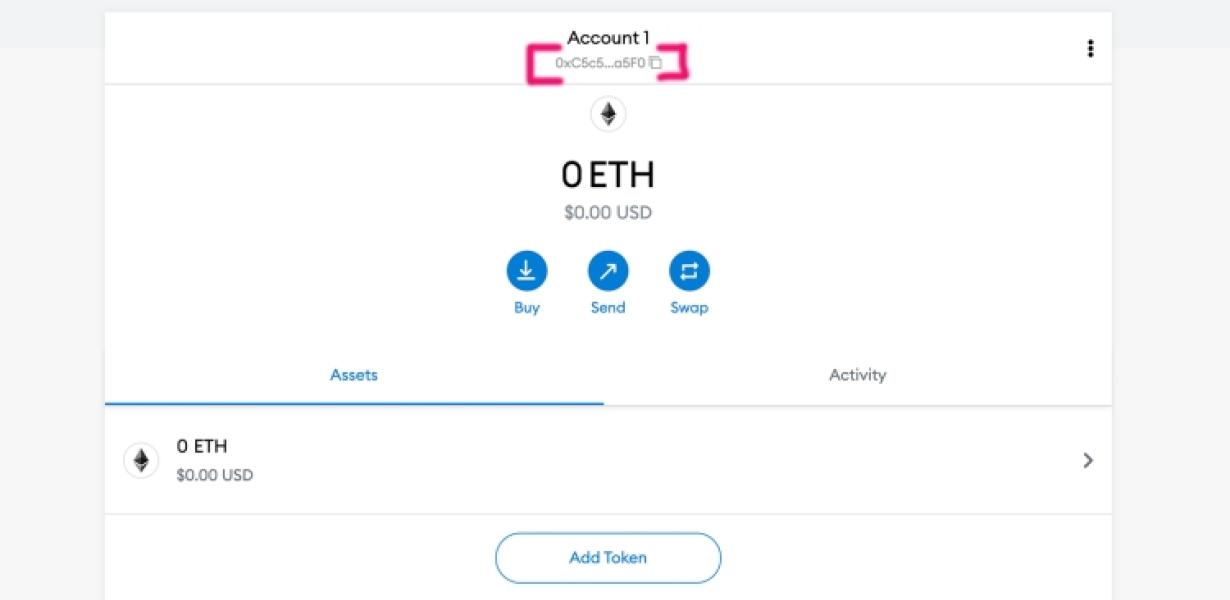
8. You will be redirected to your Metamask account page. Click on the “Metamask Account” button to view your Metamask account information.
9. To send or receive tokens, you will first need to add an ERC-20 token to your Metamask wallet. To do this, click on the “Token List” button and select the desired token from the list.
10. Next, you will need to add an address to your Metamask wallet. To do this, click on the “Add Address” button and enter the desired address into the field.
11. Finally, you will need to add a password to your Metamask wallet. To do this, click on the “Add Password” button and enter a desired password into the field.
12. You will then be able to send or receive tokens by clicking on the “Send” or “Receive” buttons, respectively.
How to make a Metamask wallet in minutes
1. Go to metamask.io and create a new account
2. Click on the "Create a New Wallet" button
3. Enter a strong password and confirm it
4. Choose a secure password for your wallet
5. Click on the "Create Wallet" button
6. Metamask will generate a seed phrase for you
7. Copy the seed phrase and keep it safe
8. Click on the "Metamask" button in the top right corner of the screen
9. Click on the "View Wallet Info" button
10. Under the "Public Key" tab, paste in your public key
11. Under the "Masked Address" tab, paste in your masked address
12. Under the "Settings" tab, click on the "Generate Transaction" button
13. Metamask will ask you to confirm the transaction
14. Click on the "Confirm Transaction" button to finish creating your Metamask wallet

Creating a Metamask wallet: a step-by-step guide
To create a Metamask wallet, first open the Metamask website and click on the "Create a New Wallet" button.
Next, you will be asked to choose a name for your new wallet and select a password. After you have completed these steps, Metamask will generate a 12-word seed for your wallet that you will need to keep safe. You will also be able to see your accounts and transactions in your Metamask wallet.
To create a new account, first click on the "accounts" tab in your Metamask wallet and select the "add an account" button. You will then be able to enter your name and email address. After you have completed these steps, Metamask will generate a unique key for your account and send you a confirmation email.
To make a transaction, first click on the "transactions" tab in your Metamask wallet and select the "send transaction" button. You will then be able to enter the recipient's address and amount. After you have completed these steps, Metamask will generate a transaction hash and send it to the recipient's Ethereum address.
How to set up a Metamask wallet in 5 simple steps
1. Open Metamask and click on the "Create New Wallet" button
2. Choose a name for your wallet and click on the "Next" button
3. Choose a password for your wallet and click on the "Next" button
4. Add some Metamask tokens to your wallet by clicking on the "Add" button and selecting the appropriate token from the list
5. Click on the "Finish" button to create your Metamask wallet
A beginner's guide to creating a Metamask wallet
Metamask is a popular browser extension that allows users to interact with the Ethereum network. Before you can start using Metamask, you will need to create a wallet.
To create a Metamask wallet, first go to metamask.io and click on the "Create a New Wallet" button. This will open the Metamask wallet creation wizard.
1. First, you will need to choose a name for your wallet.
2. Next, you will need to choose a password. Make sure to keep this password secure!
3. Finally, you will need to add some information about yourself. This includes your email address and a backup phrase (a 12-word phrase that you can use to restore your Metamask wallet should you lose your password).
Once you have completed the Metamask wallet creation wizard, you will be ready to start using it!
The ultimate beginner's guide to creating a Metamask wallet
Metamask is a web browser extension that allows users to securely conduct Ethereum transactions and access other blockchain applications. This guide will walk you through the process of creating a Metamask wallet and using it to buy Ethereum and other cryptocurrencies.
1. Download and install the Metamask extension
The Metamask extension can be downloaded from the Chrome Web Store. Once installed, open it and click on the icon in the top-right corner to open the main menu.
2. Click on the “Create a new wallet” button
This will open the wallet creation screen. You need to provide some basic information such as your name, email address, and a password. Metamask will also ask for your Ethereum address. This is where you will send your initial Ether purchase. Make sure you have saved this address somewhere safe before continuing.
3. Click on the “Create my wallet” button
This will generate a new wallet and display its address. You can now send Ether to this address to purchase Ethereum.
4. Enter your Ethereum address into the “Send Ether to” field
You can now enter the amount of Ether you want to purchase into the “Send Ether to” field. Metamask will then use the provided Ethereum address to purchase the desired amount of Ethereum from the exchanges.
5. Click on the “Buy Ethereum” button
Once you have entered the amount of Ethereum you want to purchase, click on the “Buy Ethereum” button. Metamask will then use the funds from your wallet to purchase the desired amount of Ethereum on the exchanges.