How to set up a Trezor wallet.
Trezor is a hardware wallet that allows you to store your Bitcoin, Ethereum, and other cryptocurrencies offline. In this guide, we will show you how to set up a Trezor wallet.
How to set up a Trezor Wallet for cryptocurrency security
1. Download the Trezor Wallet for your preferred cryptocurrency.
2. Connect your Trezor device to your computer.
3. Enter your passphrase to unlock your Trezor device.
4. Copy your private key to a safe place.
5. Click the “New Address” button.
6. Paste your public address into the “Address” field.
7. Click the “Create Transaction” button.
8. Type in the amount of cryptocurrency you want to send to the new address.
9. Click the “Send Transaction” button.
10. Confirm the transaction by clicking the “Yes, I am sure” button.
How to install and set up a Trezor Wallet
1. Visit https://trezor.io and create a new account.
2. Click on the “Add New Wallet” button on the homepage.
3. Select a language and click on the “Next” button.
4. Enter your desired login credentials and click on the “Next” button.
5. On the “Security Question” page, answer the security question and click on the “Next” button.
6. On the “Confirm Security Question” page, click on the “Next” button.
7. On the “Default Wallet” page, enter a name for your wallet and click on the “Next” button.
8. On the “Finish” page, click on the “Download” button to download the Trezor wallet software.
9. Install the Trezor wallet software on your computer.
10. Click on the “Trezor Wallet” icon on your computer desktop.
11. Click on the “Create New Wallet” button to create a new Trezor wallet.
12. Enter your desired login credentials and click on the “Next” button.
13. On the “Security Question” page, answer the security question and click on the “Next” button.
14. On the “Confirm Security Question” page, click on the “Next” button.
15. On the “Default Wallet” page, enter a name for your wallet and click on the “Next” button.
16. On the “Finish” page, click on the “Create Wallet” button to create your new Trezor wallet.
How to configure your Trezor Wallet for optimal security
1. First, install the TREZOR app on your smartphone or computer.
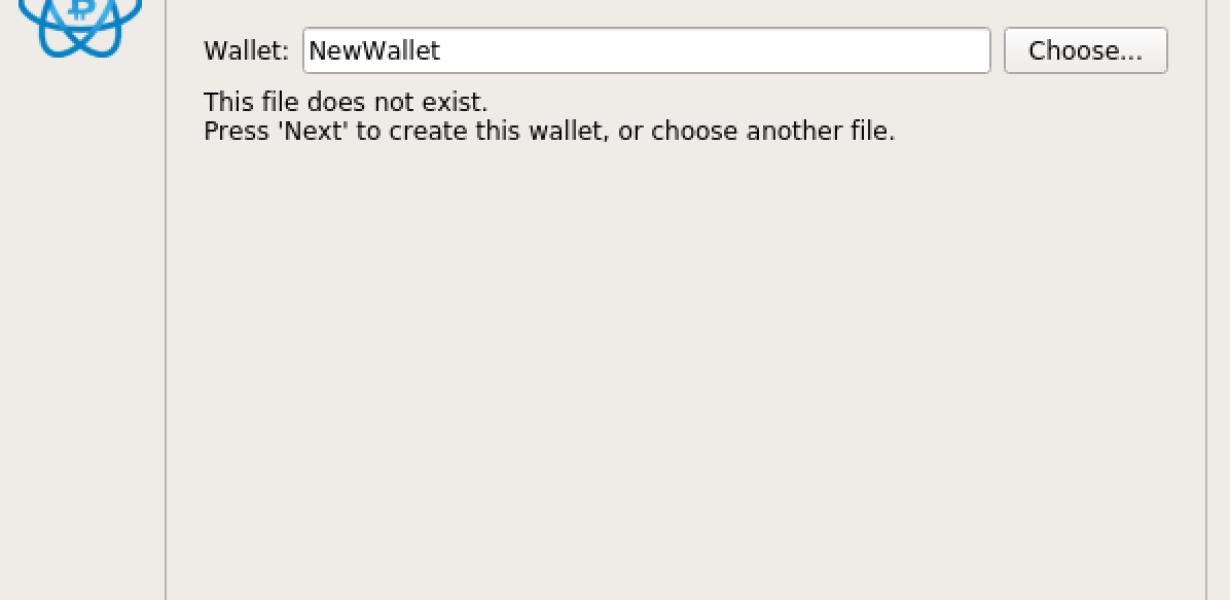
2. Next, create a new wallet by clicking on the "New Wallet" button in the TREZOR app.
3. On the next screen, enter a strong password and confirm it.
4. After creating your wallet, you will be asked to select a password for your wallet. This password is required to access your funds. You can choose to keep this password secret or share it with other members of your family.
5. Next, you will be asked to confirm your email address. This is used to notify you about new transactions and updates to your account.
6. Finally, you will be asked to create a recovery phrase. This is a unique string of words that can be used to restore your wallet if it is lost or stolen.
How to use a Trezor Wallet for safe and secure cryptocurrency storage
1. Install the Trezor Wallet on your computer.
2. Create a new wallet by clicking on the “New Wallet” button.
3. Fill in the required information, and click on the “Create” button.
4. Your new wallet will be created and displayed on the screen.
5. To start using your Trezor Wallet, click on the “Select Wallet” button, and select your existing wallet from the list.
6. After selecting your wallet, click on the “Set Up” button.
7. On the “Set Up” page, you will need to enter your seed phrase, which is a 24-word phrase that will be used to generate your private key.
8. After entering your seed phrase, click on the “Next” button.
9. On the “Next” page, you will need to choose a password for your wallet.
10. After choosing your password, click on the “Next” button.
11. On the “Verification” page, you will need to provide your email address and confirm your password.
12. After providing your email address and confirming your password, click on the “Next” button.
13. On the “Finish” page, you will be asked to write down your 24-word seed phrase.
14. Click on the “Write Down Seed” button, and keep the paper copy of your seed phrase safe.
15. To finish setting up your Trezor Wallet, click on the “Finish” button.
Tips for setting up your Trezor Wallet for maximum security
1. Always use a strong password and make sure it is unique for each account.
2. Store your recovery phrase securely and never share it with anyone.
3. Keep your device away from unauthorized access and keep the firmware up-to-date.
4. Always backup your data regularly and store the backup on a secure device.
5. Keep your device in a safe place and never leave it unattended.
Setting up a Trezor Wallet – the ultimate guide
If you want to set up a Trezor wallet, there are a few things you’ll need to do.
First and foremost, you’ll need to download the Trezor app. This can be done from the App Store or Google Play Store.
Once you have the Trezor app installed, you’ll need to create a new wallet. To do this, head to the “My Wallet” section of the app and select “New Wallet.”
Next, you’ll need to provide some important information about your wallet. This includes your name, email address, and a password. You’ll also need to select a recovery phrase – this is a unique string of letters and numbers that will help you restore your wallet if it gets lost or damaged.
Once you have completed these steps, you’re ready to start setting up your Trezor wallet.
To begin, first create a new account. This will allow you to store various cryptocurrencies and tokens in your wallet. Once you have created an account, you’ll need to add a valid cryptocurrency to it. To do this, head to the “My Transactions” section of the app and select “Add Transaction.”
Next, you’ll need to provide some important information about your transaction. This includes the address of the cryptocurrency you are transferring, the amount of cryptocurrency you are transferring, and the date and time of the transfer.
Finally, you’ll need to confirm the transfer by selecting “Confirm Transaction.” Once you have confirmed the transfer, the cryptocurrency will be added to your account and can be used in later transactions.
The ultimate guide to configuring your Trezor Wallet
If you are just getting started with your Trezor wallet, we recommend reading our beginner's guide to Trezor. This guide will get you up and running with the basics of the wallet and its features.
Once you have a basic understanding of how the Trezor works, we recommend reading the following sections to configure it to your specific needs.
1. General Settings
The first step in configuring your Trezor wallet is to set some basic parameters.
First, you need to decide on a passphrase. This is the unique password that you will use to protect your wallet and your coins. Make sure you write this down and store it securely!
Next, you need to decide on a PIN. This is a four-digit number that you will use to authorize transactions from your Trezor. Again, make sure you write this down and store it securely!
Last, you need to decide on a language. By default, the Trezor wallet is set to use the English language. If you would like to use a different language, you can select it here.
2. Add Coins
To add coins to your Trezor wallet, first open the Trezor client and click on the "Coins" tab. This tab will display all of the coins that are currently stored in your wallet.
Next, click on the "Add New Coin" button to open the Add New Coin dialog box. This dialog box will allow you to enter the following information:
Coin Name: This is the name of the coin that you are adding to your wallet.
This is the name of the coin that you are adding to your wallet. Symbol: This is the symbol for the coin.
This is the symbol for the coin. Decimals: This is the number of decimal places that the symbol will have.
This is the number of decimal places that the symbol will have. Amount: This is the amount of coins that you are adding to your wallet.
This is the amount of coins that you are adding to your wallet. Confirm: This button will confirm the addition of the coin to your wallet.
Once you have entered all of the required information, click on the "Add New Coin" button to add the coin to your wallet.
3. View Coins
To view the coins that are stored in your Trezor wallet, first open the Trezor client and click on the "Coins" tab. This tab will display all of the coins that are currently stored in your wallet.
Next, click on the "View Coins" button to open the View Coins dialog box. This dialog box will allow you to view all of the information about the coins that are stored in your wallet.
In particular, this dialog box will allow you to view the following information:
Coin Name: This is the name of the coin that you are viewing.
This is the name of the coin that you are viewing. Symbol: This is the symbol for the coin.
This is the symbol for the coin. Decimals: This is the number of decimal places that the symbol will have.
This is the number of decimal places that the symbol will have. Amount: This is the amount of coins that you are viewing.
This is the amount of coins that you are viewing. Confirm: This button will confirm the information that you are viewing.
4. Send Coins
To send coins from your Trezor wallet, first open the Trezor client and click on the "Coins" tab. This tab will display all of the coins that are currently stored in your wallet.
Next, click on the "Send Coins" button to open the Send Coins dialog box. This dialog box will allow you to enter the following information:
Coin Name: This is the name of the coin that you are sending to another user.
This is the name of the coin that you are sending to another user. Symbol: This is the symbol for the coin.
This is the symbol for the coin. Decimals: This is the number of decimal places that the symbol will have.
This is the number of decimal places that the symbol will have. Amount: This is the amount of coins that you are sending to another user.
This is the amount of coins that you are sending to another user. Confirm: This button will confirm the information that you are sending to another user.
5. Receive Coins
To receive coins from another user, first open the Trezor client and click on the "Coins" tab. This tab will display all of the coins that are currently stored in your wallet.
Next, click on the "Receive Coins" button to open the Receive Coins dialog box. This dialog box will allow you to enter the following information:
Coin Name: This is the name of the coin that you are receiving from another user.
This is the name of the coin that you are receiving from another user. Symbol: This is the symbol for the coin.
This is the symbol for the coin. Decimals: This is the number of decimal places that the symbol will have.
This is the number of decimal places that the symbol will have. Amount: This is the amount of coins that you are receiving from another user.
This is the amount of coins that you are receiving from another user. Confirm: This button will confirm the information that you are receiving from another user.
How to get the most out of your Trezor Wallet
The Trezor Wallet is a powerful device that can help you store your cryptocurrencies and keep them secure. Here are some tips to get the most out of your Trezor Wallet:
1. Keep your Trezor Wallet safe
Make sure to keep your Trezor Wallet safe, especially if you plan on storing large amounts of cryptocurrency. Store it in a safe location and keep the device itself secure by password protection and a pin code.
2. Use the Trezor Wallet to store cryptocurrencies
The Trezor Wallet is perfect for storing cryptocurrencies. You can use it to store Bitcoin, Ethereum, and other blockchain-based cryptocurrencies. The Trezor Wallet also supports several other cryptocurrencies, such as Litecoin and Dash.
3. Use the Trezor Wallet to store your cryptocurrency portfolio
The Trezor Wallet also offers a powerful security feature called cold storage. This means that you can store your cryptocurrencies offline, which gives you added peace of mind.
4. Use the Trezor Wallet to make transactions
The Trezor Wallet can also be used to make transactions. You can use it to store your cryptocurrencies and make transactions with other users.
How to set up your Trezor Wallet for ultimate security
1. Download the Trezor Wallet from trezor.io/wallet.
2. Install the Trezor Wallet on your computer.
3. Create a new Trezor Wallet.
4. Enter your recovery seed in the Recovery Seed field.
5. Click the Create button.
6. Enter your PIN in the PIN field.
7. Click the Save button.
8. Click the Connect button.
9. Enter your TREZOR Wallet address in the Address field.
10. Enter your password in the Password field.
11. Click the Connect button.
Setting up your Trezor Wallet – step by step guide
If you want to set up a Trezor wallet, you will first need to purchase a Trezor hardware wallet. After you have your hardware wallet, you will need to create an account on the Trezor website. Next, you will need to install the Trezor Wallet software on your computer. After you have installed the Trezor Wallet, you will need to create a new wallet. To do this, click on the “New Wallet” button on the main screen of the Trezor Wallet. Once you have created your new wallet, you will need to copy the 12-word backup phrase that you created when you bought your Trezor hardware wallet. You will also need to create a PIN code for your wallet. Finally, you will need to save your wallet’s password.