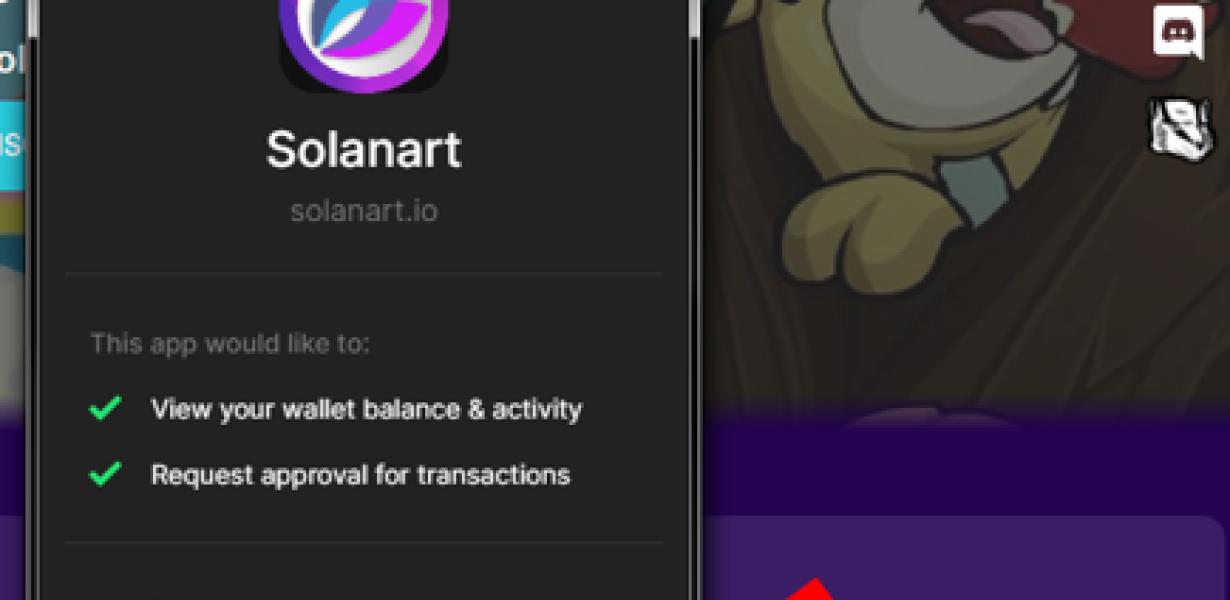
How To Connect Phantom Wallet To Solanart
If you want to use the Phantom Wallet with the Solana blockchain, you'll need to follow a few simple steps. First, you'll need to installation the Phantom Wallet. Then, you'll need to launch the Phantom Wallet and select the "Create New Wallet" option. After that, you'll need to select the "Import Existing Wallet" option and choose the "Phantom Wallet" option. Finally, you'll need to enter your mnemonic phrase and select the "Create New Wallet" button.
How to Connect Your Phantom Wallet to Solana
To connect your Phantom Wallet to Solana, follow these steps:
1. Launch the Phantom Wallet app on your mobile device.
2. Tap on the “Connect to Solana” button.
3. Enter your Solana account information and tap on the “Connect” button.
4. Your Phantom Wallet will be connected to your Solana account.
A Quick and Easy Guide to Connecting Your Phantom Wallet to Solana
To connect your Phantom Wallet to Solana, follow these simple steps:
1. Open the Phantom Wallet app on your mobile device.
2. Tap the "Settings" icon.
3. Scroll down to "Connections."
4. Tap "Solana" to open the connection screen.
5. Enter your Solana address and tap "Connect."
6. Your Phantom Wallet will now be connected to your Solana account.

Connecting Your Phantom Wallet to Solana – The Right Way
In order to connect your phantom wallet to Solana, you first need to create an account on the platform. After you have created your account, you will need to create a new wallet. To do this, click on the “Wallets” tab and then click on the “New Wallet” button.
After you have created your new wallet, you will need to enter the following information:
1. Your name
2. Your email address
3. Your password
4. The currency you want to use on the platform
5. The amount of money you want to deposit into your wallet
6. The address where you want your funds to be sent
7. The verification process will take a few minutes, and once it is complete, your wallet will be ready to use.
How to Make Sure Your Phantom Wallet is Connected to Solana
To make sure your phantom wallet is connected to Solana, you will first need to open the application on your phone. Once open, you will need to click on the three lines in the top left corner of the application. From here, you will need to select “Settings”. Once inside of the settings menu, you will need to click on the “Connections” tab. Here, you will need to select your phantom wallet from the list of devices and click on the “Connect” button. Finally, you will need to enter your Solana account password in order to connect your phantom wallet to the platform.
How to Use Your Phantom Wallet with Solana
1. Open your Phantom Wallet on your desktop computer.
2. Click on the "Add Wallet" button in the top left corner of the window.
3. Type in the address of the wallet you want to add, and press enter.
4. Click on the "Connect Wallet" button.
5. Copy the private key for the wallet you added in step 2.
6. Open Solana on your mobile phone or tablet.
7. Tap on the "Add Wallet" button in the bottom right corner of the window.
8. Paste the private key you copied in step 5.
9. Tap on the "Connect Wallet" button.
10. You're done! Your funds are now available in your new wallet.
Connecting Your Phantom Wallet to Solana for Dummies
To connect your Phantom wallet to Solana, follow these simple steps:
1. Open your Phantom wallet.
2. Click on the “Settings” button in the top right corner.
3. Under the “Connections” tab, click on the “Solana” button.
4. You will be prompted to enter your Solana account name and password.
5. After entering your credentials, click on the “Connect” button.
6. Your Phantom wallet will now be connected to Solana.