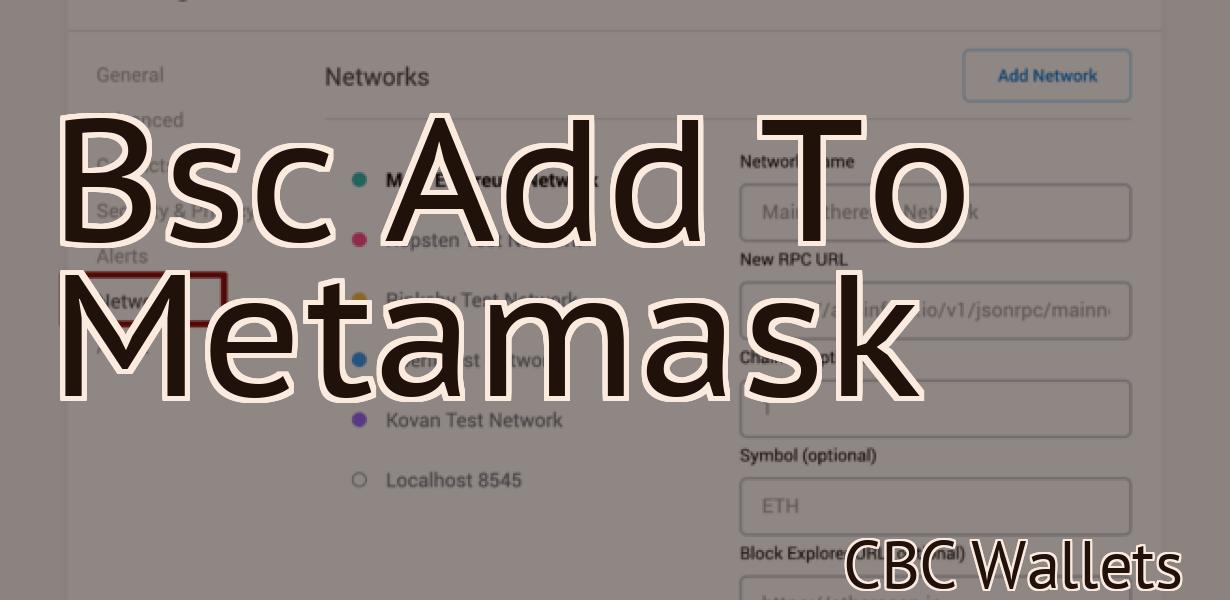
How to add a BSC testnet to Metamask?
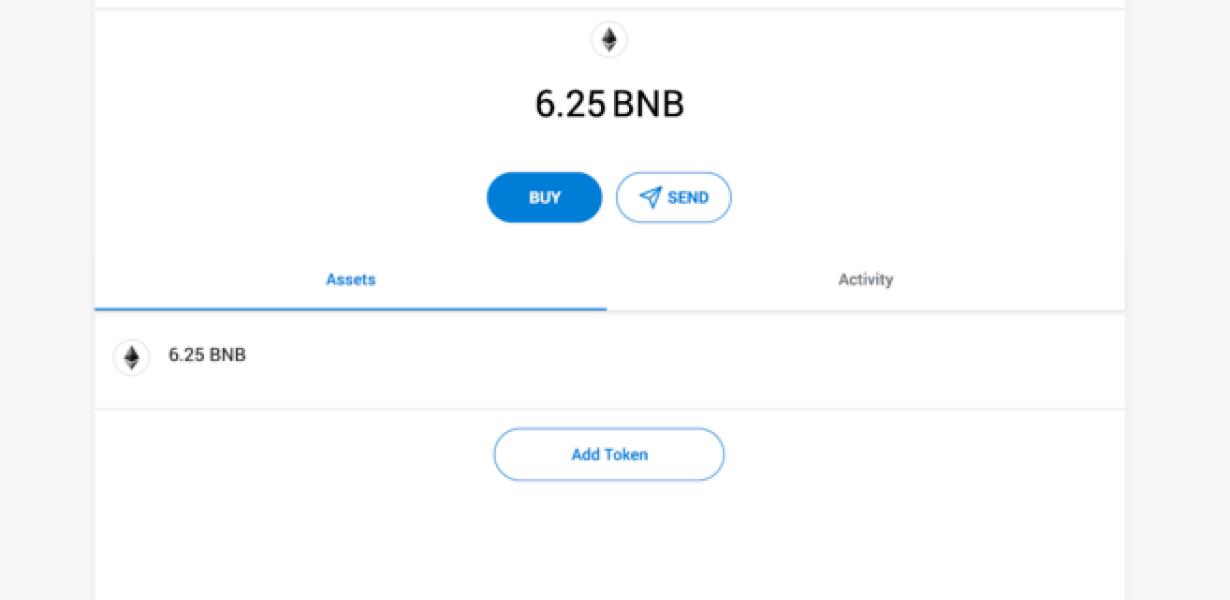
If you want to add a BSC testnet to your Metamask account, you can follow the steps in this article. First, you'll need to create a new account in Metamask. Then, you'll need to select the "Add Token" option. After that, you'll need to select the "Custom Token" tab. Finally, you'll need to enter the contract address, token symbol, and decimals for the BSC testnet you want to add.
How to add BSC Testnet to Metamask
1. Open Metamask.
2. Click on the three lines in the top left corner of the Metamask window.
3. In the "Add Wallet" dialog, find and select the BSC Testnet wallet.
4. Click on "Add."
5. Your BSC Testnet wallet will be added to Metamask.
How to Connect BSC Testnet to Metamask
1. Go to Metamask and click on the “Add Wallet” button.
2. Click on the “Import Wallet File” button and select the BSC Testnet wallet file you downloaded earlier.
3. Click on the “Create New Wallet” button.
4. Enter a name for your wallet and click on the “Create Wallet” button.
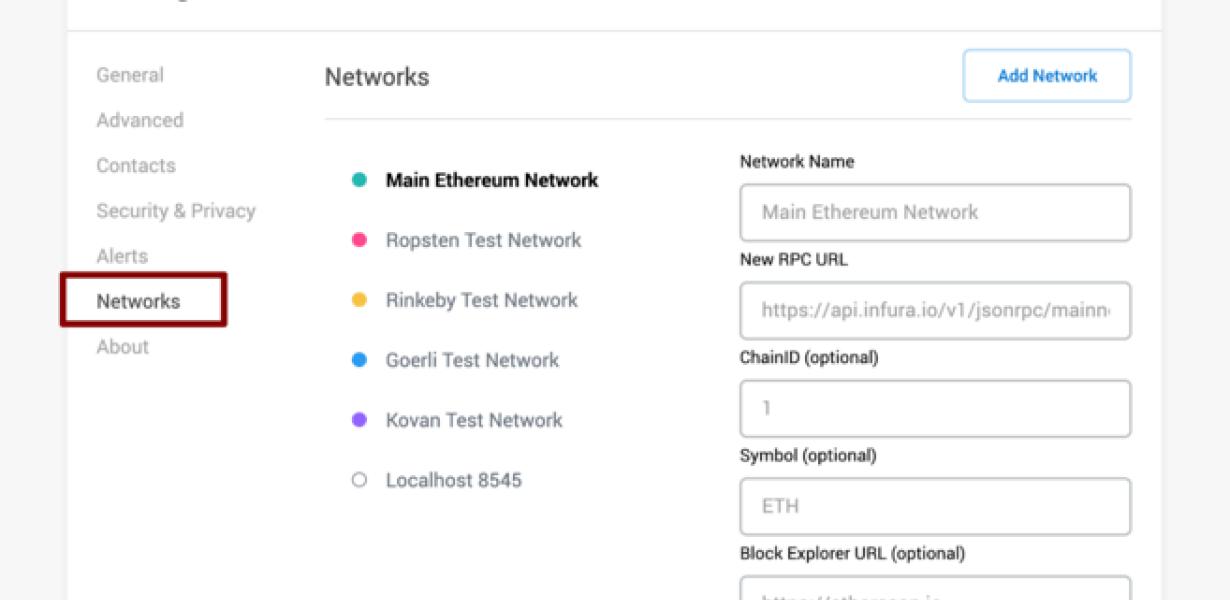
5. You will now be taken to the main Metamask screen. On the left-hand side, under the “Network” tab, select the “BSC Testnet” network.
6. Click on the “Connect” button in the bottom-left corner of the Metamask screen.
7. You will now be asked to confirm your connection to the BSC Testnet network. Click on the “Connect” button in the bottom-right corner of the Metamask screen.
Adding BSC Testnet to Metamask
If you have Metamask, open it and go to the "Profile" page. Click on the "Add new account" button and enter the following information:
Username: bsc_testnet
Email: bsc_testnet@gmail.com
Password: x
After you finish entering your information, click on the "Create Account" button.
Now, go to the "Blockchains" tab and click on the "Add a new blockchain" button. Enter the following information:
Name: BSC Testnet
Type: ERC20
Description: This is the testnet for the BSC project.
After you finish entering your information, click on the "Create Blockchain" button.
Now, go to the "Settings" tab and click on the "Metamask" button. On the Metamask page, click on the "Add Account" button. Enter the following information:
Username: bsc_testnet
Email: bsc_testnet@gmail.com
Password: x
After you finish entering your information, click on the "Metamask Account" button.
Now, go to the "Settings" tab and click on the "Bancor" button. On the Bancor page, click on the "Connect" button. After you finish connecting Bancor, click on the "Configure" button. On the Bancor Configure page, enter the following information:
Token Contract Address: 0xea9a5befd7b2c4812c1dc575980a1afcbd1bbd8c8f7
Token Symbol: BAN
Decimals: 18
After you finish entering your information, click on the "Configure" button.
Now, go to the "Settings" tab and click on the "Web3" button. On the Web3 page, click on the "Add Account" button. Enter the following information:
Username: bsc_testnet
Email: bsc_testnet@gmail.com
Password: x
After you finish entering your information, click on the "Web3 Account" button.
Configuring BSC Testnet for Metamask
To configure Metamask for the BSC Testnet, follow these steps:
1. Visit metamask.io and click on the "Add Account" button.
2. Fill in the form with your Metamask address and click on the "Create Account" button.
3. In the "My Metamask Settings" section, click on the "Testnet" button.
4. On the "Settings" page, scroll down to the "Network" section and select "Breadth First Consensus Test Network."
5. Click on the "Save" button to save your changes.
6. Open Metamask and click on the "Connect" button.
7. On the "Metamask Login" page, enter your Metamask address and click on the "Log In" button.
8. You will now see a list of nodes in the "Nodes" section. Select "BSC Testnet" from the list and click on the "Connect" button.
9. You will now see the "BSC Testnet" page, which contains information about the network. Click on the "Enable" button to enable the network.
10. Click on the "Metamask Wallet" button to open your Metamask wallet.
11. In the "Metamask Wallet" window, click on the "Configure" button.
12. On the "Configure Wallet" page, scroll down to the "Network" section and select "Breadth First Consensus Test Network."
13. Click on the "Save" button to save your changes.
14. Click on the "Trades" button to open your Metamask wallet's trades window.
15. In the "Trades" window, click on the "New Trade" button.
16. In the "New Trade" window, enter the details of your trade, such as the amount of ETH you are trading, the name of the trade, and the recipient address.
17. Click on the "Confirm Trade" button to confirm your trade.
18. Congratulations! You have now configured Metamask for use on the BSC Testnet.
Connecting BSC Testnet to Metamask
To connect BSC Testnet to Metamask, you will need the following:
1. A Metamask account
2. An Ethereum address that you control
3. A BSC Testnet account
To create a Metamask account, visit https://metamask.com/. Once you have created your account, open it and click on the "Add Account" link. Enter your Ethereum address into the "Address" field and click on the "Create Account" button.
To connect to BSC Testnet, enter your Ethereum address into the "Address" field and click on the "Connect" button. You will be prompted to login with your Metamask account. Once you have logged in, you will be taken to the BSC Testnet page. Click on the "Login" button to log in to your BSC Testnet account.
Linking BSC Testnet to Metamask
To link your BSC Testnet account to your Metamask account:
Open Metamask and click on the Accounts tab. Click on the Add Account button and enter the following details:
Name: BSC Testnet
Email: bsc@testnet.bsc.io
Type: ERC20
Click on the Connect button. Copy the private key that is displayed and save it to a safe place.
Now, open your BSC Testnet account and click on the Settings tab. Under the Account settings, paste the private key that you copied earlier and click on the Save button.
You're now ready to start trading on the BSC Testnet!
Setting up BSC Testnet on Metamask
To set up BSC Testnet on Metamask, you will first need to create a new Ethereum wallet. This can be done by visiting metamask.io and clicking on the “Create a New Wallet” button.
Once you have created your new Ethereum wallet, you will need to add a new account to it. To do this, click on the “Add Account” button on the left-hand side of the Metamask interface.
Next, you will need to input the details of your new BSC Testnet account. These details include your Metamask address (which you can find in the “My Accounts” section of Metamask), your BSC Testnet public key (which you can find in the “Public Keys” section of BSC Testnet), and your BSC Testnet private key (which you can find in the “Private Keys” section of BSC Testnet).
Finally, you will need to click on the “Save Changes” button to save your new BSC Testnet account details.
Accessing BSC Testnet through Metamask
To access the BSC Testnet through Metamask, follow these steps:
1. Visit metamask.io and click on the "Create a new account" button.
2. In the "Account creation form," input your desired username and password.
3. Click on the "Log in" button and then on the "Metamask" button in the upper right corner.
4. In the "Metamask" window, click on the "Add a new Ethereum address" button and input the desired BSC Testnet address.
5. Click on the "Connect" button and then on the "Testnet" button in the upper right corner.
6. In the "Testnet" window, you will see the BSC Testnet address and the current testnet state.
Using BSC Testnet with Metamask
To use the BSC Testnet with Metamask, you will first need to create an account on the Metamask website. After creating your account, you can then add it to your BSC Testnet account.
Once you have added your Metamask account to your BSC Testnet account, you can start using it to interact with the BSC Testnet. To do this, you will first need to install the Metamask extension on your browser. After installing the Metamask extension, you can visit the Metamask website and click on the "Add Account" button.
After clicking on the "Add Account" button, you will be presented with a list of accounts that you can add to your Metamask account. You will need to select the BSC Testnet account that you want to use. After selecting the BSC Testnet account, you will need to click on the "Add Account" button again.
After clicking on the "Add Account" button again, you will be presented with a list of permissions that the BSC Testnet account has. You will need to select the permission that you want to use. After selecting the permission, you will need to click on the "Add Permission" button.
After clicking on the "Add Permission" button, you will be presented with a list of transactions that the BSC Testnet account has made. You will need to select the transaction that you want to view. After selecting the transaction, you will be able to view the details of the transaction.
Getting Started with BSC Testnet on Metamask
To get started with BSC Testnet on Metamask, you first need to create an account on Metamask. After registering, you will be prompted to install the BSC Testnet extension. Click the green button to install the extension.
Once the extension is installed, you will be able to access BSC Testnet by clicking on the gear icon in the top-right corner of your Metamask screen and selecting "Settings". Under the "Extensions" tab, you will see the BSC Testnet extension listed. Click on it to open the extension's settings.
Under the "Settings" tab, you will need to set a few things. First, you will need to choose a network name. This is the name that other users will see when they connect to the BSC Testnet network. Next, you will need to set a gas limit. This is the amount of gas that each user will be allowed to use when participating in the network. Finally, you will need to set a token generation rate. This is the number of tokens that will be created every time a new block is generated on the network.
Once you have set these settings, you can start participating in the BSC Testnet network. To do so, click on the "Start Network" button and enter the network name and gas limit that you set earlier. You will then be prompted to generate a token. Click on the blue button to generate a token.
Exploring BSC Testnet with Metamask
To explore the BSC Testnet, you first need to set up Metamask. Metamask is a browser extension that enables you to access decentralized applications (DApps) on the Ethereum network. To install Metamask, click the following link:
https://metamask.io/en/
Once you have installed Metamask, you can visit the following link to access the BSC Testnet:
https://bsc-testnet.com/
To start using the BSC Testnet, you first need to create a new account. To do this, click the “New Account” button on the main page of the BSC Testnet.
Next, you will need to enter your personal information. This includes your name, email address, and password.
After you have entered your personal information, you will need to verify your account. To do this, you will need to provide your phone number and upload a photo of your government-issued ID.
Once your account has been verified, you can begin to explore the BSC Testnet!
Interacting with BSC Testnet via Metamask
To interact with BSC Testnet, you will first need to install Metamask. Metamask is a Chrome browser extension that allows you to interact with the Ethereum network. After installing Metamask, you will need to open it and click on the three lines in the top right corner. Then, you will need to click on the “Ethereum” button. In the Ethereum section, you will then need to click on the “Metamask” button. After clicking on Metamask, you will need to click on the “Add Account” button. Then, you will need to fill out the following information:
In the “Name” field, you will need to enter “BCS Testnet.”
In the “Email Address” field, you will need to enter “testnet@bsc.io.”
In the “Description” field, you will need to enter “BCS Testnet.”
In the “Access Token” field, you will need to enter your Metamask access token.
In the “Secret Key” field, you will need to enter your Metamask secret key.
Click on the “Create Account” button. After clicking on the “Create Account” button, you will be redirected to the BSC Testnet website. On the BSC Testnet website, you will need to click on the “Register” button. After clicking on the “Register” button, you will be redirected to the Metamask registration page. On the Metamask registration page, you will need to fill out the following information:
In the “First Name” field, you will need to enter “Test User.”
In the “Last Name” field, you will need to enter “Test User.”
In the “Email Address” field, you will need to enter “testnet@bsc.io.”
In the “Phone Number” field, you will need to enter your phone number.
In the “Country” field, you will need to enter your country.
In the “City” field, you will need to enter your city.
In the “State/Province” field, you will need to enter your state or province.
In the “Zip Code” field, you will need to enter your zip code.
After filling out all of the required information, click on the “Submit” button. After clicking on the “Submit” button, you will be redirected back to the BSC Testnet website. On the BSC Testnet website, you will need to click on the “Register” button. After clicking on the “Register” button, you will be redirected to the Metamask registration page. On the Metamask registration page, you will need to fill out the following information:
In the “First Name” field, you will need to enter “Test User 2.”
In the “Last Name” field, you will need to enter “Test User 2.”
In the “Email Address” field, you will need to enter “testnet2@bsc.io.”
In the “Phone Number” field, you will need to enter your phone number.
In the “Country” field, you will need to enter your country.
In the “City” field, you will need to enter your city.
In the “State/Province” field, you will need to enter your state or province.
In the “Zip Code” field, you will need to enter your zip code.
After filling out all of the required information, click on the “Submit” button. After clicking on the “Submit” button, you will be redirected back to the BSC Testnet website. On the BSC Testnet website, you will need to click on the “Register” button. After clicking on the “Register” button, you will be redirected to the Metamask registration page. On the Metamask registration page, you will need to fill out the following information:
In the “First Name” field, you will need to enter “Test User 3.”
In the “Last Name” field, you will need to enter “Test User 3.”
In the “Email Address” field, you will need to enter “testnet3@bsc.io.”
In the “Phone Number” field, you will need to enter your phone number.
In the “Country” field, you will need to enter your country.
In the “City” field, you will need to enter your city.
In the “State/Province” field, you will need to enter your state or province.
In the “Zip Code” field, you will need to enter your zip code.
After filling out all of the required information, click on the “Submit” button. After clicking on the “Submit” button, you will be redirected back to the BSC Testnet website. On the BSC Testnet website, you will see a list of registered users. You can then click on any of the user names to view their account information.