Add Solana To Metamask
Adding Solana to Metamask is a great way to increase your crypto holdings! Solana is a fast and secure blockchain that is perfect for storing crypto assets. Additionally, Metamask allows you to easily view your Solana balance and transactions.
How to add Solana to your MetaMask wallet
To add Solana to your MetaMask wallet, follow these steps:
1. Open your MetaMask wallet and click on the three lines in the top left corner.
2. Click on Add Account.
3. Enter the following information:
Name: Solana
Email: [email protected]
4. Click on Next.
5. Choose a password and confirm it.
6. Click on Import Account File.
7. Select the Solana account file you downloaded from our website and click on Open.
8. Click on Done to finish adding Solana to your MetaMask wallet.
Adding Solana support to MetaMask
MetaMask is a popular browser extension that allows you to manage your digital assets and transactions with cryptocurrencies like Bitcoin and Ethereum.
To add Solana support to MetaMask, follow these steps:
1. Open MetaMask and click on the three lines in the top right corner.
2. Under "Extensions," click on "Add New Extension."
3. In the "Add New Extension" window, paste the following code into the text field and click on "Add":
{ "name": "Solana", "description": "Solana is a new blockchain platform that allows for secure, low-cost, and fast transactions.", "type": "web_extension", "version": "0.4.0" }
4. Click on the "Install" button to install the extension.
5. After the extension has been installed, open MetaMask and click on the three lines in the top right corner.
6. Under "Extensions," click on the "Active Extensions" tab.
7. In the "Active Extensions" tab, scroll down and select the "Solana" extension.
8. Click on the "Activate" button to enable the extension.
9. Click on the "Settings" button to open the "Solana" extension's settings window.
10. Under the "General" tab, click on the "Enable blockchain transaction" button to enable Solana support.
11. Under the "Transactions" tab, click on the "Enable transaction" button to enable Solana support for transactions.
12. Click on the "Close" button to close the settings window.
13. Click on the "Send" button in the "Transactions" tab to send a transaction.
14. After the transaction has been sent, click on the "Receive" button in the "Transactions" tab to view the transaction's details.
Now you can add Solana to your MetaMask wallet!
To add Solana to your MetaMask wallet, follow these steps:
1. Open MetaMask and click on the three lines in the top left corner.
2. Select Add a Wallet.
3. Click on the plus sign in the top right corner of the Solana window.
4. Enter your MetaMask password and click on the OK button.
5. Review the information in the Solana window and click on the Next button.
6. Click on the Add a Token button.
7. Enter the information for Solana (name, symbol, and amount).
8. Click on the Save button.
9. Click on the Close button.
10. Open Solana in your browser.
Use Solana with MetaMask by adding it to your wallet
MetaMask is a browser extension that allows you to manage your online identities and transactions with your regular browser. Once you have installed MetaMask, open it and click the three lines in the top left corner. Under "Add new account," type solana and click "Create." You will then be prompted to enter your information, including your ERC20 address. Click "Next." You will now be asked to add a password. Type solana into the password field and click "Create." Your solana account is now ready to use!
How to use Solana with MetaMask
1. Open the MetaMask app on your computer.
2. Click the three lines in the top left corner of the MetaMask window.
3. Click the Add Wallet button.
4. Click the Solana icon.
5. Enter your Solana address and password.
6. Click the blue Verify button.
7. Click the Close button.
Accessing Solana through MetaMask
To access Solana through MetaMask, you will need to open a web browser and go to the following URL:
https://metamask.io/en/buy
Once you have opened the MetaMask app, you will need to find the "Add New Token" button and click on it.
You will be prompted to input the details of your Solana account, including its address and private key. After you have entered all the necessary information, click on the "Generate New Token" button.
You will then be prompted to open a new web browser and visit the following URL:
https://solana.com/
You will be asked to enter your Metamask address and password in order to log in to your account. Once you have logged in, you will be able to see all of your Solana tokens and transactions.
Using Solana in your MetaMask wallet
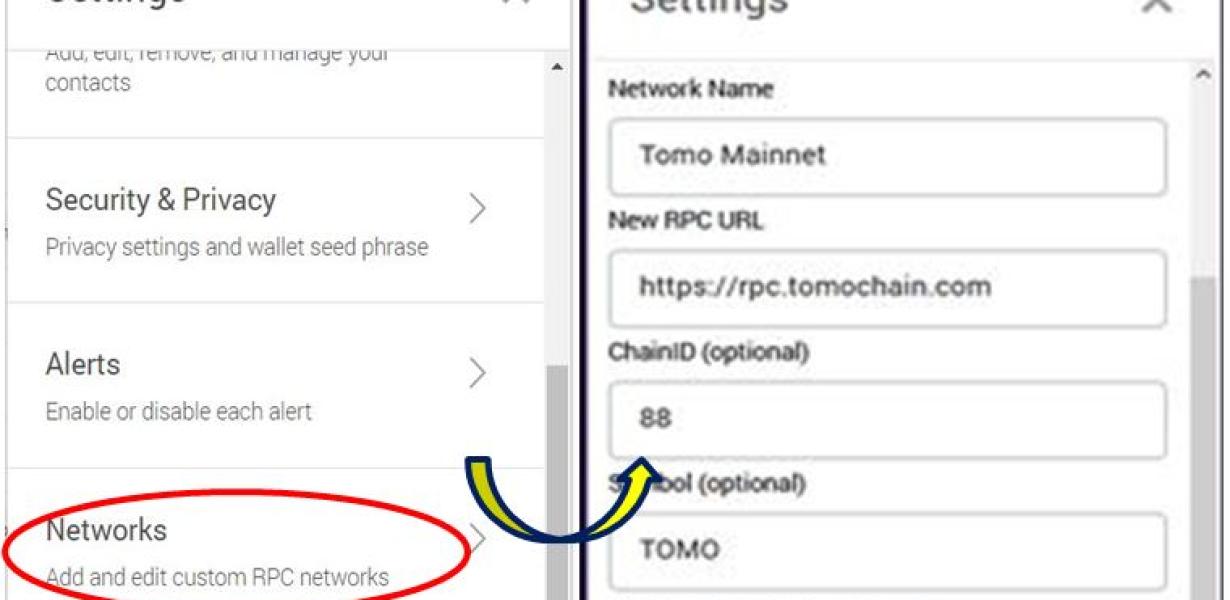
To use Solana in your MetaMask wallet, open the MetaMask app and click on the three lines in the top left corner. Then, click on Add Token.
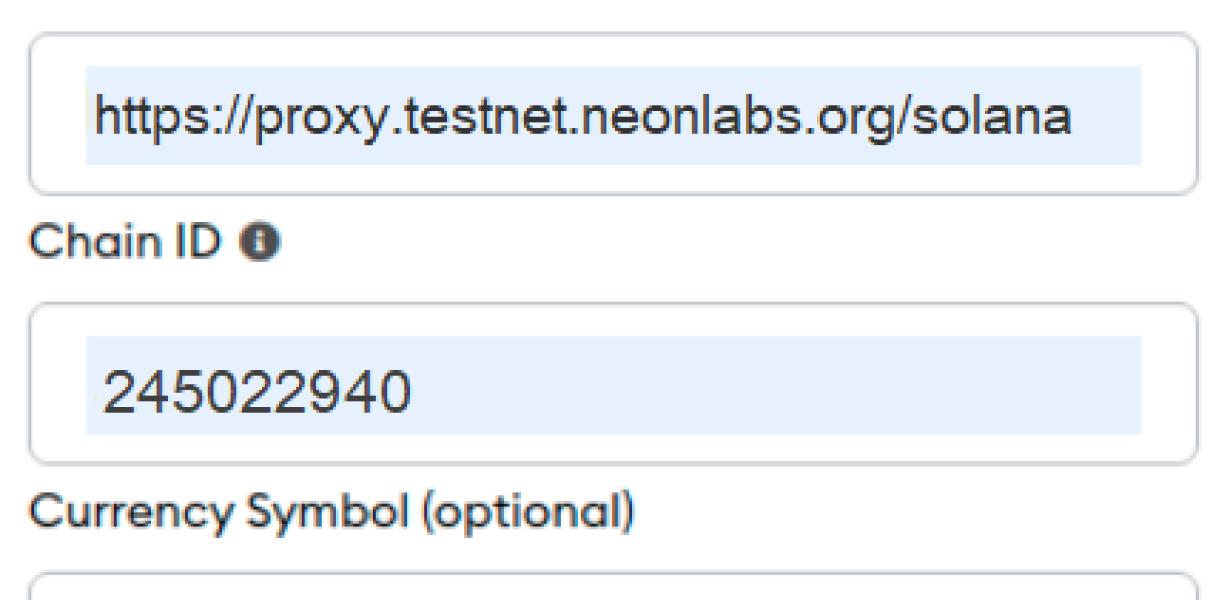
In the Add Token window, enter solana and click on the Next button.
In theToken Details window, you will need to provide some information about Solana. First, you will need to select a name for the token. In this example, we will call the token Solana. Next, you will need to specify the amount of tokens that you will own. We will be providing 1,000 Solana tokens for this tutorial. Finally, you will need to specify a symbol for the token. We will be using S.
Click on the Next button to continue.
In the Token Security Details window, you will need to provide some information about how you will be securing your Solana tokens. We will be providing a security key. You can either provide a key that you generated yourself or you can download the key from our website. Click on the Next button to continue.
In the Review Token Details window, you will need to review the details of your Solana token. Click on the Finish button to finish adding your Solana token to your MetaMask wallet.