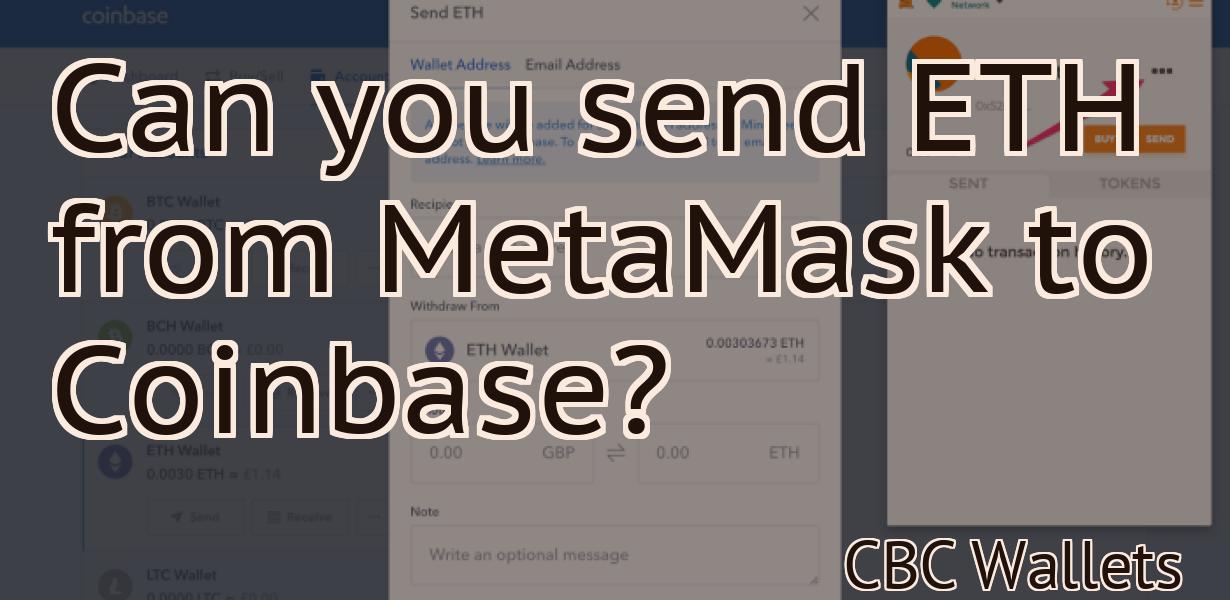
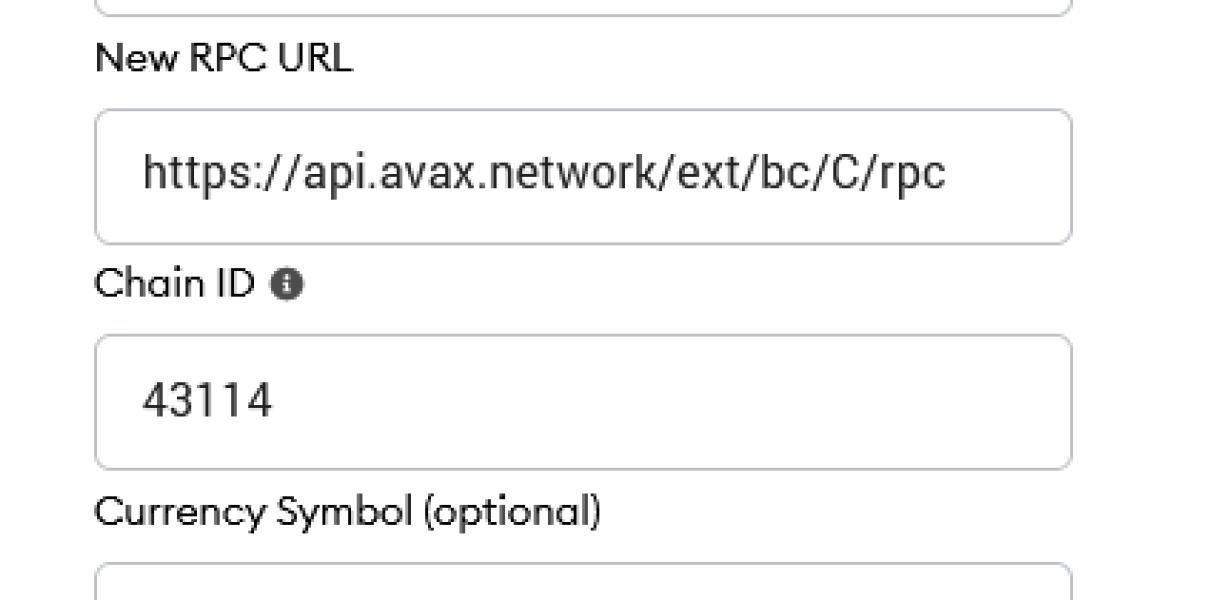
Add Avalanche Network To Metamask
In order to add the Avalanche network to Metamask, follow these simple steps: 1. In your Metamask account, click on the "Networks" tab. 2. Click on the "Add Network" button. 3. Enter the following URL into the "New RPC URL" field: https://avalanchego.com/jsonrpc 4. Enter "Avalanche Network" into the "Network Name" field. 5. Click on the "Save" button. You will now be able to select the Avalanche network from the "Networks" dropdown menu in Metamask.
Metamask Now Supports Avax
x
Metamask is now officially supported by Avaxx, one of the leading identity management platforms. Metamask is a decentralized application that allows users to manage their digital identities and access the internet securely.
This integration will allow users to manage their Metamask accounts and transactions from within the Avaxx platform. Additionally, it will allow users to access their Metamask accounts from other devices, including the Metamask mobile app.
This integration will make it easier for users to access their Metamask accounts and make transactions more secure. It will also allow users to manage their identities and access the internet securely from within the Avaxx platform.
How to Add Avalanche to Metamask
1. Visit the Avalanche website and create an account.
2. Once you have created an account, visit the Add Contract page.
3. On the Add Contract page, you will need to provide the following information:
- The Avalanche token address
- The amount of Avalanche tokens you would like to purchase
- The Metamask address you would like to use to purchase the Avalanche tokens
4. Click on the Purchase Avalanche button.
5. On the Metamask confirmation page, click on the Agree and Submit button.
6. You will then be prompted to login to your Metamask account. Once you have logged in, you will be able to see the Avalanche tokens that you have purchased.
Adding Avax Support to Metamask
Avax is a decentralized protocol that enables users to access and share content securely. With Avax support, Metamask users can access and share content securely with Avax. This will enable Metamask users to share their content securely with other Metamask users and with the outside world. Additionally, this will allow Metamask users to access and share content securely with other Avax-enabled applications.
Enabling Avax Support in Metamask
To enable Avax support in Metamask, follow these steps:
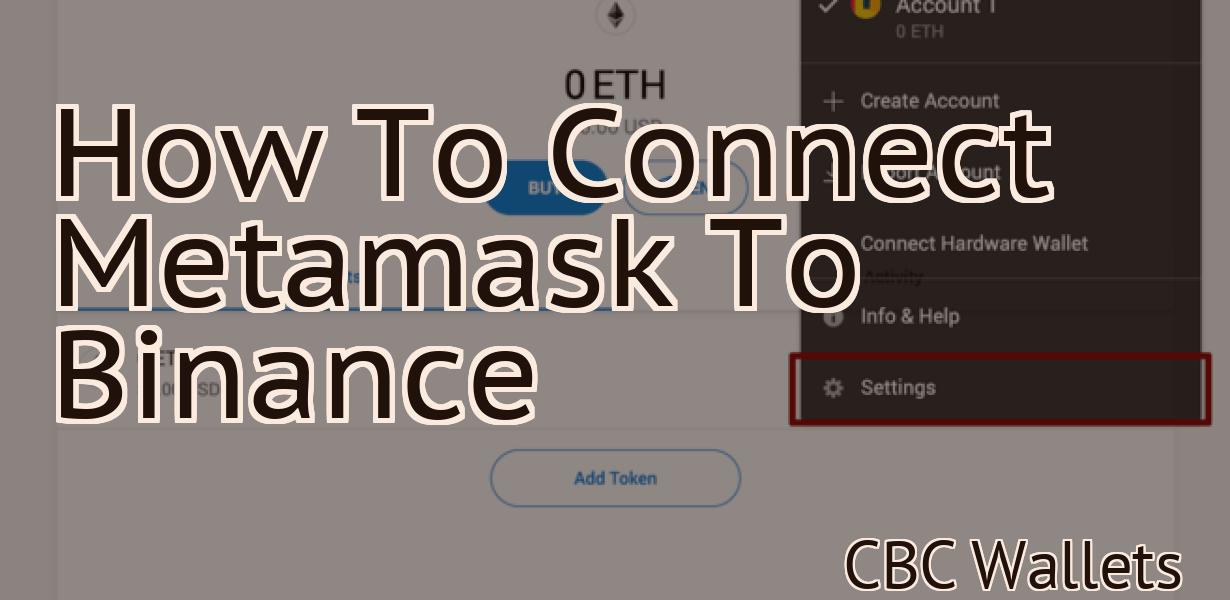
1. In the Metamask app, click on the Settings gear icon.
2. Under the "Avax Support" category, select the "Enable" checkbox.
3. Click on the "Save Changes" button.
How to Use Avalanche with Metamask
1. Visit the Avalanche website and create an account.
2. Click on the "Add Token" button on the main page.
3. Enter the token information into the "Token Address" field and click on the "Generate Transaction" button.
4. Copy the transaction address and paste it into Metamask.
5. Click on the "Import Address" button and select the Avalanche transaction address from the list.
6. Click on the "OK" button to complete the transaction.
Using Avalanche with Metamask
If you would like to use the Metamask extension with Avalanche, please follow these instructions:
1. Install Metamask.
2. Install Avalanche.
3. In Avalanche, open the Settings dialog and click on the Extensions tab.
4. Click on the Add extension button and search for Metamask.
5. Click on the Metamask extension and click on the Enable button.
6. In the Settings dialog, click on the Advanced tab and select the Enable anonymous payments option.
7. Click on the OK button to save the changes.
Configuring Metamask for Avalanche
Metamask is a decentralized application that allows users to manage their digital identities and access the internet securely. To use Metamask, you will first need to download and install the Metamask browser extension. Once you have installed Metamask, you will need to create a new account.
To create a new Metamask account, click on the Metamask icon in the top right corner of the web browser and select "Create New Account." On the "Account Creation" page, enter your desired name and email address, and click "Create Account." You will now be prompted to select a password. Make sure that you choose a strong password and keep it confidential.
Once you have created your Metamask account, you will need to add a security key. To add a security key, click on the "Metamask" button in the top right corner of the browser and select "Add Security Key." On the "Add Security Key" page, enter your desired security key and click "Add." You will now be prompted to choose a password for the security key. Make sure that you choose a strong password and keep it confidential.
Finally, you will need to add an ERC20 token to your Metamask account. To add an ERC20 token, click on the "Metamask" button in the top right corner of the browser and select "Add Token." On the "Add Token" page, enter the name of the ERC20 token and click "Add." You will now be prompted to select a price for the ERC20 token. Make sure that you choose a price that is fair and reasonable.
Setting up Avalanche with Metamask
1. Navigate to the Metamask website and click on the "Create a New Wallet" button.
2. On the next screen, enter your Metamask address and password.
3. Click on the "Create Account" button to finish setting up your Metamask account.
4. You will now be taken to the Metamask main page. In the top left corner of this page, under the "Settings" heading, click on the "Add Wallet" button.
5. In the "Add Wallet" dialog box, click on the "Avalanche" icon.
6. Enter the following information into the "Add Your Wallet Address" and "Add Your Wallet Password" fields:
- Your Avalanche wallet address
- Your Avalanche wallet password
7. Click on the "Create" button to finish setting up your Avalanche account.
Getting Started with Avalanche and Metamask
Avalanche is a crypto wallet that supports Metamask. To start using Avalanche and Metamask, first install the following:
Open the Google Chrome browser.
Go to the website https://metamask.io/.
Click on the “Set Up Metamask” button.
Click on the “Download the Wallet” button.
Click on the “Download the Avalanche” button.
Click on the “Install Avalanche” button.
Click on the “Create New Wallet” button.
Enter a name for your wallet and click on the “Next” button.
Click on the “Add Address” button.
Enter your wallet address and click on the “Next” button.
Click on the “Add Custom Token” button.
Type in the ticker symbol of your custom token and click on the “Next” button.
Click on the “Finish” button.
Close the Google Chrome browser.
Start the Avalanche wallet.
To start using Metamask with Avalanche, first install Metamask:
Open the Google Chrome browser.
Go to the website https://metamask.io/.
Click on the “Add New Account” button.
Enter your email address and click on the “Next” button.
Click on the “Add Your Phone Number” button.
Enter your phone number and click on the “Next” button.
Click on the “Add Your Public Key” button.
Click on the “Upload” button.
Click on the “Metamask” button.
Click on the “Install Metamask” button.
Click on the “Add Account” button.
Enter your wallet address and click on the “Next” button.
Using Metamask with Avalanche
Metamask is a browser extension that enables users to interact with decentralized applications (DApps) and smart contracts. Avalanche is a DApp built on the Ethereum blockchain that allows users to buy and sell products and services. Metamask and Avalanche are compatible, so you can use Metamask to access Avalanche and vice versa.