Set Up Trezor
If you're looking to store your cryptocurrency offline in a secure way, then you'll want to check out Trezor. In this guide, we'll show you how to set up your Trezor hardware wallet.
How to set up your Trezor hardware wallet
1. Connect your Trezor to your computer using the supplied USB cable.
2. Click on the Trezor icon on your computer and click on the "Trezor Setup" button.
3. In the "Trezor Setup" window, click on the "Create New Wallet" button.
4. In the "New Wallet" window, enter a name for your wallet and click on the "Create" button.
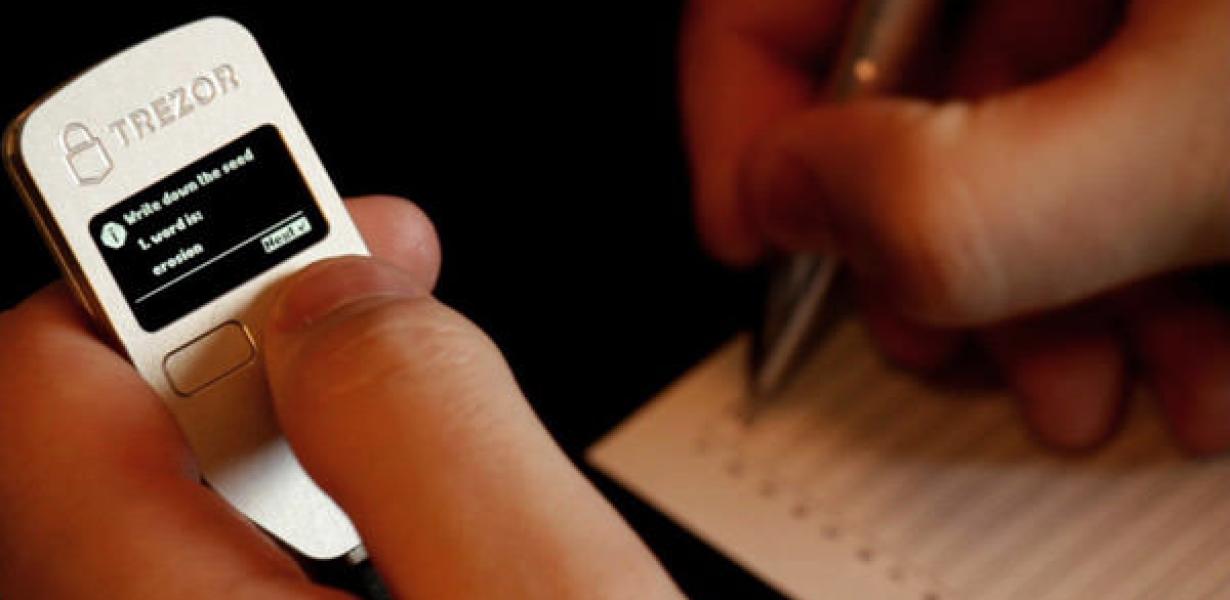
5. Your Trezor will now create a new bitcoin address and a 12-word backup sentence. Make a note of these details for later use.
6. Click on the "Next" button to proceed to the next step.
7. In the "Next" window, click on the "Select Your Language" button and select the language you want to use for the Trezor.
8. Click on the "Next" button to proceed to the final step.
9. In the "Finish" window, click on the "OK" button to finish the Trezor setup process.
Setting up your Trezor for the first time
To set up your Trezor for the first time, you will need to connect it to a computer. Once it is connected, you will need to install the Trezor software. After the software is installed, you will need to create a new account.
Getting started with your Trezor
To get started with your Trezor, you will first need to create an account on the Trezor website. After you have created your account, you will need to download the Trezor app onto your mobile device. The Trezor app is available for both Android and iOS platforms. Once you have downloaded the app, you will need to set up your Trezor account. To set up your Trezor account, you will first need to generate a new passphrase. After you have generated your passphrase, you can use it to log into your account on the Trezor website. Once you have logged into your account, you will need to set up your Trezor device. To set up your Trezor device, you will first need to insert your Trezor device into your computer. After you have inserted your Trezor device into your computer, you will need to copy the trezor.dat file from the trezor device to your computer. You will also need to create a new password for your Trezor account. After you have copied the trezor.dat file and created your new password, you can use the Trezor app to set up your Trezor device.
How to properly set up your Trezor
To properly set up your TREZOR, you will need to do the following:
1. Download the TREZOR software.
2. Connect your TREZOR to your computer.
3. Click on the trezor icon on your computer.
4. Click on the “TREZOR Setup” button.
5. Click on the “Import Wallet” button.
6. Click on the “Select Wallet” button.
7. Click on the “Choose File” button.
8. Click on the “Open” button.
9. Click on the “Import” button.
10. Click on the “ Finish” button.
11. Your TREZOR will now be ready to use.
How to set up your Trezor in under 5 minutes
1. Connect your Trezor to your computer.
2. Open the Trezor Manager.
3. Click on the My Wallet tab.
4. Select Import Wallet from File.
5. Select the .zip file you downloaded from our website.
6. Click on Open.
7. Your Trezor will now be imported into the Trezor Manager.
The ultimate guide to setting up your Trezor
The Trezor is a hardware wallet that can be used to store cryptocurrencies. Before you can use your Trezor, you need to set it up. This guide will teach you how to do this.
1. Connect your Trezor to your computer
To connect your Trezor to your computer, you first need to install the Trezor firmware update. This can be done by following these instructions.
2. Create a new Bitcoin wallet
Once your Trezor has been updated, you can create a new Bitcoin wallet. To do this, open the Trezor wallet and click on thebutton.
3. Click on thebutton to open the settings menu
Next, you will need to open the settings menu. To do this, click on thebutton.
4. Click on thebutton to open the settings menu
Next, you will need to open the settings menu. To do this, click on thebutton.
5. Click on thebutton to open the settings menu
Next, you will need to enter your PIN code. To do this, click on thebutton.
6. Click on thebutton to open the main settings screen
Now, you will need to enter your PIN code. To do this, click on thebutton.
7. Click on thebutton to open the main settings screen
Once you have entered your PIN code, you will need to click on thebutton to open the main settings screen.
8. Click on thebutton to add a new wallet
Now, you will need to add a new wallet. To do this, click on thebutton.
9. Click on thebutton to open the create new wallet screen
Next, you will need to enter a name for your new wallet and a password. To do this, click on thebutton.
10. Click on thebutton to create your new wallet
Once you have entered your information, click on thebutton to create your new wallet.
How to set up your Trezor like a pro
1. Plug your Trezor into a computer with a USB cable.
2. Open the Trezor web wallet.
3. On the left side of the web wallet, click on “settings”.
4. On the settings page, click on the “auth” tab.
5. In the “auth” tab, click on the “create new key” button.
6. On the “key creation” window, enter a name for your new key (e.g. “My New Trezor Key”) and click on the “create” button.
7. Copy your newly created key to a safe place. You will need it to unlock your Trezor later.
8. On the settings page, click on the “auth” tab again.
9. In the “auth” tab, click on the “profile” button.
10. On the profile page, click on the “edit” button next to your newly created key.
11. On the “edit key” window, enter your PIN code and click on the “save” button.
12. Close the Trezor web wallet and unplug your Trezor from the computer.
A step-by-step guide to setting up your Trezor
If you’re new to hardware wallets, or just want a refresher, this guide will walk you through the process of setting up your Trezor.
1. Download and install the Trezor software.
2. Connect your Trezor to your computer via a USB cable.
3. On the Trezor software, click “New Wallet.”
4. In the “Type a name for your wallet” field, type “Trezor.”
5. In the “Select a wallet file” field, select the .trezor file you downloaded from TREZOR’s website.
6. Click “Next.”
7. In the “Create new seed” field, type a 12-word seed. This is the unique key that will allow you to access your funds in the future. Do not write this down; remember it only!
8. Click “Next.”
9. In the “Create new PIN” field, type a 4-word PIN. Again, do not write this down; remember it only!
10. Click “Next.”
11. In the “Confirm your PIN” field, enter your PIN and click “Next.”
12. Click “Finish.”
13. Your Trezor will now be ready to use!
The beginner's guide to setting up your Trezor
If you are new to cryptocurrencies, or just want to get a better understanding of how to use your Trezor wallet, this guide is for you.
1. Install the Trezor wallet on your computer.
2. Connect your Trezor to the computer via a USB cable.
3. Click on the "Trezor" button in the menu bar at the top of your computer screen.
4. On the "Trezor" window that opens, click on the "Settings" tab.
5. Under "General", make sure that the "USB Mode" is set to "Trezor."
6. Under "Security," make sure that the "PIN Code" and "Passphrase" fields are filled in with a strong password.
7. Under "Account," click on the "New" button.
8. Enter the "Name" and "Email" fields, and click on the "Create Account" button.
9. Click on the "Close" button in the "Trezor" window, and disconnect your Trezor from your computer.
10. Store your TREZOR in a safe place, such as a safe deposit box.
How to easily set up your Trezor
The Trezor is a hardware wallet that allows you to store your bitcoin and other cryptocurrencies securely. To set it up, follow these steps:
1. Download the Trezor app from the App Store or Google Play store.
2. Connect your Trezor to your computer using the included USB cable.
3. Open the Trezor app and click on the "Create New Wallet" button.
4. Enter your desired password and click on the "Create Wallet" button.
5. You will now see your newly created wallet. Copy the 12-word recovery seed phrase to a safe place.
6. Click on the "View Wallet Info" button and enter your address. You will also see your balance and transaction history.
7. To send bitcoins, click on the "Send Bitcoins" button and enter the amount you want to send. You will then be prompted to confirm the transaction.
Setting up your Trezor in no time
1. Plug in your Trezor and turn it on.
2. Click on the "Trezor" button in the top right corner of the Trezor interface.
3. Click on "Create New Wallet."
4. Enter a strong password and click on "Create."
5. Your new Trezor wallet will be created and displayed. Click on it to open it.
6. To add a new address, click on the "Add Address" button.
7. Type in the address you want to use and click on "Add."
8. To view your addresses and transactions, click on the "View Wallet Info" button.