Metamask Github
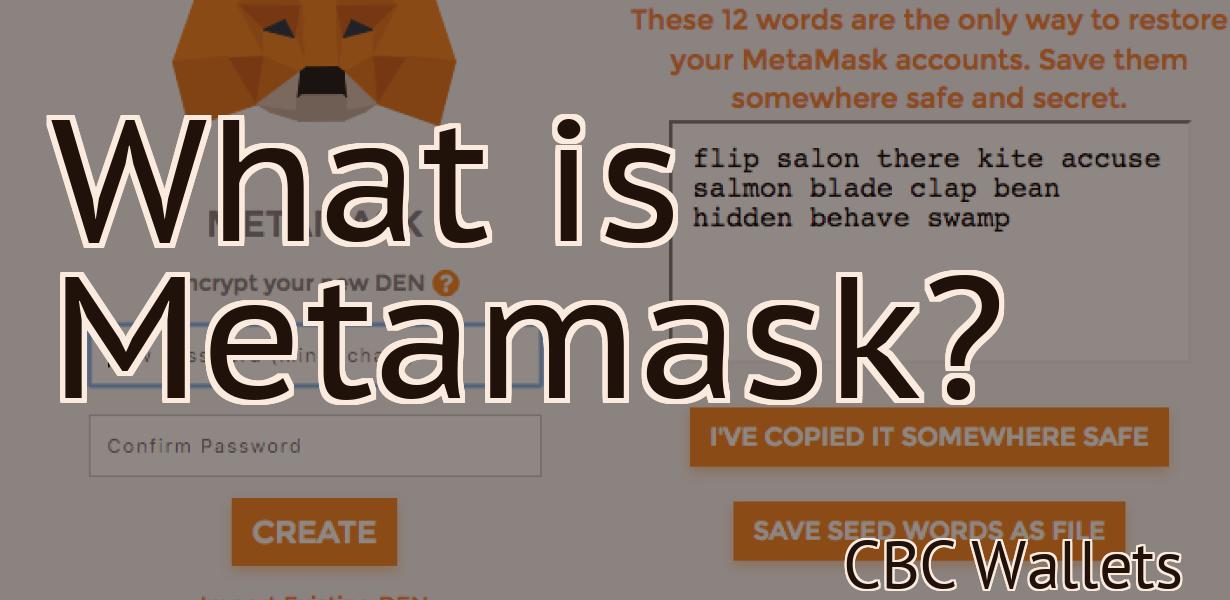
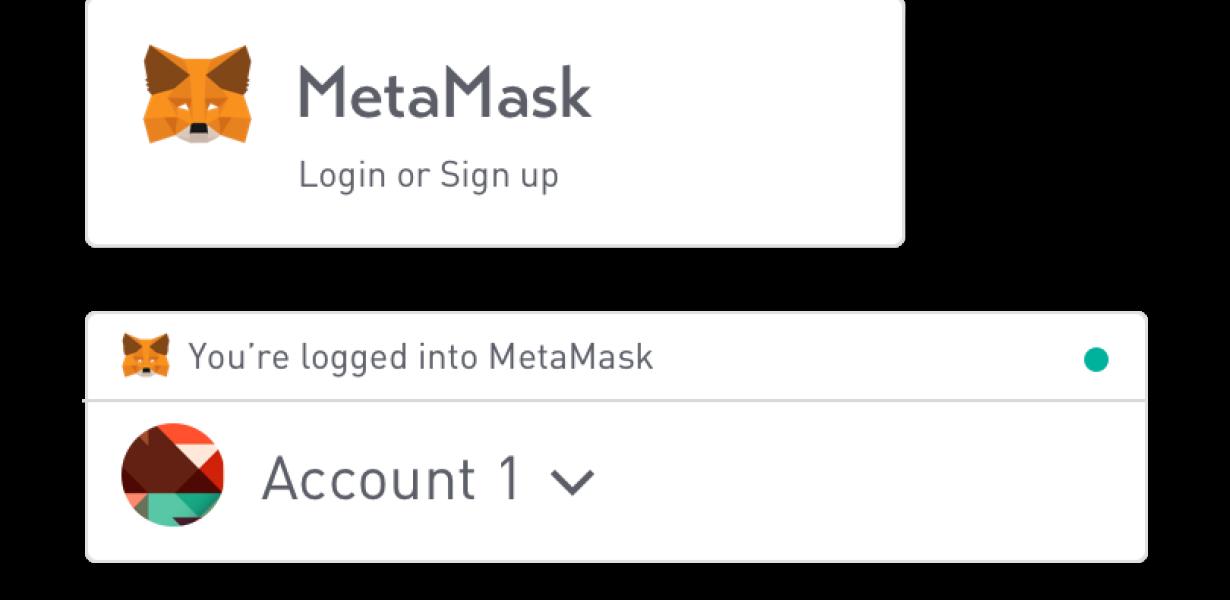
Metamask is a free, open-source, and cross-platform Ethereum wallet that allows you to interact with decentralized applications (dapps) on the Ethereum blockchain. It is one of the most popular Ethereum wallets available, and has been downloaded over 1 million times. Metamask is available as a browser extension for Google Chrome, Mozilla Firefox, and Brave, and as a mobile app for Android and iOS.
Metamask: the ultimate guide to using Github
If you’re a developer, you’ve probably heard of GitHub. It’s a popular source code management and collaboration platform used by millions of developers worldwide.
This guide will teach you everything you need to know about using GitHub to manage your code. We’ll cover topics like creating and managing repositories, issuing and tracking code reviews, and more.
By the end of this guide, you’ll have everything you need to start using GitHub effectively. Let’s get started!
The ins and outs of Metamask's Github repository
Metamask's Github repository is a place where you can find the source code for Metamask and other related projects.
To access the repository, go to https://github.com/metamask/metamask.
On the homepage, click the " Clone or Download " button to get a copy of the repository.
" button to get a copy of the repository. To clone the repository, use the " Clone or Download " button on the right side of the screen, and enter the following command:
git clone https://github.com/metamask/metamask.git
If you want to contribute to Metamask, make sure to check out our Contributing Guidelines first.
Metamask: How to use Github for your project
If you’re not familiar with Git and GitHub, we recommend that you read our beginner’s guide to Git and GitHub first.
Once you have a basic understanding of Git and GitHub, you can use them to manage your project’s codebase.
To use Git and GitHub for your project, you first need to create a repository for your project.
To create a repository on Github, click the “Create a new repository” button on the main page of the website, and fill out the required fields.
When you’re finished, click the “Create repository” button to create your repository.
Next, you need to add the source code for your project to your repository.
To add source code to your repository, click the “Clone or download” button next to the repository you created in step 1, and select the “Download ZIP” or “Clone” option.
The source code for your project will now be added to your repository.
If you want to change the name of your repository, click the “Rename repository” button and enter a new name for your repository.
You’re now ready to start working on your project using Git and GitHub.
To start working on your project using Git and GitHub, you first need to clone your repository onto your computer.
To clone your repository onto your computer, click the “Clone or download” button next to the repository you created in step 1, and select the “Clone” option.
Your repository will now be cloned onto your computer.
Now you can start working on your project using Git and GitHub.
To start working on your project using Git and GitHub, you first need to open your cloned repository on your computer.
To open your cloned repository on your computer, double-click the cloned repository file.
Your project will now be open in a new window or tab on your computer.
Metamask: A beginner's guide to using Github
If you're new to GitHub, or if you're looking for an overview of the platform, we recommend reading our beginner's guide to using Github.
Metamask and Github: The perfect combination for your next project
If you are looking for a way to securely store and manage your project files, then you should consider using Metamask and Github.
Metamask is a desktop application that allows you to encrypt your data and access it from anywhere. This means that you can safely store your project files on GitHub without having to worry about anyone stealing them.
GitHub also makes it easy to share and collaborate on project files with other people. You can easily add comments and build relationships with other developers by sharing your project files with them.
Metamask: An introduction to using Github repositories
with Metamask
Metamask is a Chrome extension that allows users to control their Ethereum and ERC20 tokens from within the browser.
Github is a code management and collaboration platform. It allows developers to manage their code and share it with others.
To use Metamask with Github, first install the extension. Then, open a new tab and visit your Github account. On the left-hand side of the screen, click the three dots next to your account name. This will open the account settings page.
Under "Account Settings", click "Repositories". This will open a list of all of your repositories. Click the blue "Metamask" button next to the repository that you want to use with Metamask. This will open the repository settings page.
Under "Repository Settings", click "Collaborate". This will open the collaboration settings page for the repository. Under "Access Rights", click the "Metamask" button. This will open the Metamask settings page for the repository.
Under "Metamask Settings", click the "Add" button. This will open the "Add a Token" dialog box. Add the Ethereum or ERC20 token address (or symbol) of the token that you want to use with Metamask. For example, if you want to use Binance Coin with Metamask, you would type binance into the "Token Address" field.
Click the "Add" button. This will add the token to the list of tokens that you can use with Metamask.
To use the token with Metamask, open a new tab and enter the address (or symbol) of the token in the "Token Address" field. Metamask will automatically load the token information from the repository and allow you to control your token from within the browser.
Metamask tutorial: Using Github for your project
If you're not already using Git for your project, we highly recommend it. Git is a free and open source distributed version control system that helps you keep track of changes to your files.
To get started with Git, we recommend reading our tutorial on how to use Git.
Once you have a basic understanding of Git, you can start using it to manage your project files.
To use Git for your project, you first need to create a repository for your project. To do this, open up your Git client (e.g. Git Bash, Git Explorer, or Gitk) and enter the following command:
git init
This will create a new repository called "myproject" in your current directory. You can check out (or clone) this repository by entering the following command:
git clone myproject
This will copy the contents of the myproject repository into your current directory.
Now that you have a repository for your project, you need to add files to it. To add a file to your project, you first need to add the file to your local copy of the repository. To do this, enter the following command:
git add filename
This will add the contents of the filename file to the myproject repository. You can also use the git add -A command to add all files in the current directory and its subdirectories to the myproject repository.
Now that you have added files to your project, you need to commit (or write) these changes to the repository. To commit your changes, enter the following command:
git commit -am 'added file name'
This will commit the changes made to the myproject repository, including the addition of the file name. You can also use the git commit -m 'message' command to commit additional information about the commit (e.g. the file contents, the commit message, or the commit message and file contents).
You can now view the changes made to your project by entering the following command:
git diff
This will show you the differences between the current version of the myproject repository and the version of the myproject repository that was committed (or written) earlier.
If you want to revert a change that was made to your project, you can use the git revert command to revert the last commit made to the myproject repository. You can also use the git reset --hard HEAD~1 command to completely delete all changes made to the myproject repository since the last commit.
If you ever want to remove your project from GitHub (or any other source), you can use the git push command to send all the changes made to the myproject repository to GitHub. You can also use the git push --force command to force push all changes made to the myproject repository to GitHub even if they don't meet the requirements for a successful push.
From zero to hero with Metamask and Github
Metamask is a Chrome extension that allows users to manage their Ethereum and ERC20 tokens without leaving the browser. Github is a web-based platform for hosting and sharing code with others.
1. Install Metamask and Github.
To install Metamask, click the link below and then click the "Add to Chrome" button.
https://metamask.io/en/download
To install Github, click the link below and then click the "Add to Chrome" button.
https://github.com/github/browser
2. Log in to Metamask and GitHub.
Once you have installed Metamask and Github, you will need to log in to each site. To log in to Metamask, click the link below and then enter your Metamask address (this is the address where you stored your ERC20 tokens).
https://metamask.io/en/account
To log in to Github, click the link below and then enter your Github username and password.
https://github.com/login?user=username&password=password
3. Add your ERC20 tokens to Metamask.
To add your ERC20 tokens to Metamask, click the "Add Custom Token" button on the Metamask homepage. You will then be prompted to input the details of your token, including its name, symbol, and total supply.
4. Access your ERC20 tokens on GitHub.
Once you have added your ERC20 tokens to Metamask, you can access them on GitHub by clicking the "My tokens" link on the top left corner of the Github homepage. This will display a list of all of your tokens, along with their current values and total supplies.
How to use Metamask and Github together
Metamask is a browser extension that allows you to manage your Ethereum and ERC20 tokens. You can use it to create, send, and receive tokens, as well as view the balance and transactions of your tokens.
To use Metamask with Github, first install the Metamask extension. Then, open a new web page in your browser and click on the Metamask extension icon. On the Metamask extension page, click on the Add a new account button. In the Add new account dialog, enter your Github username and password. Click on the Connect button to finish setting up your account.
Now, when you log in to your Github account, you'll see the Metamask extension listed under the Tools menu. To use Metamask with your Github account, first click on the Metamask icon and then on the Accounts tab. Under the Accounts tab, you'll see all of the accounts that you have connected to Metamask. Select the account that you want to use and then click on the Actions button. Under the Actions button, you'll see three options: Send tokens, View tokens, and Transactions.
Under the Send tokens option, you'll see a list of all of the tokens that you have registered with Metamask. You can select the token that you want to send and then click on the Send button. Under the View tokens option, you'll see a list of all of the tokens that are registered with Metamask. You can select the token that you want to view and then click on the View button. Under the Transactions option, you'll see a list of all of the transactions that have been made using the token that you selected under the Send tokens or View tokens options.
Metamask + Github = Success
We're going to use Metamask to securely access our Github account. Metamask is a desktop app that allows you to interact with decentralized applications (DApps) and smart contracts. We'll then use Github to manage our DApp's source code.
To get started, open Metamask and click on the "Add a New Account" button.
Enter the following information and click "Create Account".
Metamask will then ask you to authorize the application. Click on the "Authorize" button.
Next, we'll need to add our Github account. Click on the "Accounts" tab and click on the "Add Account" button.
Enter the following information and click "Create Account".
Once we've added our Github account, we'll need to authorize Metamask. Click on the "Authorize" button.
Next, we'll need to add our Github repository. Click on the "Repositories" tab and click on the "Add Repository" button.
Enter the following information and click "Create Repository".
Metamask will then ask us to authorize the repository. Click on the "Authorize" button.
Now that we've added our repository and authorized Metamask, we can start working on our DApp.
First, we'll need to add our DApp's source code to our repository. Click on the "Files" tab and click on the "Add File" button.
Select the source code file that you want to add and click on the "Add File" button.
Next, we'll need to add a commit message. Click on the "Commit Message" tab and enter a commit message.
Finally, we'll need to add a tag name and branch name. Click on the "Tag Name" and "Branch Name" tabs and enter a tag name and branch name, respectively.
After we've added our source code, commit message, and tag name, we can push the changes to our repository. Click on the "Push" button and enter the following information:
git push origin my-new-tag-name
After we've pushed our changes to our repository, we can go ahead and deploy our DApp to Ethereum blockchain. To do this, we'll need an Ethereum address for our DApp. We can get an Ethereum address by using a cryptocurrency wallet such as MyEtherWallet. After we've gotten our Ethereum address, we can deploy our DApp to the Ethereum blockchain by using the following command:
git push -u origin my-new-tag-name
The power of Metamask and Github working together
Metamask is a great tool that allows you to run Ethereum dApps on your mobile device. It also integrates with Github, which makes it easy to share and manage your Ethereum projects.
By using Metamask and Github together, you can easily manage your projects and track your progress. You can also share your projects with other people, so they can help you make them even better.
How to get the most out of Metamask and Github
Metamask is a decentralized application (dApp) that allows users to interact with decentralized applications and smart contracts. Github is a web-based hosting and collaboration platform for software development projects.