How To Set Up A Trezor Wallet
This article provides step-by-step instructions on how to set up a Trezor wallet. Trezor is a hardware wallet that stores your Bitcoin and other cryptocurrencies offline, so you can keep your coins safe even if your computer is hacked. The setup process is simple and only takes a few minutes.
How to set up your first cryptocurrency wallet with Trezor
First, you will need to create a new Trezor account. Once you have created your account, you will be able to access your Trezor wallet.
To start your Trezor wallet, open the Trezor application on your computer.
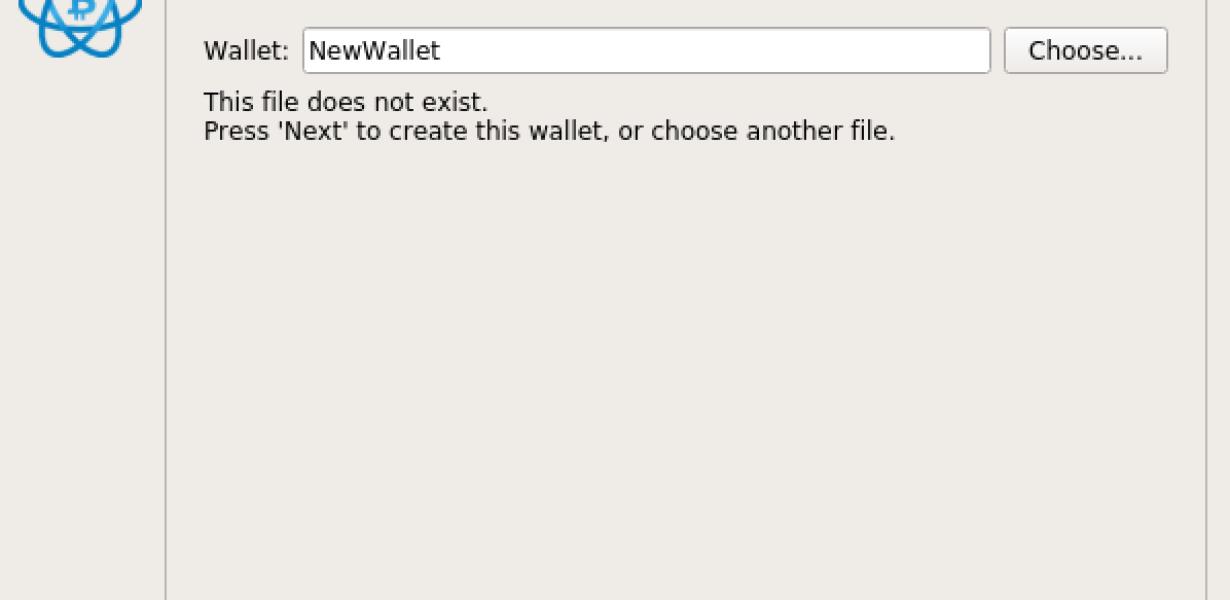
Next, click on the “New Wallet” button.
Enter the required information for your new wallet, such as your address and password.
After you have finished setting up your wallet, click on the “Create New Wallet” button.
Trezor will generate a new 24-word recovery seed for your wallet. You will need to write down this recovery seed in case you lose your Trezor device.
Next, click on the “Close” button to finish setting up your Trezor wallet.
Getting started with Trezor: How to set up your wallet
If you haven't already, create a new Trezor account by clicking on the "Create a New Account" button on the main Trezor homepage.
Once you've created your account, you'll need to set up your Trezor wallet. To do this, first click on the "Trezor" tab on your account page and then click on the "Set Up a New Wallet" button.
Next, you'll need to provide your Trezor account number and unlock your Trezor device. After you've done this, you'll be able to copy your recovery seed to a new, secure location.
Finally, you'll need to create a new password for your wallet. You can do this by clicking on the "Passwords" tab on your account page and then clicking on the "Create a New Password" button.
How to create a secure cryptocurrency wallet with Trezor
First, you will need to create a Trezor wallet. You can do this by visiting trezor.io and clicking on the “Create New Wallet” button.
Once you have created your Trezor wallet, you will need to generate a new password. You can do this by clicking on the “Generate New Password” button on your Trezor wallet page.
Next, you will need to copy the generated password into the “Trezor Wallet Password” field on the “Security Settings” page of your Trezor wallet.
Finally, you will need to click on the “Save Settings” button on the “Security Settings” page of your Trezor wallet to save your new settings.
How to use Trezor to set up your first Bitcoin wallet
Download and install the Trezor wallet on your computer.
Create a new wallet by clicking on the "New Wallet" button on the main Trezor screen.
Select a strong password for your wallet and confirm it by clicking on the "Create New Password" button.
Select the "BIP38" format for your wallet and click on the "Next" button.
Enter your wallet's 12-word seed into the "Wallet Seed" field and click on the "Next" button.
Select the "I understand. Continue." button and click on the "Next" button.
Select the "Use My Own Bitcoin Address" radio button and enter your bitcoin address into the "Bitcoin Address" field.
Click on the "Next" button and confirm your wallet's settings by clicking on the "Finish" button.
Your new Trezor wallet is now ready to use.

Setting up your Trezor wallet for the first time
If you don't have a Trezor wallet yet, you can create one by following these instructions:
Open the Trezor Wallet app on your device. Tap on the new account button to create a new account. Type in a strong password. Select the type of account you want to create: Personal or Business. Select the country you reside in. (Please note that if you reside in a country that is not listed on our supported countries page, we may not be able to help you set up your Trezor wallet.) Tap on the continue button. Enter your personal details, such as your name, email address and birthdate. Tap on the continue button again. Enter your business details, such as your company name and address. Tap on the continue button again. Review your details and tap on the finish button.
Configuring your Trezor wallet
Once you have created your Trezor wallet, you will need to configure it to work with your devices.
To configure your Trezor wallet for the first time, follow these instructions:
Open the Trezor Wallet app on your device. Tap on the Settings gear icon (3 horizontal lines in the top left corner). Select the Security tab. Tap on the Enable Two-Factor Authentication checkbox. Tap on the Continue button. Type in your Trezor login credentials. (If you don't have a Trezor login yet, you can get one by following these instructions.) Tap on the Continue button again. Type in your two-factor authentication code. (If you don't have a two-factor authentication code yet, you can generate one by following these instructions.) Tap on the Finish button.
You will now be asked to confirm your configuration. Tap on the Confirm button.
You are now ready to use your Trezor wallet!
How to get started with Trezor: A beginner's guide
If you're new to cryptocurrency and Trezor, here's a quick guide to get started.
1. Install the Trezor Wallet:
The first step is to install the Trezor wallet. This is a free, open-source cryptocurrency wallet that supports Bitcoin, Ethereum, and other cryptocurrencies.
To install the Trezor wallet, follow these steps:
a. Go to Trezor.com and click on the "Download" button.
b. In the "Download" window, click on the blue "Trezor" logo and then on the "Download Trezor" button.
c. In the "Trezor" window, click on the "Install" button.
d. In the "Install" window, click on the "Agree" button.
e. Click on the "Finish" button.
f. Go to your computer and open the Trezor app.
2. Add a Trezor Wallet Address:
The next step is to add a Trezor wallet address. You will need this address to send and receive cryptocurrencies from your Trezor wallet.
To add a Trezor wallet address, follow these steps:
a. Go to your Trezor wallet and click on the "Menu" button.
b. In the "Menu" window, click on the "Add Address" button.
c. In the "Add Address" window, type in your Trezor wallet address and then click on the "OK" button.
3. Import your Bitcoin, Ethereum, and other cryptocurrencies:
Now that you have added a Trezor wallet address and imported your cryptocurrencies, you are ready to start trading cryptocurrencies. To start trading cryptocurrencies, you will need to import your Bitcoin, Ethereum, and other cryptocurrencies into your Trezor wallet.
To import your cryptocurrencies into your Trezor wallet, follow these steps:
a. Go to your Trezor wallet and click on the "Menu" button.
b. In the "Menu" window, click on the "Import / Export" button.
c. In the "Import / Export" window, click on the "Bitcoin" button.
d. In the "Bitcoin" window, click on the "Addresses" tab.
e. In the "Addresses" tab, click on the "Import" button.
f. In the "Import" window, select the file you want to import your Bitcoin, Ethereum, and other cryptocurrencies into your Trezor wallet from and then click on the "Open" button.
g. After importing your Bitcoin, Ethereum, and other cryptocurrencies into your Trezor wallet, you will need to send them to your actual cryptocurrency exchanges. For example, you can send Bitcoin to Coinbase or Ethereum to GDAX.
How to set up a Trezor cryptocurrency wallet
To set up a Trezor cryptocurrency wallet, first make sure you have a Trezor device. You can purchase a Trezor device on the Trezor website or from various retailers.
Once you have your Trezor device, open it and follow these steps to set it up:
1. On the main screen of your Trezor device, click on thebutton.
2. In the next window, click on thetab.
3. On thetab, you will see a list of accounts. You can create a new account by clicking on thebutton.
4. In the next window, fill in the following information:
- Name: This is the name you will use to identify your Trezor account in the Trezor user interface.
- Email: Enter your email address to receive notifications about updates to your Trezor account.
- Password: Enter a strong password that you will remember.
5. Click on thebutton to finish setting up your Trezor account.
6. Next, click on thebutton to open theaccounts list.
7. On thetab, you will see a list of all the accounts that are registered on your Trezor device. You can access your accounts by clicking on the corresponding account name.
8. To manage your cryptocurrencies, you will need to add a new account to your Trezor device. To do this, click on thebutton and then on thetab.
9. On thetab, you will see a list of all the cryptocurrencies that are currently stored on your Trezor device. You can add a new cryptocurrency by clicking on thebutton and then on thetab.
10. In the next window, enter the following information:
- Name: This is the name of the cryptocurrency that you are adding to your Trezor device.
- Address: This is the address of the cryptocurrency wallet that you are adding to your Trezor device.
- Password: Enter the password for the cryptocurrency wallet that you are adding to your Trezor device.
11. Click on thebutton to add the cryptocurrency to your Trezor device.
12. Next, click on thebutton to open theaccounts list.
13. On thetab, you will see a list of all the accounts that are registered on your Trezor device. You can access your accounts by clicking on the corresponding account name.
14. To manage your cryptocurrencies, you will need to add a new account to your Trezor device. To do this, click on thebutton and then on thetab.
15. On thetab, you will see a list of all the cryptocurrencies that are currently stored on your Trezor device. You can add a new cryptocurrency by clicking on thebutton and then on thetab.
16. In the next window, enter the following information:
- Name: This is the name of the cryptocurrency that you are adding to your Trezor device.
- Address: This is the address of the cryptocurrency wallet that you are adding to your Trezor device.
- Password: Enter the password for the cryptocurrency wallet that you are adding to your Trezor device.
17. Click on thebutton to add the cryptocurrency to your Trezor device.
A step-by-step guide to setting up your Trezor wallet
This guide will show you how to set up your Trezor wallet, so that you can store your cryptocurrencies securely.
1. Download the Trezor wallet app from the App Store or Google Play Store.
2. Open the Trezor app and click on the “New Wallet” button.
3. Choose a strong password and fill in your personal details.
4. Click on the “Create New Address” button and provide your wallet address.
5. Select the currencies you want to store in your wallet and click on the “Add Funds” button.
6. Enter the amount of cryptocurrency you want to add to your wallet and click on the “Add Funds” button.
7. Click on the “View Wallet Info” button to view your wallet details.
8. Click on the “Trezor Hardware Wallet” button to connect your Trezor wallet to your computer.
9. Open the Trezor app on your computer and click on the “Open Wallet” button.
10. Click on the “Select Coins” button to select the cryptocurrencies you want to store in your Trezor wallet.
11. Click on the “Send Coins” button to send your cryptocurrencies to your Trezor wallet.
How to configure your Trezor wallet
Trezor is an extremely secure wallet that allows you to store your cryptocurrencies offline. To configure your Trezor wallet, follow these steps:
1. Connect your Trezor to your computer.
2. Open the Trezor software.
3. Click on the “Trezor” button.
4. On the left side of the Trezor window, click on the “Settings” button.
5. On the “Settings” page, click on the “Add new account” button.
6. Enter your details and click on the “Create” button.
7. Your new account will be created and displayed on the right side of the Trezor window.
8. Click on the “Account” button in the top right corner of the Trezor window.
9. On the “Account” page, click on the “View transactions” button.
10. On the “View transactions” page, you will see a list of all the transactions that have been made in your account. You can also see the addresses that were used in each transaction.