How to link Trezor to Metamask?
If you're a security-conscious crypto user, you probably use a hardware wallet like Trezor. But what if you want to use the popular browser extension Metamask? In this article, we'll show you how to link your Trezor wallet to Metamask.
How to link Trezor to Metamask
To link your Trezor device to Metamask, follow these steps:
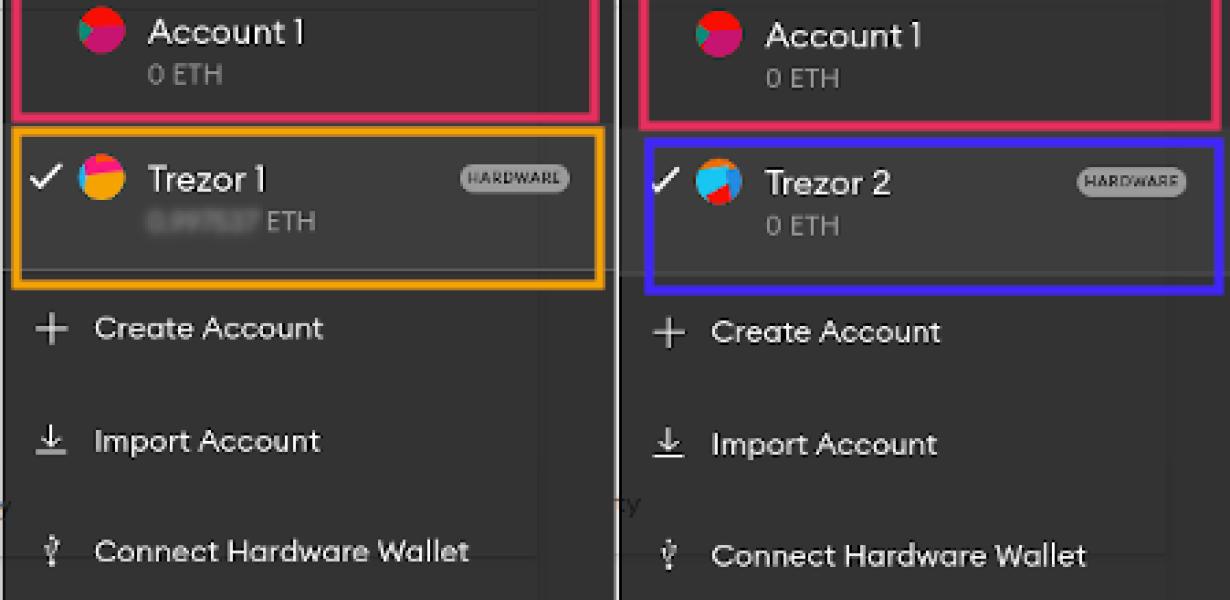
Open Metamask. Click on the three lines in the top left corner. Under "Connected Accounts", click on the trezor button. Enter your trezor's PIN and click on the button to connect.
You're now connected to your Trezor device!
The easy way to link your Trezor to Metamask
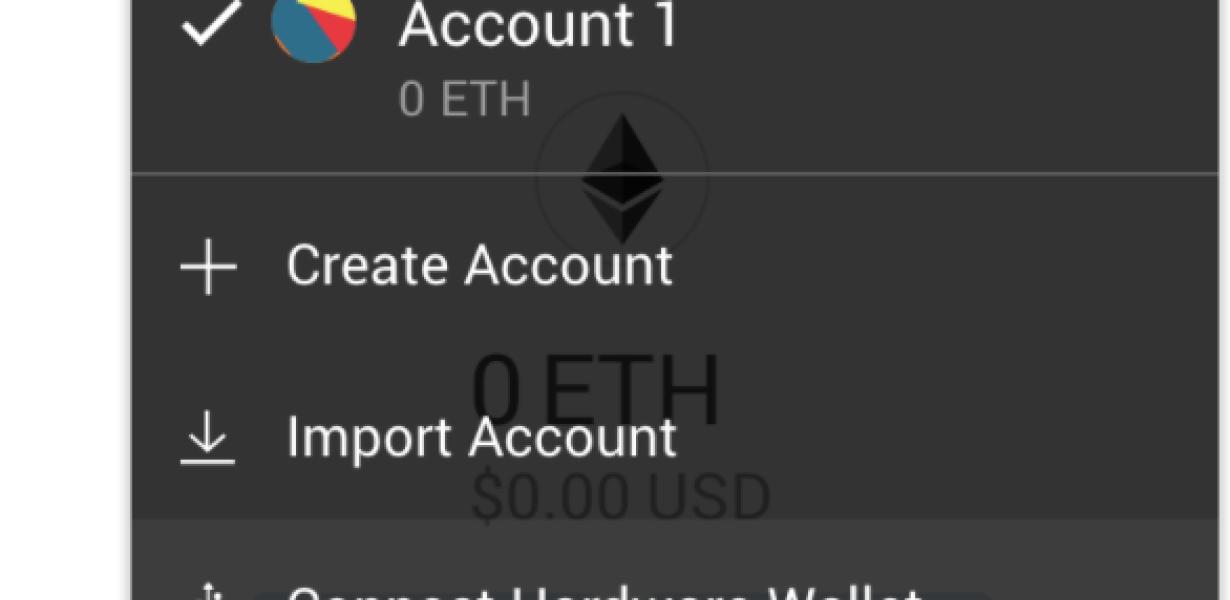
If you have a Trezor device, you can easily link it to Metamask. To do this, open the Metamask app and click on the three lines in the top right corner. This will open the Settings menu. Under the Accounts section, click on Add Account. In the Add Account dialog, enter the following information:
Name: Trezor
Email: [email protected]
Password: yourpassword
Click on the Metamask logo in the top left corner to finish setting up your account. Next, click on the three lines in the top right corner again to open the Settings menu. Under the Advanced section, click on the Connections button. In the Connections dialog, click on the Add Connection button. In the Add Connection dialog, enter the following information:
Name: trezor
Address: yourtrezoraddress.com
Port: 8888
Click on the Metamask logo in the top left corner to finish setting up your connection. Next, click on the three lines in the top right corner again to open the Settings menu. Under the Accounts section, click on the Add Account button. In the Add Account dialog, enter the following information:
Name: Trezor
Email: [email protected]
Password: yourpassword
Click on the Metamask logo in the top left corner to finish setting up your account. Finally, click on the three lines in the top right corner again to open the Settings menu. Under the Advanced section, click on the Connections button. In the Connections dialog, click on the Add Connection button. In the Add Connection dialog, enter the following information:
Name: trezor
Address: yourtrezoraddress.com
Port: 8888
Linking your Trezor to Metamask, made simple
To link your Trezor to Metamask, first open the Metamask browser extension. Then click on the three lines in the top right corner of the Trezor screen. This will open the Trezor connection settings. In the "Trezor" section, select "Connect to Metamask". You will then be asked to provide your Metamask address and password. Once you have connected, your Trezor will automatically store all of your Metamask tokens in the secure Trezor vault.
A step-by-step guide to linking Trezor and Metamask
1. Open the Trezor app and click on the three lines in the top left corner.
2. On the next screen, click on the three lines in the top right corner.
3. On the next screen, click on the three lines in the bottom left corner.
4. Click on the Add Wallet button.
5. Enter your Metamask address in the Address field and click on the Connect button.
6. Your Trezor will now be connected to your Metamask account.
How to connect Trezor and Metamask
1. Launch the Metamask app on your computer.
2. In the Metamask app, click on the "Trezor" button.
3. In the Trezor window, click on the "Add a new wallet" button.
4. In the "Add a new wallet" window, enter the following information:
- Your Ethereum address
- Your Metamask account password
5. Click on the "Create" button.
6. You will now be able to see your Trezor wallet information in the "Trezor" tab of the Metamask app.
How to use Trezor with Metamask
1. Install Metamask on your computer.
2. Launch Metamask and click on the “Add Wallet” button.
3. In the Add Wallet dialog, enter the following information:
- Your Ethereum address
- Your Trezor password
- Select Trezor as your wallet type
4. Click on the “Create New Wallet” button.
5. In the new wallet creation dialog, enter the following information:
- Your Metamask address
- Your Trezor seed phrase (12 words)
- Your email address
6. Click on the “Create Wallet” button.
7. Your Metamask wallet will now be created and you will be able to start using it to interact with the Ethereum network.
The benefits of linking Trezor and Metamask
One of the benefits of linking your Trezor device and Metamask account is that you can access your Metamask wallet from anywhere in the world. This means that you can easily store and manage your cryptocurrencies without having to carry them around on a physical device. Additionally, you can use Trezor to authorise transactions on your Metamask account, ensuring that you are always safe and secure when making transactions.
How to get the most out of linking Trezor and Metamask
To get the most out of linking your Trezor and Metamask accounts, follow these simple steps:
1. Open your Trezor and Metamask accounts.
2. On Trezor, click on the three lines in the top right corner of the main screen.
3. Under "My Accounts," click on "Connections."
4. On Metamask, click on the three lines in the top right corner of the main screen.
5. Under "My Accounts," click on "Connections."
6. In the "Connected Services" section of each account, click on the blue link next to "Trezor."
7. In the "Connected Services" section of Metamask, click on the blue link next to "Metamask."
8. Enter your Trezor's PIN and click on "Connect."
9. Enter your Metamask's password and click on "Connect."
Making the most of linking Trezor and Metamask
Trezor and Metamask are both great tools for security. By linking them, you can keep your coins safe and easily manage your transactions.
How to ensure a successful link between Trezor and Metamask
If you are using Metamask to store your Trezor data, follow these steps to ensure a successful link:
1. Open Metamask and click on the three lines in the top right corner.
2. In the "Connected Networks" section, click on the Trezor icon.
3. In the "Trezor Connection" dialog, ensure that the "Use TREZOR network" checkbox is checked and click on the "Connect" button.
4. Your Trezor will now be connected to the Metamask network and you can start using the Metamask extension to manage your Trezor accounts.
Tips for linking Trezor and Metamask
1. Copy the Metamask address you want to use and paste it into the Trezor address bar.
2. Hit "Connect."
3. In the Trezor main window, under "Account," select "Trezor."
4. In the "Trezor Settings" window, under "Account Type," select "Metamask Account."
5. Hit "Connect."
6. In the Metamask main window, under "Account," select "Trezor."
7. In the "Trezor Settings" window, under "Account Type," select "Metamask Account."
8. Hit "Connect."
FAQs about linking Trezor and Metamask
1. What is the process for linking my Trezor and Metamask accounts?
To link your Trezor and Metamask accounts, you will first need to download the Metamask extension from the Chrome Web Store. Once the Metamask extension has been installed, you will need to open it and click on the three dots in the top right corner. From here, you will be able to select your Trezor account and link it with your Metamask account.