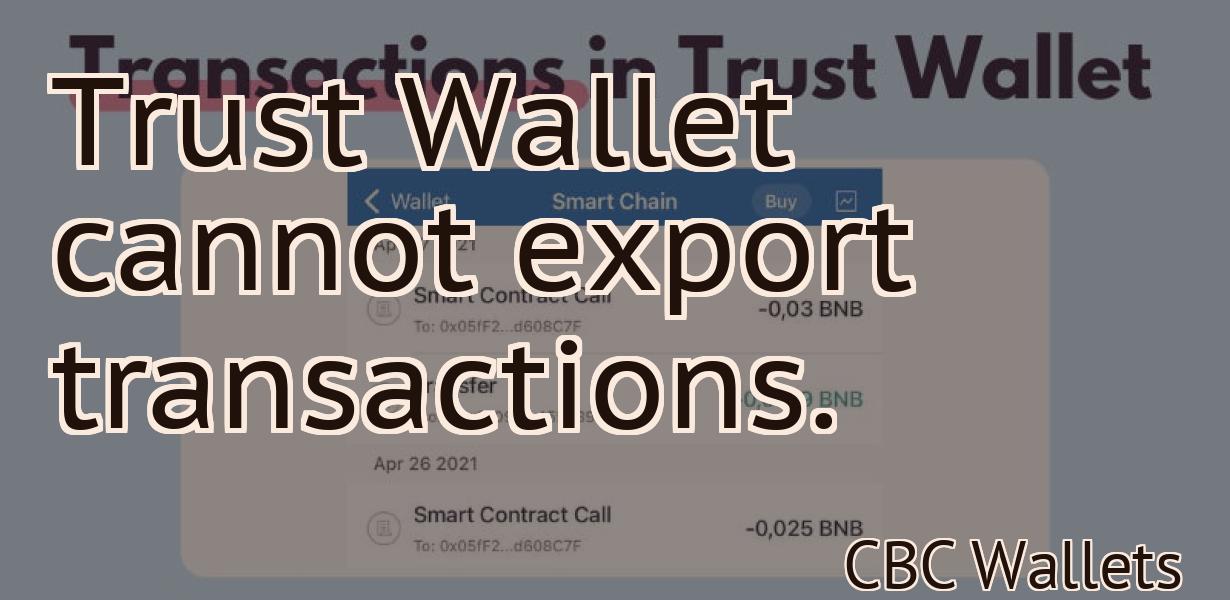
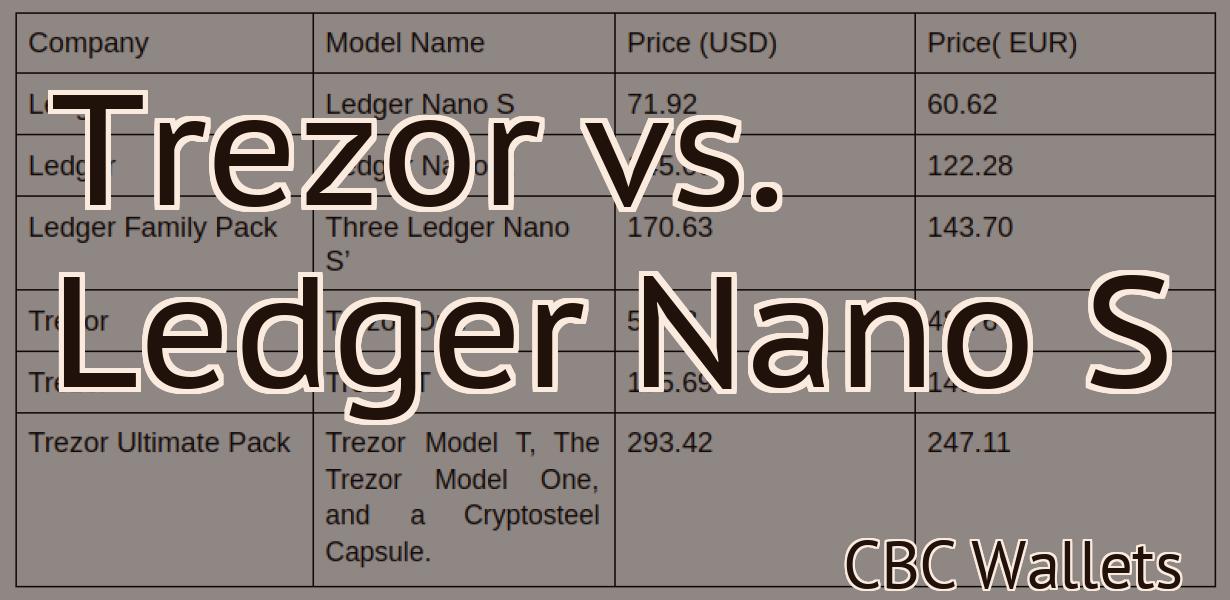
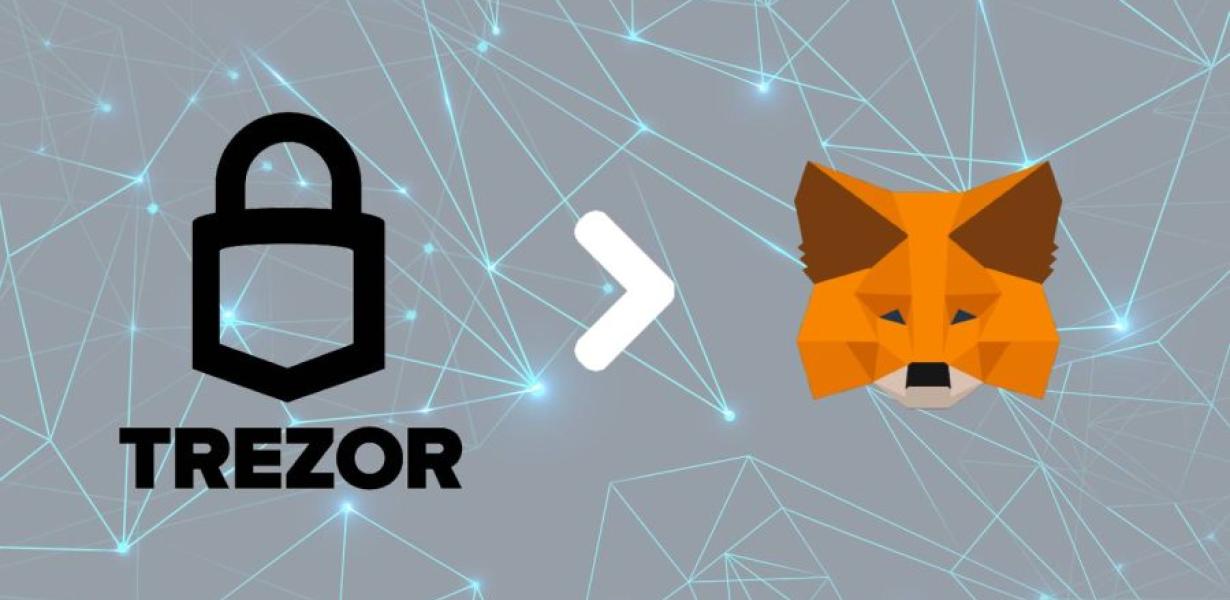
Connecting Trezor To Metamask
If you're a fan of the Trezor hardware wallet, you'll be happy to know that it's now possible to connect your Trezor to Metamask. This means that you can use your Trezor to manage your ETH and ERC20 tokens in Metamask, adding an extra layer of security to your crypto management. Here's a quick guide on how to do it.
How to Connect Your Trezor to Metamask
1. Open the Metamask app on your computer or mobile device.
2. Click on the “Connect to a Wallet” button in the upper right corner.
3. Select your Trezor wallet from the list of wallets that appear.
4. Enter your Trezor login credentials.
5. Click on the “Connect” button.
Now You Can Use Metamask with Your Trezor Hardware Wallet
Metamask is a Chrome extension that lets you use your Trezor hardware wallet with the Ethereum network.
To start using Metamask, open Chrome and click on the three lines in the top right corner of the browser window. (If you don't see the three lines, click on the three horizontal lines in the top left corner of the browser window.)
Next, click on the "Extensions" tab and select "Metamask."
On the Metamask screen, click on the "Add Account" button and enter the following information:
Your Ethereum address : This is the address of your Ethereum wallet. You can find this address on your Trezor device or on the Ethereum network.
: This is the address of your Ethereum wallet. You can find this address on your Trezor device or on the Ethereum network. Your Trezor device's public key : This is the 48-character long public key that is printed on your Trezor device. You can find this key by clicking on the "Trezor" button in the top right corner of the Trezor device's main screen and then clicking on "View Public Key."
: This is the 48-character long public key that is printed on your Trezor device. You can find this key by clicking on the "Trezor" button in the top right corner of the Trezor device's main screen and then clicking on "View Public Key." Your Metamask account's password: This is the password for your Metamask account. You can find this password by clicking on the "Metamask" button in the top right corner of the Metamask screen and then clicking on "View Account Info."
Once you have entered all of the required information, click on the "Create Account" button.
Now you will be prompted to select a currency. You can use either Ether or Bitcoin for now, but you will eventually be able to use other currencies as well.
Once you have selected a currency, click on the "Select Wallet" button and select your Trezor device from the list of wallets that appears.
You now have access to all of the features of your Trezor hardware wallet using Metamask. For example, you can add new accounts, send and receive transactions, and view your account's balance.
Connecting Trezor to Metamask - The Easy Way
If you already have a Trezor device, you can easily connect it to Metamask.
To do this, first install Metamask on your computer. Then, open the Metamask website (https://metamask.io/) and click the "Add Account" button.
Next, enter your Trezor address and click "Connect." You will then be prompted to authorize Metamask to access your Trezor account. Click "Authorize."
Finally, you will be ready to start using your Trezor device with Metamask!
How to Use Trezor with Metamask
Trezor is a popular hardware wallet that can be used with Metamask. To start using Trezor with Metamask, first install Metamask on your computer. After Metamask is installed, open it and click on the "Add Account" button. In the "Add Account" dialog, click on the "Trezor" button and enter your Trezor's TREZOR_WALLET_ADDRESS into the "Trezor Wallet Address" field. Click on the "Create Account" button.
Now, when you want to use Trezor with Metamask, first open Metamask and click on the "Tools" button. In the "Tools" dialog, click on the " TREZOR " button and enter your Trezor's TREZOR_WALLET_ADDRESS into the "Trezor Wallet Address" field. Click on the "Connect" button.
Now, when you want to use Trezor with Metamask, you will need to first copy your Trezor's private key into Metamask. To do this, first open Metamask and click on the "View Wallet Info" button. In the "View Wallet Info" dialog, click on the "Copy Private Key" button. After the private key has been copied into Metamask, you can use it to send and receive cryptocurrencies with Trezor.
The Benefits of Connecting Trezor to Metamask
Some of the benefits of connecting your Trezor to Metamask include:
You can use your Trezor as a secure wallet for your Metamask account.
You can use Trezor to securely store your METamask tokens.
You can use Trezor to sign transactions with your Metamask account.
You can use Trezor to manage your Metamask account securely.
How to Get Started With Metamask and Trezor
There are a few things you need in order to get started with Metamask and Trezor. First, you will need a desktop or laptop computer with a USB port. Second, you will need a Trezor or Metamask device. Third, you will need an Ethereum wallet, such as MyEtherWallet or Mist. Fourth, you will need to install the Metamask and Trezor Chrome extensions. Finally, you will need to create a new Ethereum wallet on the Ethereum blockchain.
To get started with Metamask and Trezor, first install the Chrome extension on your desktop or laptop computer. Next, connect your Trezor or Metamask device to your computer using the USB port. Finally, open the Metamask and Trezor Chrome extension and click the “Create New Ethereum Wallet” button.
On the next page, you will be asked to enter your name, email address, and password. You will also be asked to choose a password recovery method. Once you have completed the registration process, you will be taken to the Ethereum wallet page. Here, you can click the “Create New Ethereum Wallet” button to create a new Ethereum wallet.
To use your Metamask and Trezor account to securely store your Ethereum tokens, you will first need to transfer your tokens to your new Ethereum wallet. To do this, open the Metamask and Trezor Chrome extension and click the “Send Ether & Tokens” button. On the next page, you will be asked to enter the recipient address, amount of Ether or tokens to be sent, and the confirmation message. Once you have completed the transfer, the transaction will be processed and the tokens will be transferred to the recipient address.
Troubleshooting: Connecting Trezor to Metamask
If you are having trouble connecting your Trezor to Metamask, please follow these steps:
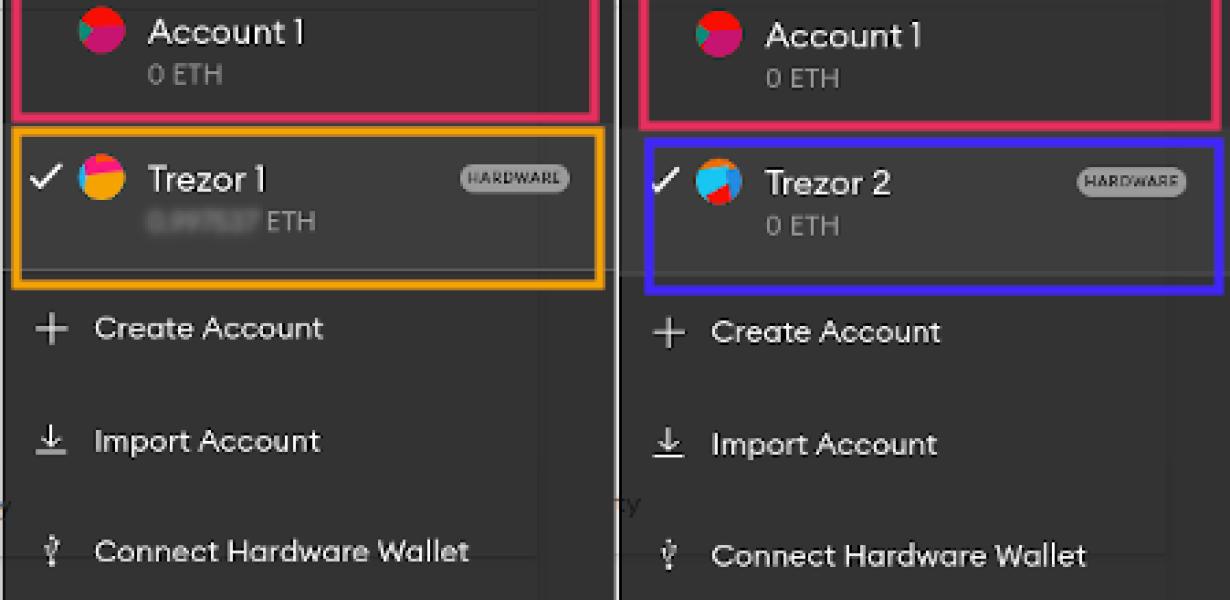
1. Make sure that your Trezor device is properly synced with the Metamask wallet. To do this, open the Metamask wallet and click on the three lines in the top left corner. Under "Accounts," select "Trezor." If your Trezor is not listed under "Accounts," please sync it first.
2. Under "Settings," make sure that the "Connect to Trezor" box is checked.
3. Under "Settings," make sure that the "Metamask" box is checked.
4. Under "Settings," make sure that the "Browser Extension" box is checked.
5. If you are using Chrome, click on the three lines in the top right corner of the Metamask window, select "Extensions," and then select "Trezor." If you are using Firefox, click on the three lines in the top right corner of the Metamask window, select "Tools," and then select "Trezor."