Avalanche To Metamask
The popular Ethereum wallet, MetaMask, has announced a new partnership with the Avalanche blockchain. The two will work together to provide users with a more seamless and secure experience when interacting with decentralized applications (dApps). MetaMask is one of the most widely used wallets for Ethereum and has been downloaded over 1 million times. The partnership will allow users to access dApps on the Avalanche network directly through the MetaMask interface. This will make it easier for users to connect to and use dApps, as they will no longer need to switch between wallets. The partnership will also help to improve the security of dApp interactions, as MetaMask will now be able to provide users with a higher level of protection against phishing attacks.
How to Use MetaMask With Avalanche
1. Open the MetaMask app on your computer.
2. Click the "Add wallet" button in the top left corner of the MetaMask window.
3. Type in the name of your Avalanche account, and click "Create."
4. Copy the private key for your Avalanche account, and click "Generate."
5. Paste the private key into the MetaMask window, and click "Import."
6. Click "Avalanche" in the list of currencies in the left panel of the MetaMask window.
7. Click the "Send" button in the top right corner of the MetaMask window.
8. Type in the amount of Bitcoin or Ethereum you want to send, and click "Send."
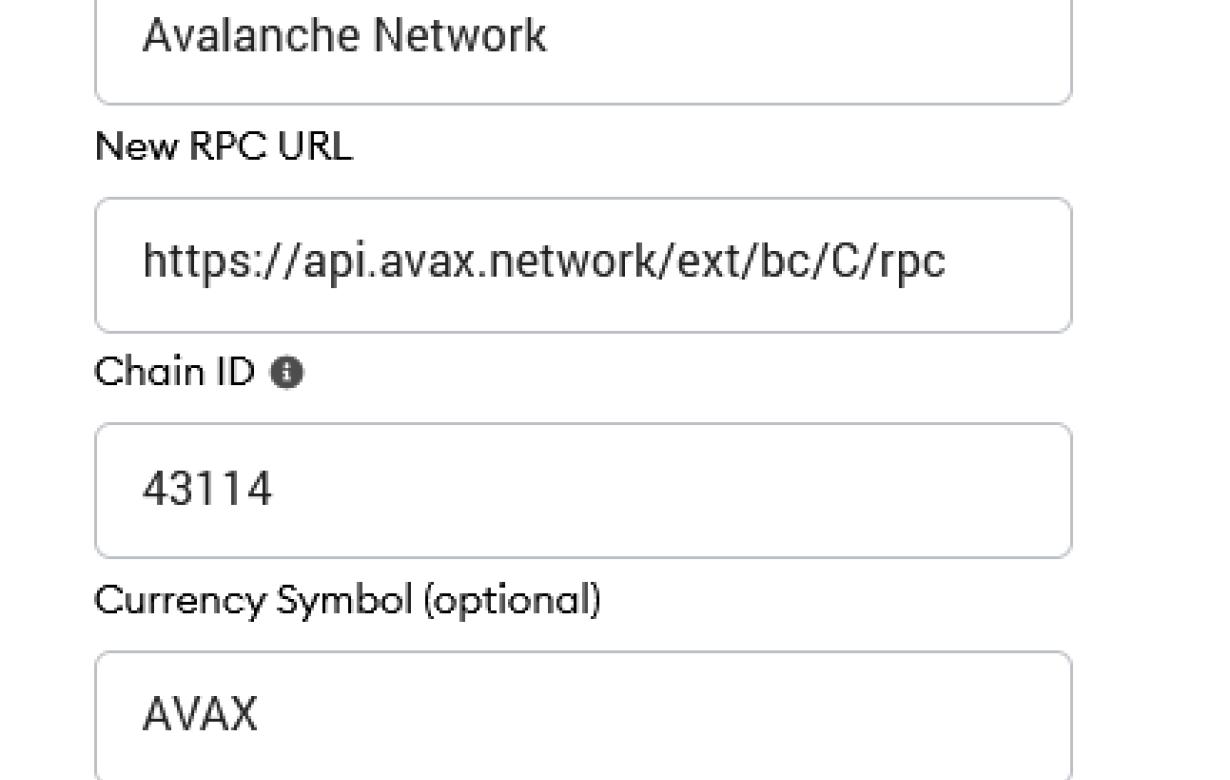
How to Connect MetaMask to Avalanche
Open the MetaMask app on your desktop or phone. Click on the three lines in the top right corner. Select Connect. Type in the address bar: https://avalanche.co.za/. Click on the blue Connect button. If everything goes well, you'll see a notification that you're connected.
Now you're ready to start trading!

How to Create an Account on MetaMask
To create an account on MetaMask, you will first need to install the MetaMask extension for your browser. Once the extension is installed, you can visit the MetaMask website and sign in.
Once you have logged in, you will be presented with a list of options. The first option is to create a new account. If you already have an account on MetaMask, you can click on the link to log in.
Once you have logged in, you will be presented with a list of options. The first option is to create a new account. If you already have an account on MetaMask, you can click on the link to log in.
If you do not have an account on MetaMask, you can click on the button to create a new account. You will be prompted to enter your name, email address, and a password. Once you have entered all of the information, click on the button to create your account.
Once you have created your account, you will be able to access your account information and start trading cryptocurrencies.
How to Import an Account on MetaMask
If you want to import an account on MetaMask, follow these steps:
1. Open the MetaMask app on your computer.
2. Click on the three lines in the top left corner of the app window.
3. Click on "Import account."
4. Select the account you want to import.
5. Click on "Next."
6. Confirm the account import.
7. Close the MetaMask app.
How to Export an Account on MetaMask
To export an account on MetaMask, follow these steps:
1. Open MetaMask and click on the three lines in the top left corner.
2. In the "Accounts" section, select the account you want to export.
3. On the right side of the window, under "Export Account," click on the button that says "Export Account Private Key."
4. In the "Keypair Export Format" drop-down menu, select "JSON."
5. Click on the "Export" button to save the keypair.
6. Open a text editor, like Notepad, and copy the keypair's contents.
7. Go back to MetaMask and paste the keypair's contents into the "Private Keys" field on the "Accounts" page.
8. Click on the "Save" button to save the changes to your account.

How to Send Transactions Using MetaMask
1. Open MetaMask and click on the three lines in the top left corner.
2. On the Transactions page, select a transaction you want to send.
3. Click on the Send button next to the transaction.
4. MetaMask will ask you to confirm the transaction. Click on the Send button again to confirm the transaction.
How to Receive Transactions Using MetaMask
1. Open MetaMask and click the three lines in the top right corner.
2. On the left, select "Receive."
3. On the right, enter the address of the person or company you want to send money to.
4. Click "Send."
5. MetaMask will show you the transaction details. Click "Confirm."
How to Sign Messages Using MetaMask
To sign a message using MetaMask, follow these steps:
Open MetaMask and click the three lines in the top left corner. This will open the address book. Click the Add New Entry button in the bottom left corner. In the Add New Entry dialog box, enter your message and click the Sign button.
Note: You can also enter a message without signing it first by right-clicking on the message and selecting Send With Signed Message.
How to Verify Messages Using MetaMask
To verify messages using MetaMask, open the MetaMask app on your computer and sign in. Click on the three lines in the top right corner of the window, and then select "Messages." You'll see a list of all of your messages, as well as the addresses of the people who sent them. To verify a message, simply click on the address of the person who sent it. If the message is valid, you'll see a message confirming that it was sent from that address.